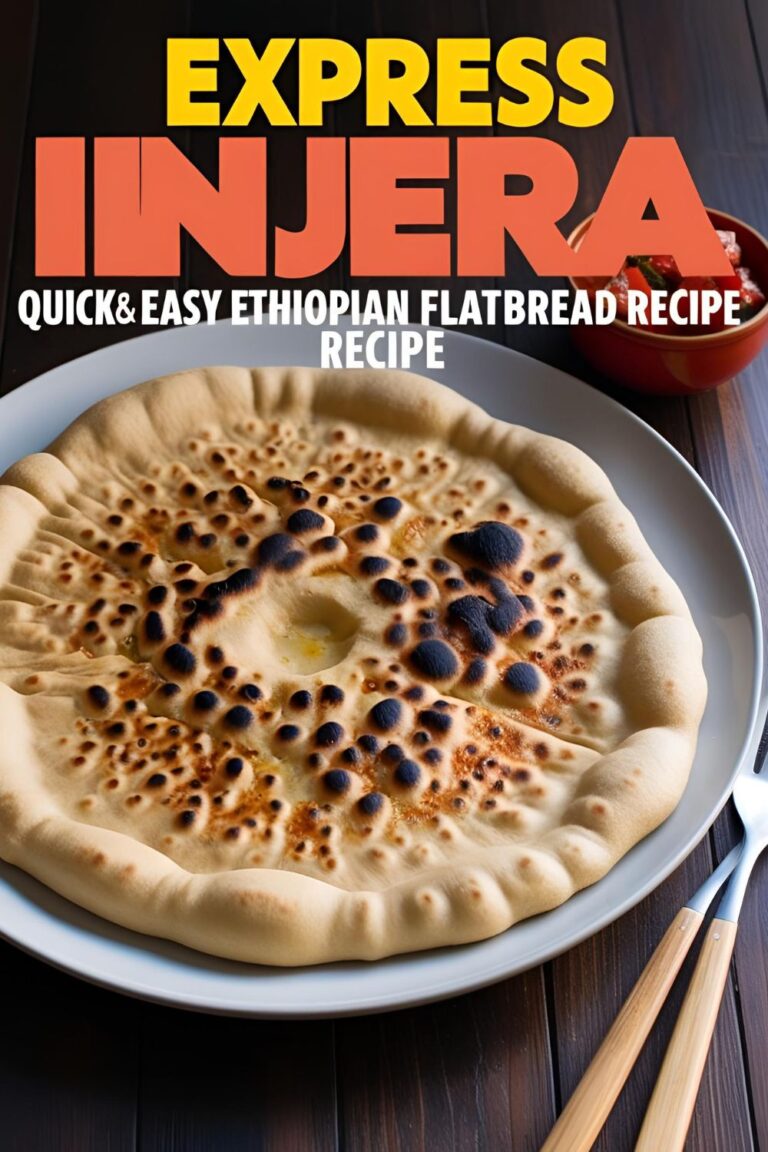
Swift Dosa: The Lazy Foodie’s Guide to Instant South Indian Glory
A Quick, Catchy Intro with a Viral Hook
Ever had that moment when you’re craving a crispy, golden d
osa but realize you forgot to soak the rice and dal last night? Yeah, we’ve all been there. Enter the Swift Dosa—your new best friend for those spontaneous South Indian breakfast cravings. No soaking, no fermenting, no waiting. Just mix, pour, and flip. It’s like the fast food version of traditional dosa, but without the guilt.
Why This Recipe Is Awesome
Let’s be real: traditional dosa-making is an art, but sometimes you just want the masterpiece without the museum tour. The Swift Dosa is:
- Quick: Ready in under 30 minutes.
- Easy: No fancy equipment or ingredients.
- Delicious: Crispy edges, soft center, and that authentic dosa flavor.
- Versatile: Perfect for breakfast, lunch, dinner, or a midnight snack.
- Impressive: Your guests will think you spent hours in the kitchen.
Ingredients
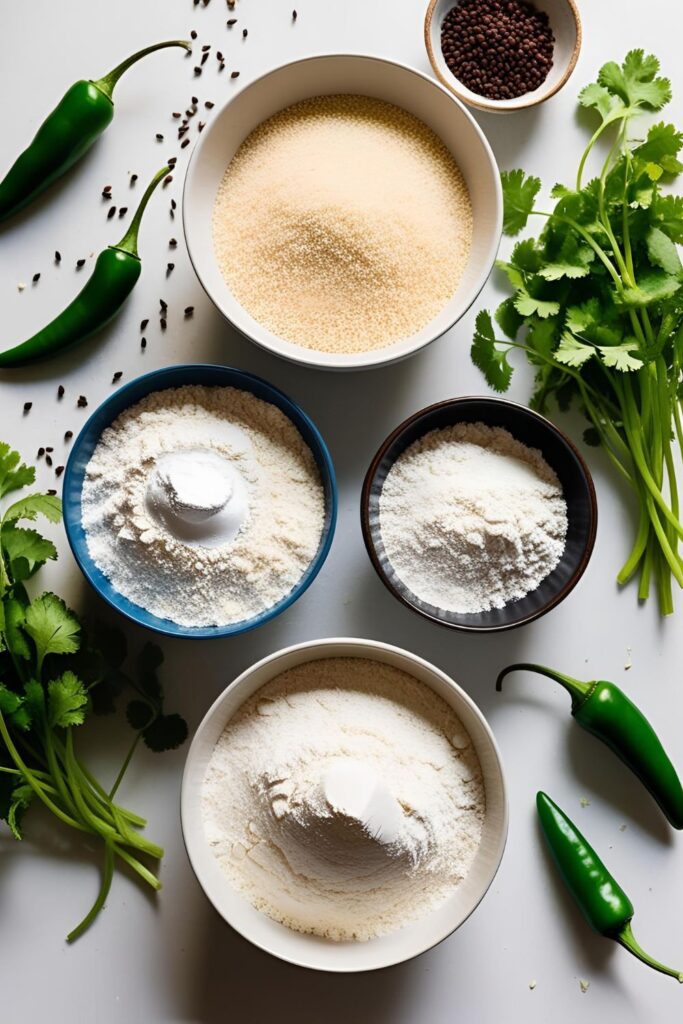
- ½ cup fine semolina (rava/sooji)
- ½ cup rice flour
- ¼ cup all-purpose flour (maida)
- ½ teaspoon salt
- ½ teaspoon cumin seeds
- 1-2 green chilies, finely chopped (optional)
- 1 tablespoon chopped coriander leaves (optional)
- 1½ to 2 cups water
- Oil or ghee for cooking
Substitutions:
- Use whole wheat flour instead of maida for a healthier twist.
- Add finely chopped onions or grated carrots for extra flavor and texture.
Tools & Kitchen Gadgets Used
To make the Swift Dosa, you’ll need:
- Mixing bowl: For combining ingredients.
- Whisk or spoon: To mix the batter.
- Non-stick or cast-iron skillet: For cooking the dosa.
- Ladle: To pour the batter onto the skillet.
- Spatula: To flip and remove the dosa.
Optional:
- Measuring cups and spoons: For precise measurements.
- Chopping board and knife: If adding optional ingredients.
Step-by-Step Instructions
- Mix Dry Ingredients: In a mixing bowl, combine semolina, rice flour, all-purpose flour, salt, and cumin seeds.
- Add Water: Gradually add water while stirring to create a thin, pourable batter. Aim for a consistency similar to buttermilk.
- Optional Add-ins: Mix in chopped green chilies and coriander leaves if using.
- Rest the Batter: Let the batter sit for 10-15 minutes. This allows the semolina to absorb water and soften.
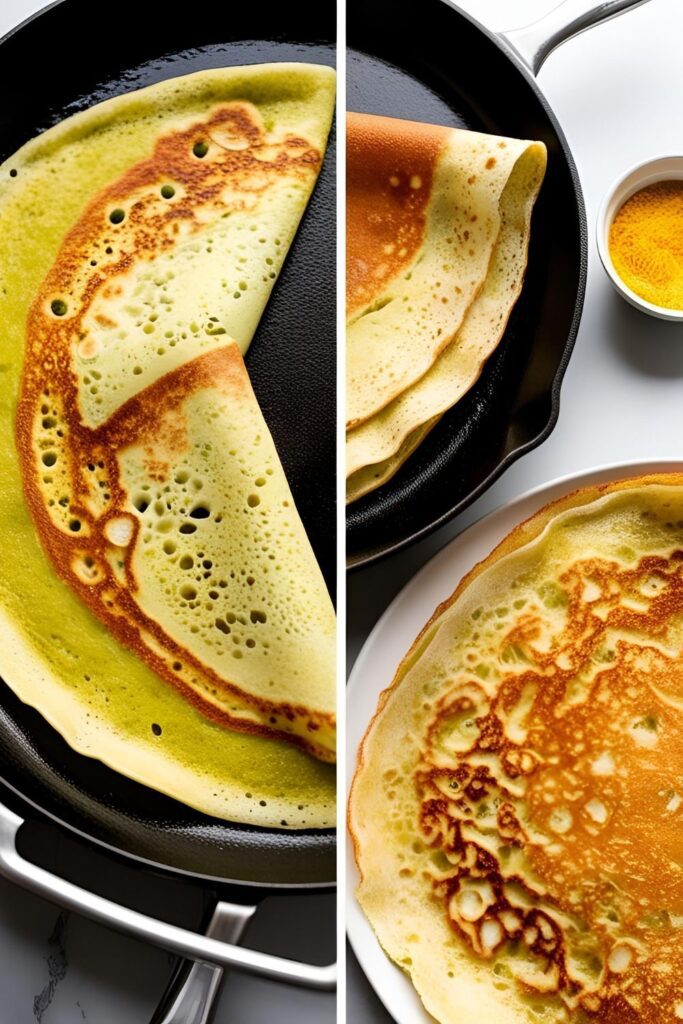
- Heat the Skillet: Place your skillet over medium heat. Once hot, drizzle a little oil and spread it evenly.
- Pour the Batter: Stir the batter well. Using a ladle, pour the batter from a height onto the skillet, starting from the edges and moving towards the center. Do not spread with the ladle; let the batter naturally form holes.
- Cook the Dosa: Drizzle a little oil around the edges. Cook until the bottom turns golden brown and the edges start to lift.
- Flip (Optional): If you prefer, flip the dosa and cook the other side for 30 seconds.
- Serve Hot: Remove the dosa and serve immediately with chutney or sambar.
Calories & Nutritional Info
Per serving (1 dosa):
- Calories: ~120
- Carbohydrates: ~22g
- Protein: ~3g
- Fat: ~3g
- Fiber: ~1g
Note: Nutritional values are approximate and can vary based on ingredients used.
Common Mistakes to Avoid
- Batter Too Thick: A thick batter won’t spread properly. Ensure it’s thin and pourable.
- Skillet Not Hot Enough: A lukewarm skillet leads to soggy dosas. Make sure it’s hot before pouring the batter.
- Not Stirring the Batter: Semolina tends to settle. Stir the batter each time before pouring.
- Overcrowding the Skillet: Pouring too much batter can lead to uneven cooking. Stick to one dosa at a time.
Variations & Customizations
- Spicy Swift Dosa: Add red chili powder or finely chopped green chilies for a kick.
- Cheese Dosa: Sprinkle grated cheese on top while cooking for a gooey delight.
- Herb-Infused Dosa: Mix in chopped mint or curry leaves for an aromatic twist.
FAQ Section
Q1: Can I use whole wheat flour instead of all-purpose flour?
A1: Absolutely! Whole wheat flour adds a nutty flavor and makes it healthier.
Q2: How do I store leftover batter?
A2: Store in an airtight container in the refrigerator for up to 2 days. Stir well before use.
Q3: Can I make the batter ahead of time?
A3: Yes, but it’s best used fresh. If storing, the batter may thicken; adjust with water before use.
Q4: Why is my dosa sticking to the pan?
A4: Ensure the skillet is well-heated and lightly greased. A non-stick or well-seasoned cast-iron skillet works best.
Q5: Can I make this gluten-free?
A5: Yes! Replace all-purpose flour with chickpea flour or more rice flour.
Q6: What can I serve with Swift Dosa?
A6: Coconut chutney, tomato chutney, sambar, or even plain yogurt.
Q7: Can I add vegetables to the batter?
A7: Definitely! Finely chopped onions, grated carrots, or spinach work great.
Final Thoughts
So there you have it—the Swift Dosa. Quick, easy, and oh-so-delicious. Perfect for those lazy mornings or when unexpected guests drop by. Give it a try, and you’ll wonder why you ever bothered with the traditional method. Share your dosa creations with us; we’d love to see your twists on this classic!