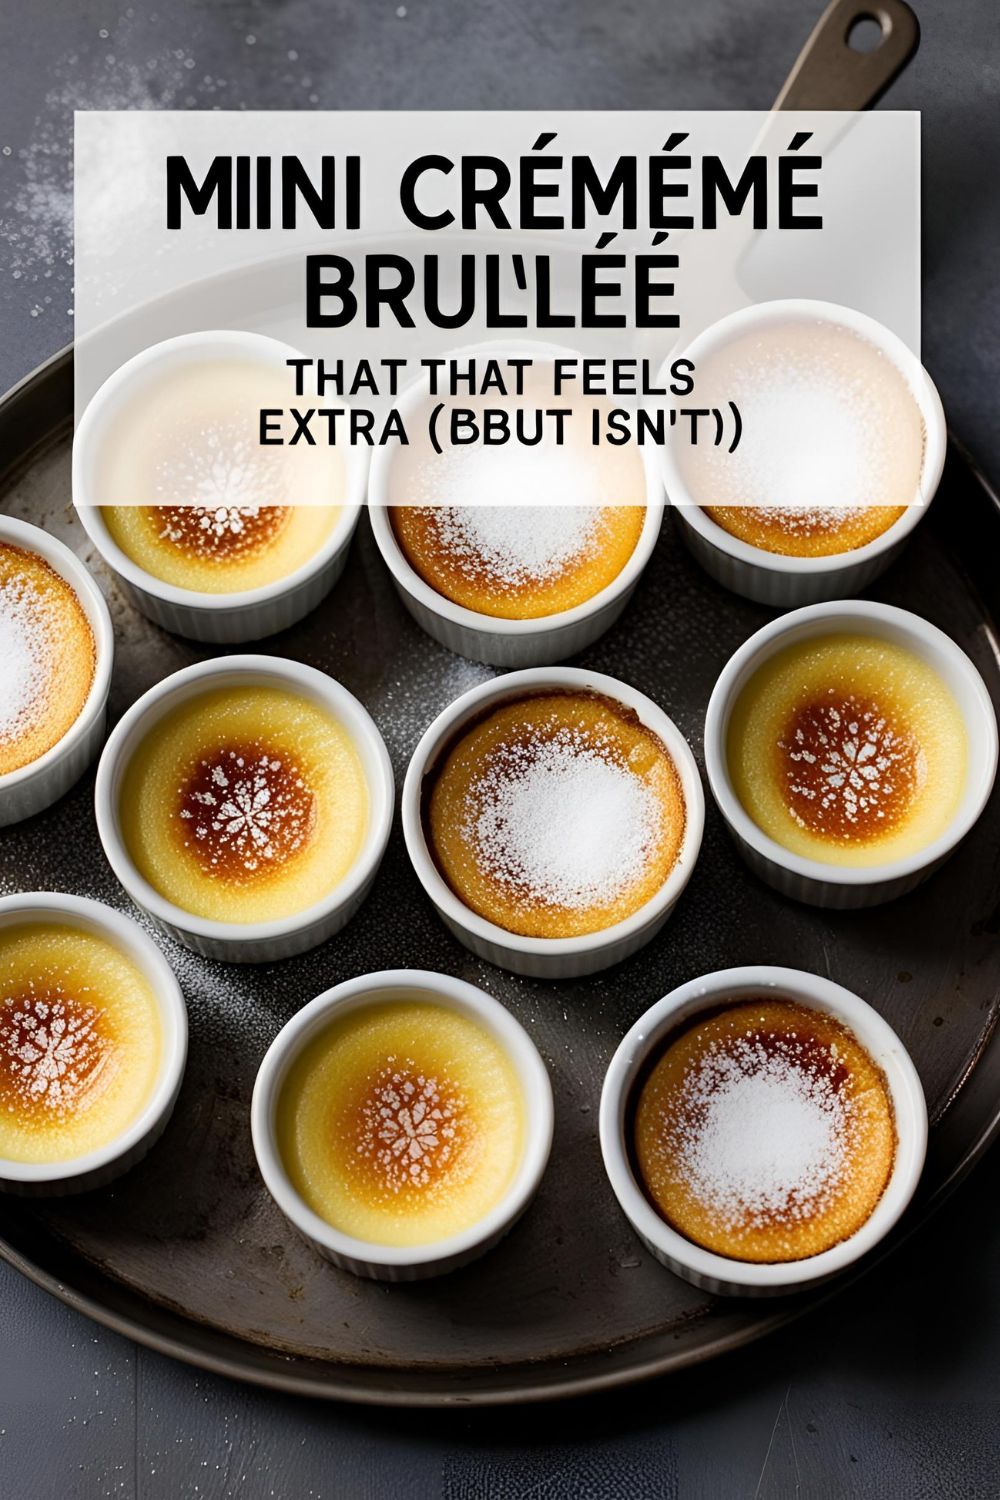
Mini Crème Brûlée Magic: The Only Dessert You’ll Ever Need (Because Fancy Shouldn’t Be Hard)
The Mini Crème Brûlée That Broke the Internet (Or Should Have)
Ever dreamt of whipping out a torch and dramatically caramelizing sugar while your guests gasp in awe? No? Just me? Well, get ready to join the drama club, because mini crème brûlée is the kind of dessert that screams, “I have my life together,” even if your fridge contains three sauces and a lonely cucumber.
This isn’t just a dessert. It’s a flex. It’s luxurious. It’s creamy. And the best part? It’s deceptively easy. Seriously, your cat could make this (okay, not really, but you get the point).
Why This Mini Crème Brûlée Recipe Is Basically Dessert Royalty
Let’s cut to the chase: this recipe is a crowd-pleaser. Mini crème brûlée is like that quiet person at a party who suddenly drops a flawless karaoke performance. Nobody expects it to be this good, yet everyone is obsessed.
Why should you make it?
- Silky custard that melts in your mouth.
- Crunchy caramelized sugar top you get to torch like a dessert dragon.
- Perfect portion size (unless you eat five, which, hey, no judgment).
- Looks bougie, but it’s surprisingly beginner-friendly.
Plus, it’s the kind of thing that makes you look like a Pinterest queen or king with zero actual culinary degree. Win.
Ingredients (AKA the Dream Team)
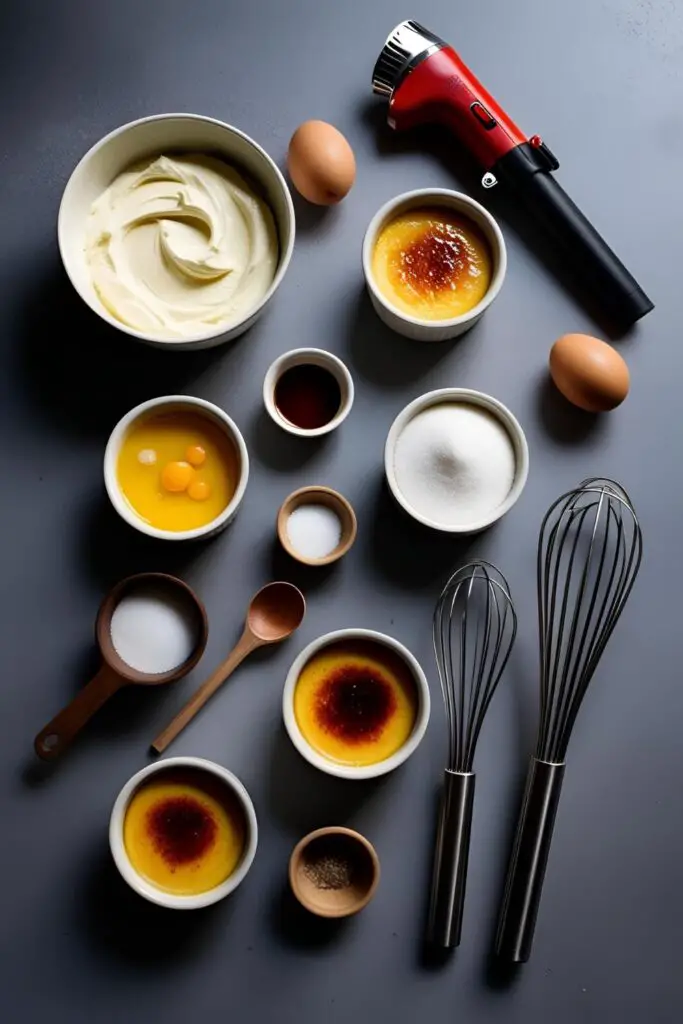
- 2 cups heavy cream (don’t even think about swapping for milk, I see you)
- 5 large egg yolks (yup, just the yellow)
- 1/2 cup granulated sugar (plus extra for that iconic topping)
- 1 tsp vanilla extract (or vanilla bean paste if you’re feeling extra)
- Pinch of salt
Substitutions:
- No vanilla extract? Use a splash of bourbon.
- Need it dairy-free? Coconut cream works, but it’ll change the flavor (still amazing though).
Tools & Kitchen Gadgets Used (AKA Time to Flex Your Amazon Cart)
Here’s what you’ll need. Add to cart, guilt-free:
- Mixing bowls
- Whisk
- Fine-mesh sieve (trust me, your texture depends on it)
- Ramekins (the smaller, the cuter)
- Baking dish (for the water bath – don’t skip!)
- Saucepan
- Kitchen torch (hello, main character moment!)
- Aluminum foil
- Measuring cups and spoons
Step-by-Step Instructions (No Culinary Degree Required)
Step 1: Preheat & Prep Preheat your oven to 325°F (160°C). Place your ramekins in a deep baking dish. Set a kettle of water to boil.
Step 2: Warm the Cream In a saucepan, heat the heavy cream over medium heat until it’s hot but not boiling. Remove from heat.
Step 3: Mix the Custard In a bowl, whisk the egg yolks, sugar, vanilla, and salt until smooth. Slowly pour in the hot cream while whisking constantly (we’re making custard, not scrambled eggs).
Step 4: Strain It Like You Mean It Pour the mixture through a fine-mesh sieve into a clean bowl. This gets rid of any eggy bits and gives you silky-smooth custard.
Step 5: Pour & Bake Divide the custard into ramekins. Pour boiling water into the baking dish until it reaches halfway up the sides of the ramekins (yes, the water bath is annoying – do it anyway).
Cover loosely with foil. Bake for 30-40 minutes until the centers are just set but still jiggly (like your favorite TikTok dance).
Step 6: Chill Out Let them cool, then refrigerate for at least 4 hours (overnight is better, but who has that kind of patience?).
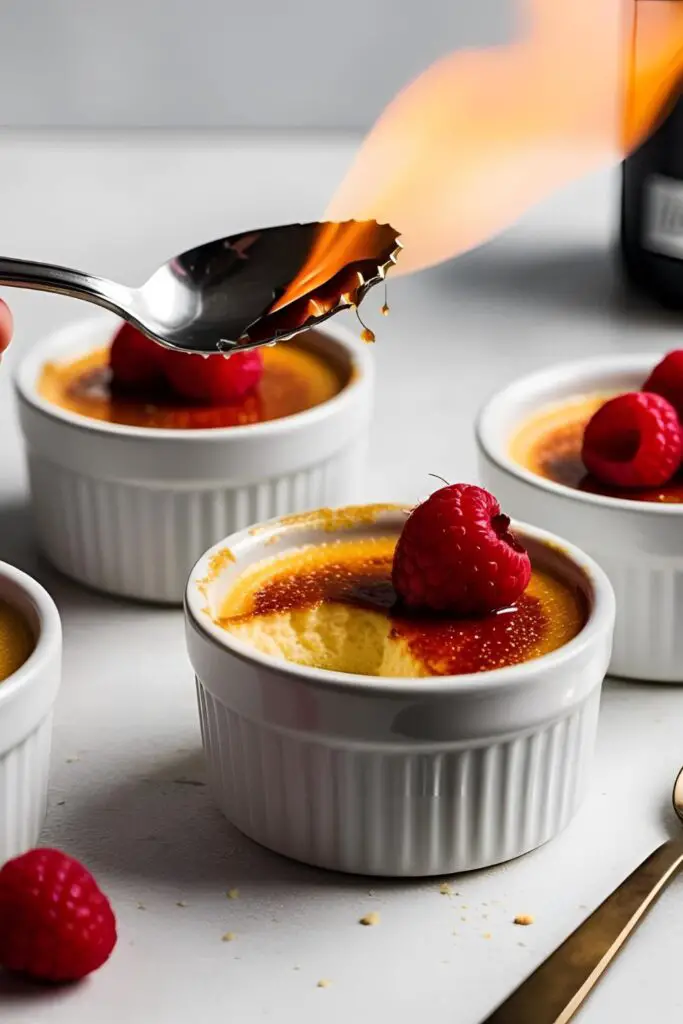
Step 7: The Torch Moment Sprinkle a thin layer of sugar on top. Torch until golden, bubbly, and dramatic. Instagram it. Serve.
Calories & Nutritional Info (Ain’t Nobody Counting, But Here You Go)
- Calories: ~280 per mini ramekin
- Protein: 3g
- Carbs: 18g
- Fat: 23g
- Sugar: 17g
- Gluten-Free: Yes (you’re welcome)
Common Mistakes to Avoid (Because We’ve All Been There)
- Overbaking. If it looks like flan, you’ve gone too far.
- Skipping the sieve. Don’t be lazy. Lumpy custard is a crime.
- Too much sugar on top. You want a crisp lid, not a sugar swamp.
- Not chilling long enough. Warm custard = regret.
- Holding the torch too close. We want caramel, not cremation.
Variations & Customizations (Because One Size Never Fits All)
- Keto Version: Use heavy cream and swap sugar with erythritol or monk fruit sweetener.
- Spicy Twist: Add a pinch of cayenne or use chili-infused sugar for a surprise kick.
- Flavored Upgrade: Infuse your cream with lavender, Earl Grey tea, or espresso before mixing.
FAQ: Mini Crème Brûlée Edition
1. Can I make mini crème brûlée ahead of time?
Yes! Make them up to 2 days ahead. Just add the sugar and torch right before serving.
2. What if I don’t have a kitchen torch?
Use your broiler. Not as fun, but it works. Just watch it like a hawk.
3. How do I know when they’re baked perfectly?
They should be set but jiggle slightly in the center. Think Jello, not soup.
4. Can I freeze them?
Not ideal. The texture gets funky. Eat fresh, live your best life.
5. What size ramekin should I use?
4 oz is perfect. It’s called mini for a reason.
6. Can I use milk instead of cream?
Technically, yes. But why would you do that to yourself?
7. Is mini crème brûlée gluten-free?
Yup! Naturally gluten-free and fabulous.
Final Thoughts: Your Inner Pastry Chef Just Leveled Up
If you’ve made it this far, congrats – you’re now officially a mini crème brûlée wizard. This dessert might sound fancy, but deep down, it just wants to be loved (and eaten). Once you torch your first sugar crust, there’s no going back to store-bought pudding cups. Sorry, snack packs.
Tag me in your creations. Or don’t. But definitely make this, eat it in silence, and feel powerful.