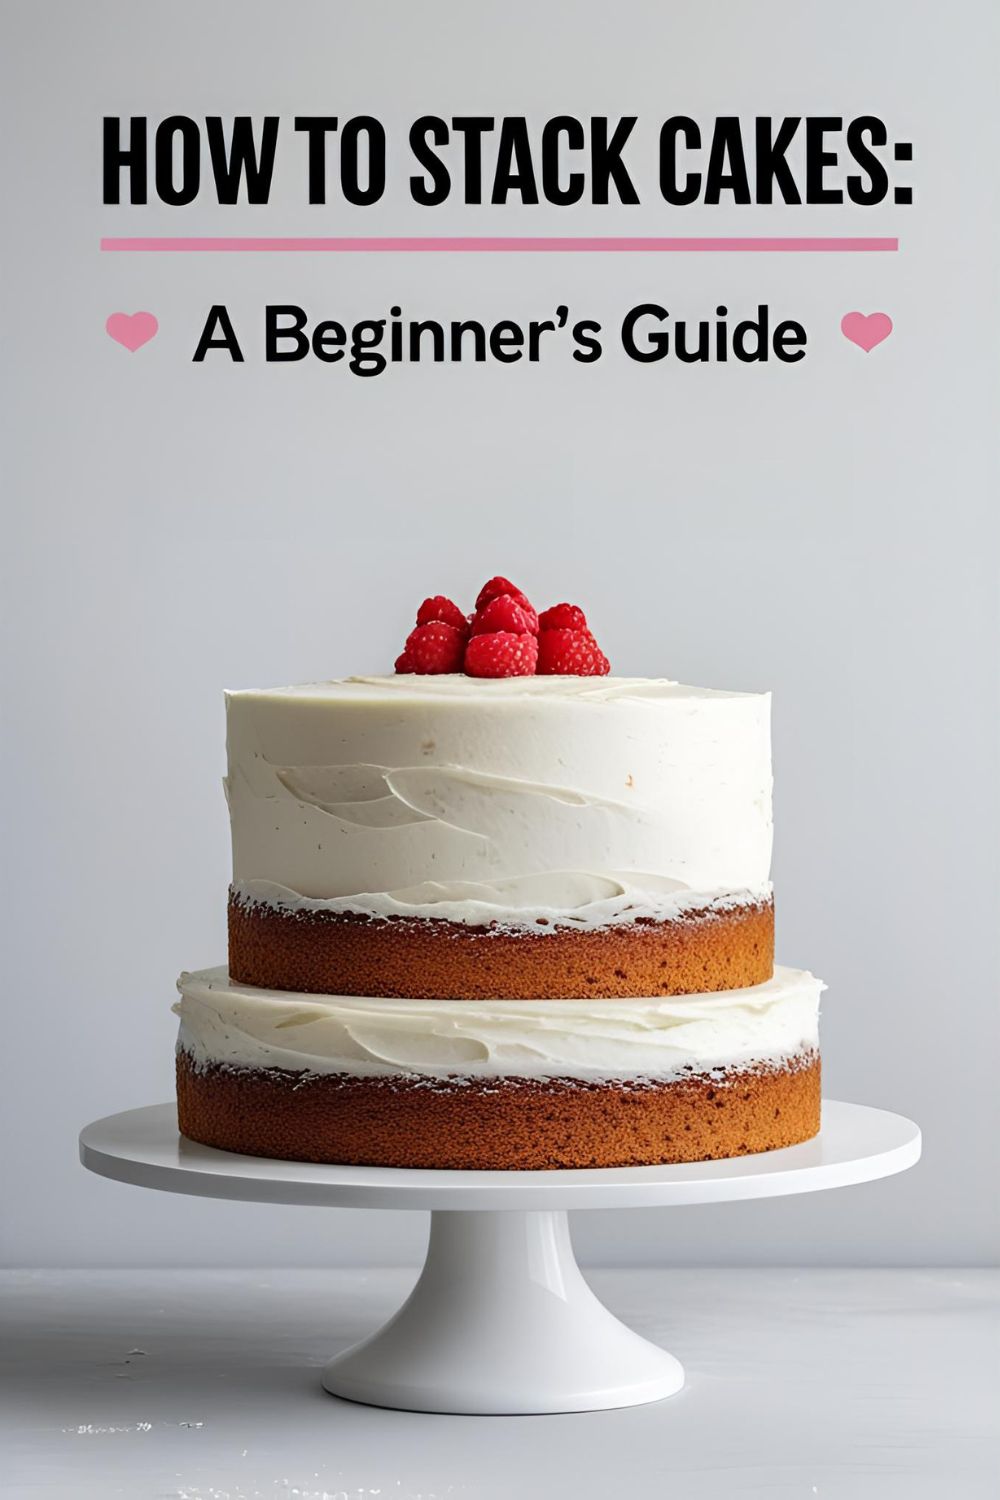
How to Stack Cakes Like a Pro (A Beginner’s Guide to Not Having a Meltdown)
How to Stack Cakes Like a Pro (A Beginner’s Guide to Not Having a Meltdown)
We’ve all seen the viral videos. The leaning tower of wedding cake, tilting at a gravity-defying, anxiety-inducing angle. The slow, tragic, buttery slide of a three-tiered birthday masterpiece into a puddle of ruin on the kitchen counter. It’s the stuff of baking nightmares, a public spectacle of structural failure that makes you want to swear off layer cakes forever.
But what if I told you that building a stable, multi-tiered cake isn’t about hope, prayers, or making a pact with a dark entity? What if I told you it’s just about simple, brilliant physics and a few plastic straws? Today, we are going to become cake engineers. You’re going to learn how to stack cakes so they are strong, stable, and ready for their Instagram close-up, no nervous breakdowns required.
Why This Skill Is Your Baking Gold Medal
This isn’t just a recipe; it’s a guide to unlocking your final form as a baker. Mastering the art of stacking is a total game-changer, and here’s why you need this skill in your life.
First, it unleashes your true baking potential. Once you know how to properly support a tiered cake, you graduate from single-layer sheet cakes to creating stunning, multi-layered celebration cakes. We’re talking about impressive birthday cakes, baby shower centerpieces, and yes, even DIY wedding cakes. The sky (or, well, your ceiling) is the limit.
Second, it’s a masterclass in confidence-building. Successfully building and presenting a tiered cake is a massive achievement. The feeling of stepping back and looking at a beautiful, stable, multi-storied creation that you built with your own two hands? It’s a rush. You’ll feel like you can do anything.
Finally, let’s be honest: it’s all about the “wow” factor. A perfectly stacked cake is the ultimate showstopper. It commands the attention of any room. It’s a towering monument to deliciousness that makes people gasp. You’re not just serving a dessert; you’re serving a spectacle.
The “Ingredients” (aka The Structural Components)
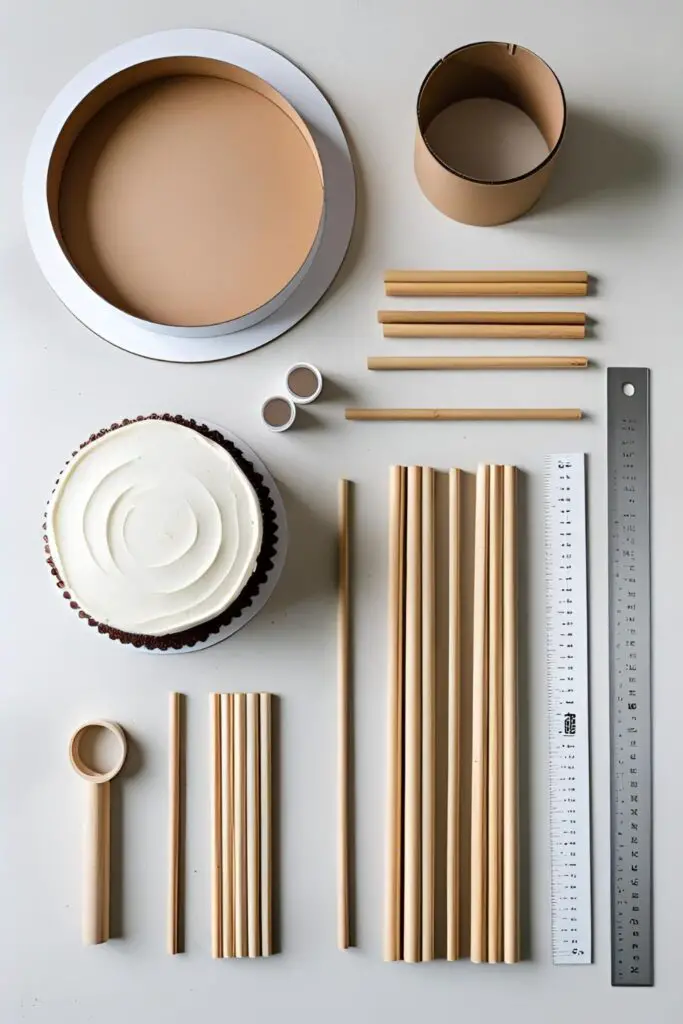
We’re not talking flour and sugar here. We’re talking about the crucial hardware, the construction materials that will form the hidden skeleton of your edible skyscraper.
- Your Baked & Cooled Cakes: You’ll need at least two different-sized cake tiers that have been baked, fully cooled, and leveled. For our example, we’ll use a 10-inch round bottom tier and an 8-inch round top tier. It’s crucial to use a sturdy cake recipe, not a light, airy one.
- The “Mortar” (Your Frosting): A stable buttercream (like American, Swiss, or Italian meringue) or a firm chocolate ganache works best. This will act as the delicious glue holding everything together.
- The Foundation (Cake Boards): This is non-negotiable. You’ll need:
- A thick cake drum (about ½-inch thick) that is 2 inches wider than your bottom tier (e.g., a 12-inch drum for a 10-inch cake).
- A thin cardboard cake circle that is the exact same size as your top tier (e.g., an 8-inch circle for an 8-inch cake).
- The Pillars (The Dowels): These are your internal support columns. You can use:
- Wooden Cake Dowels: The traditional choice.
- Thick Plastic Dowels: Easy to cut and reusable.
- Bubble Tea Straws: A surprisingly sturdy and cheap alternative for smaller, two-tier cakes. Do not use regular drinking straws.
- The Central “Rebar” (Optional but Recommended): One long, sharpened wooden dowel that will go through the entire cake from top to bottom for ultimate transport security.
The Construction Equipment (Your Toolkit)
You are now a cake contractor. You need the right tools for the job.
- A Cake Turntable: This is a non-negotiable game-changer. It makes frosting and smoothing your cakes infinitely easier and more professional.
- An Offset Spatula and a Bench Scraper: The dynamic duo for achieving that perfectly smooth, bakery-worthy frosting finish.
- A Long Serrated Knife or a Cake Leveler: For the crucial first step of creating perfectly flat cake layers.
- Dowel Cutters or a Pair of Strong Clippers: For cleanly and precisely cutting your support dowels to the exact right height.
- A Small Hammer or a Rubber Mallet: For gently tapping in that final, central dowel.
- A Ruler and a Food-Safe Marker: For measuring the height of your cake and your dowels. Precision is your friend!
- A Bubble Level (The Pro Move): Yes, the kind from the hardware store. For the true perfectionists who want to ensure their tiers are perfectly, mathematically level.
The Architectural Blueprint: Your Step-by-Step Guide

We’re going to build a simple, classic two-tier cake. Read through all the steps first, take a deep breath, and remember: cold is your friend.
Phase 1: Prep Your Tiers (The Foundation)
- Level the Playing Field: Your cake layers must be perfectly flat. Once your cakes are completely cool, use a long serrated knife to carefully slice off any domed tops. A flat surface is a stable surface. (The cake scraps are your reward. Eat them.)
- Assemble and Frost Each Tier SEPARATELY:
- Place your bottom tier cake (the 10-inch) on its 12-inch cake drum. Fill and stack its layers.
- Place your top tier cake (the 8-inch) on its 8-inch cardboard circle. Fill and stack its layers.
- Apply a thin, smooth “crumb coat” of frosting to both entire tiers.
- CHILL. EVERYTHING. This is a critical step. Place both of your fully assembled and crumb-coated tiers in the refrigerator for at least 30-60 minutes, or until the frosting is firm to the touch. Cold cakes are stable cakes.
- The Final Frosting: Apply the final, beautiful coat of frosting to both tiers while they are still separate. Get them as smooth and perfect as you like. Chill the bottom tier again while you work on the next, most crucial step.
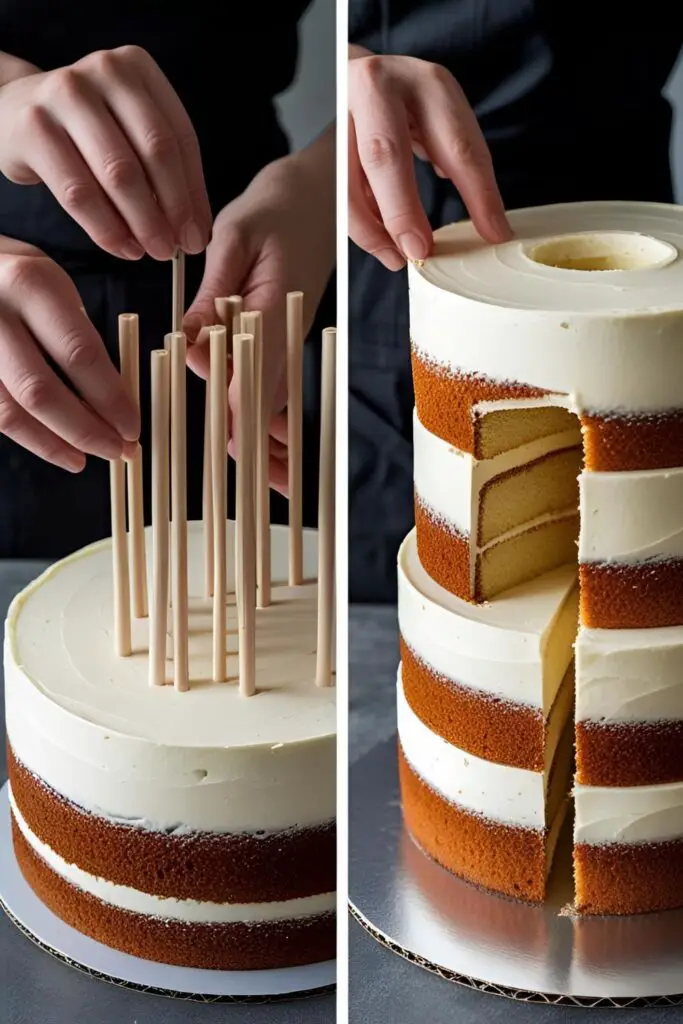
Phase 2: Installing the Support System
- Map Your Dowels: Take the 8-inch cardboard circle (the one your top tier is on) and gently press it onto the center of your frosted 10-inch bottom tier. This will leave a faint circular impression in the frosting. This is your blueprint for where to place the dowels.
- Measure and Cut: Take one dowel and push it straight down into the bottom tier, about an inch inside the circle you just made. Push it all the way down until it hits the cake drum at the bottom. Use your food-safe marker to mark the dowel right at the level of the frosting.
- Cut the Dowels: Pull the marked dowel out and use your clippers to snip it cleanly at the mark. This is your master dowel. Now, cut 4-5 more dowels to the exact same length. They must be absolutely identical!
- Insert the Dowels: Push the cut dowels straight down into the bottom tier, evenly spaced out inside your circle guide. You have just built a tiny, invisible table inside your cake that will support the entire weight of the top tier.
Phase 3: The Grand Assembly
- The Big Lift: Spread a small dollop of frosting in the center of your doweled area on the bottom tier. This acts as glue. Now, take a deep breath. Using a large offset spatula to help you lift and guide it, carefully place your chilled 8-inch tier (which is on its own board) directly on top of the doweled support system. Use the faint circle as your guide to center it perfectly.
- The Final Lockdown (The Central Dowel): If you’re transporting the cake or just want ultimate peace of mind, this step is a lifesaver. Take your long, sharpened wooden dowel and carefully drive it down through the center of the top tier, through its cardboard base, and deep into the bottom tier until it hits the cake drum. You may need a small hammer to gently tap it the last little bit. Snip the top of the dowel so it’s flush with the top of the cake.
- The Cover-Up: Now that your cake is structurally sound as a bridge, you can apply your final decorations. Use a piping bag to add a decorative border around the base of the top tier. This elegantly hides the seam where the cake board meets the bottom tier.
The Laws of Cake Physics (The “Nutrition”)
This isn’t about calories; it’s about the fundamental principles that keep your cake standing tall.
- Law #1: Distribute the Weight. The dowels are not holding up the cake below them; they are holding up the cardboard cake board of the tier above them. They transfer that weight directly down to the foundation.
- Law #2: Cold is Your Ally. Chilling your cakes at every stage—after baking, after crumb coating, and after final frosting—makes them firm, stable, and a thousand times easier to handle.
- Law #3: A Level Foundation is Everything. If your cake layers are not perfectly flat, your entire structure will be tilted from the start. Level your cakes!
Common Stacking Catastrophes to Avoid
Don’t let your masterpiece become a cautionary tale. Avoid these classic, tragic mistakes.
- Stacking a Warm or Room-Temperature Cake. Do not do this. Ever. It is a recipe for a buttercream landslide. The frosting will be soft, the cake will be fragile, and everything will shift and collapse. Everything must be chilled and firm.
- Using Unevenly Cut Dowels. If your support “table” is wobbly because your dowel “legs” are different lengths, your cake will be wobbly. You will create the Leaning Tower of Cake, and it will not end well. Measure twice, cut once. They must be identical.
- Forgetting the Cake Board Under the Top Tier. This is the cardinal sin of cake stacking. It is a fatal error. Without a board under the top tier, the dowels have nothing to support, and the top cake will slowly and tragically sink into the bottom one.
- Using Flimsy Supports. Regular drinking straws will buckle. Coffee stirrers will snap. Toothpicks are a joke. You need supports designed for the job: proper cake dowels or thick-walled bubble tea straws.
Variations & Customizations (Advanced Architectural Styles)
Once you’ve mastered the basic two-tier, you can get even more creative.
- The Asymmetrical or Offset Stack: If you want your top tier to be off-center for a modern look, you still follow the same rules. Simply place your guide circle where you want the cake to sit, and place all your support dowels inside that circle.
- The “Naked” Cake Stack: This popular rustic style, with minimal frosting on the sides, is beautiful but leaves no room for error. Your layers must be perfectly level and your stacking perfectly centered, as there’s no thick layer of frosting to hide any imperfections.
- Using Pillars for Dramatic Separation: For a more traditional, old-school look with a visible space between the tiers, you can use plastic separator plates and pillars. The same principle applies: the pillars support the plate, and the plate supports the cake.
Your Burning Stacking Questions, Answered
Let’s clear up some of the most common points of confusion.
Do I really, truly need to use dowels to stack a two-tier cake?

YES. A million times, yes. Even a small 8-inch cake on top of a 10-inch cake is too heavy. It will sink and create a bulge in the bottom tier. Dowels are not optional. They are the law.
What’s the best, cheapest substitute for cake dowels?
Thick, wide plastic straws made for bubble tea (boba) are the best and most widely used substitute. They are food-safe, easy to cut with scissors, and surprisingly strong.
How far in advance can I stack my cake?
It’s best to do the final stack on the day of the event. You can have the individual tiers fully frosted and chilled in the refrigerator for 1-2 days ahead of time.
What is the absolute safest way to transport a tiered cake?
In separate, chilled boxes. Place each fully frosted and chilled tier in its own box. Place the boxes on a flat, level surface in your car (like the floor of the trunk), preferably on a non-slip mat. Drive like you’re transporting a precious, fragile artifact. Do the final, quick stack on-site at the venue.
How do you actually serve a doweled cake?
You serve it one tier at a time, from the top down. Remove any external decorations, then carefully remove the top tier (it will lift right off with its board). Place it on the counter, and slice and serve it. Then, use clean pliers or your fingers to pull the dowels out of the bottom tier, and slice and serve the bottom tier.
Can I stack a cake that has a soft filling like mousse or custard?
Yes, but you absolutely must create a “dam” of stiff buttercream. Before you add your soft filling between the cake layers, pipe a thick, sturdy ring of stiff frosting around the outer edge of the bottom layer. This dam will contain the soft filling and prevent it from squishing out the sides under the weight.
Help! My cake tiers are sliding! How do I stop them?
This is a sign that your cake is not cold enough, or that there’s condensation making things slippery. A dollop of “frosting glue” between the tiers helps, but the ultimate solution is the central dowel. It mechanically locks all the tiers together and prevents any sliding.
Final Thoughts
Look at you. You are no longer just a baker; you are a structural engineer of deliciousness. A cake architect. A conqueror of gravity. You have stared into the face of a wobbly, multi-storied challenge and you have emerged victorious, with a stable, stunning masterpiece.

So go forth. Build the edible skyscrapers of your dreams. And the next time someone sees your creation and asks, with wide, impressed eyes, “How did you do that?”, you can just smile knowingly and say, “It’s all about having a good support system.”