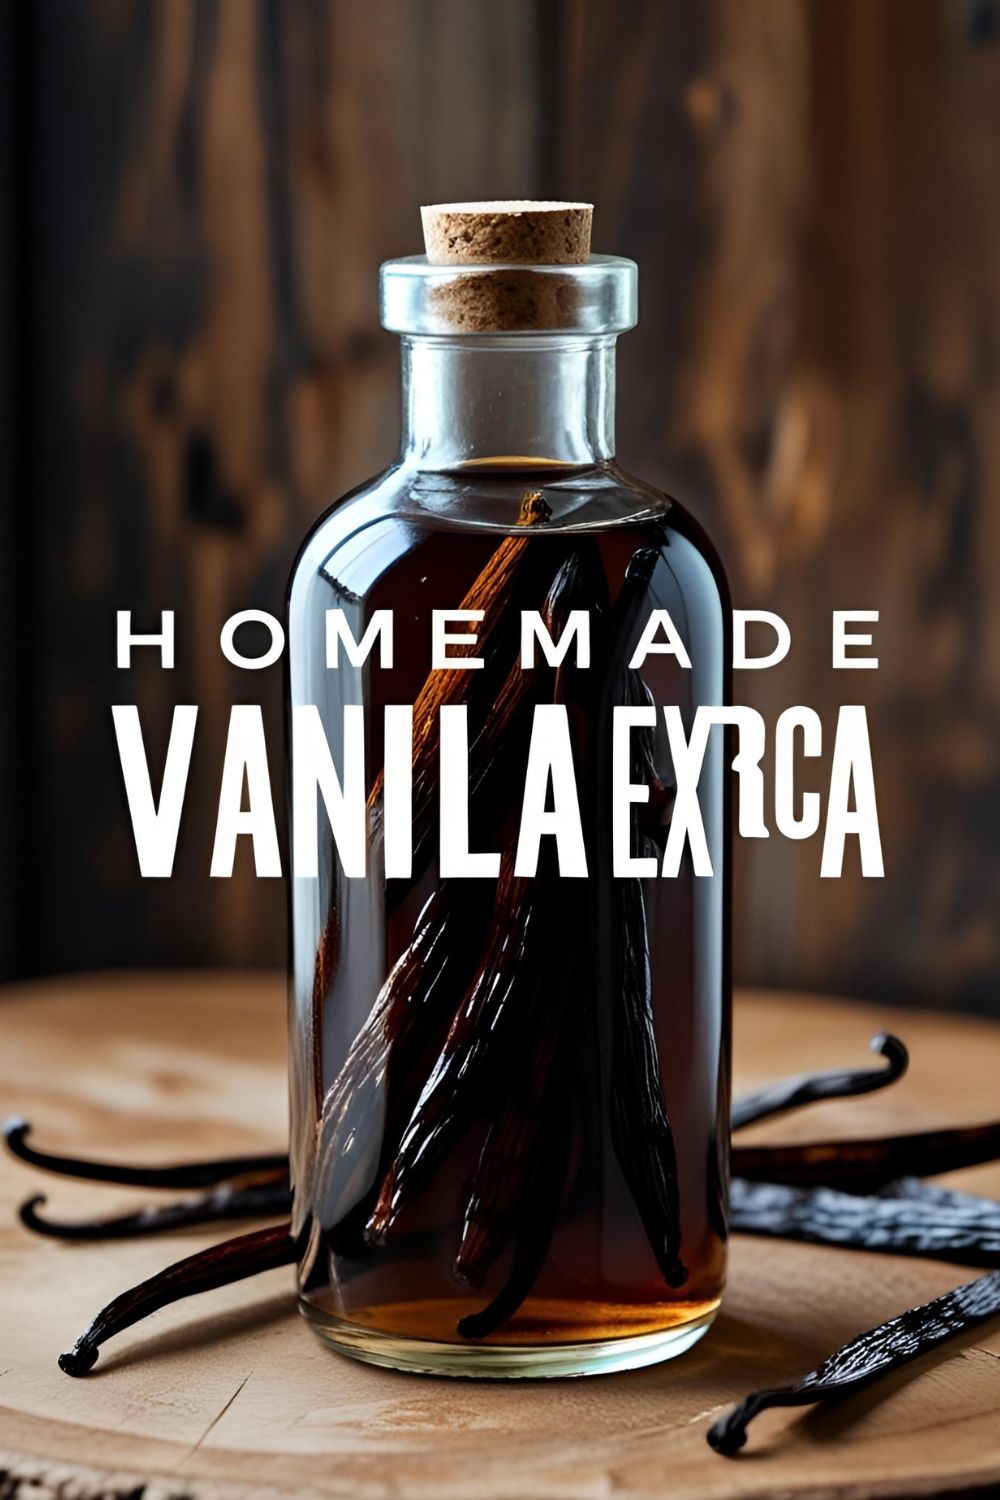
How to Make Your Own Vanilla Extract (It’s Shockingly Easy!)
How to Make Your Own Vanilla Extract (It’s Shockingly Easy!)
Let’s talk about that tiny, outrageously expensive bottle of vanilla extract in your pantry. You know the one. You guard it with your life, doling it out in ¼ teaspoon increments like it’s liquid gold. What if I told you that for the price of one of those little bottles, you could make a massive, never-ending supply of a far superior product? Today, my friend, we are diving deep into the ridiculously simple world of how to make your own vanilla extract.
I’m not kidding when I say this is the easiest recipe you will ever make. It has two main steps: put things in a jar, and then completely forget about it for a while. If you possess the ability to do those two things, you can make vanilla extract that will blow the store-bought stuff out of the water.
So, are you ready to embark on the laziest, most rewarding DIY project in the entire culinary universe? Let’s get started.
Why This Recipe is Awesome
If you’re still clutching your pricey little bottle, let me convince you to join the homemade-extract revolution.
- It Will Save You a Ridiculous Amount of Money: This is the big one. Good quality pure vanilla extract is expensive. Making your own is a small upfront investment in beans and booze that pays for itself over and over and over again. You’ll never have to ration your vanilla again.
- The Flavor is Infinitely Better: Homemade vanilla extract has a depth, complexity, and smoothness of flavor that you just don’t get from the mass-produced stuff. You can also customize it with different spirits (bourbon vanilla, anyone?) to create your own signature blend.
- It’s the Easiest Recipe on Planet Earth: There is no cooking, no measuring (beyond a rough estimate), and the main ingredient is patience. Plus, a small, beautifully labeled bottle of homemade vanilla extract makes for an incredibly impressive and thoughtful gift. People will think you’re a wizard.
Ingredients
Prepare to be underwhelmed. This is the shortest ingredient list you’ll ever see.
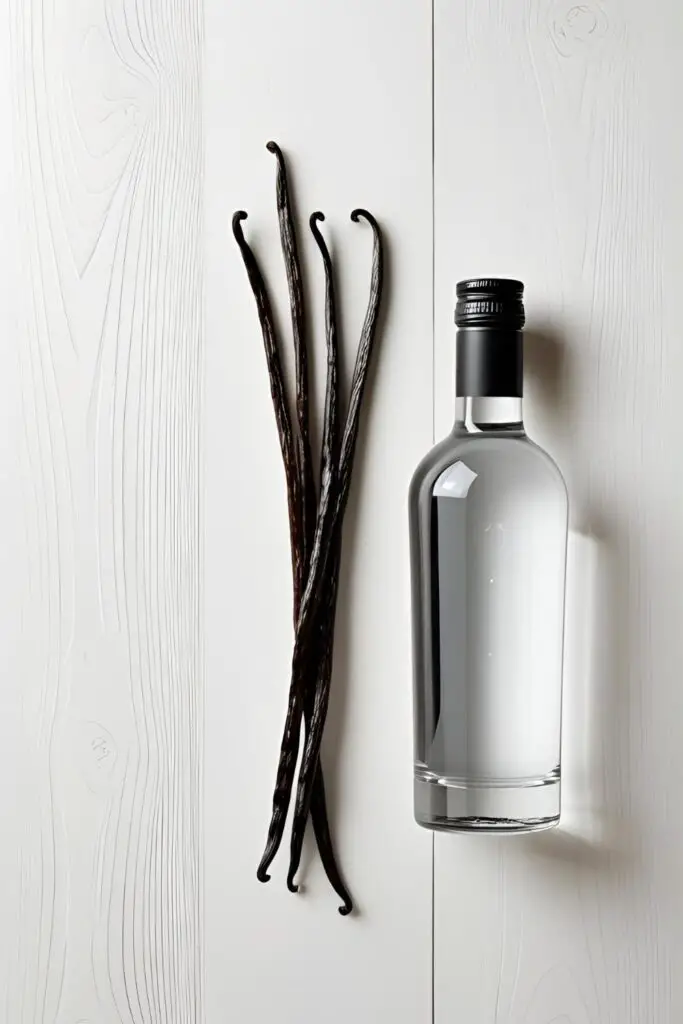
- Vanilla Beans: You’ll want about 6-8 vanilla beans for every 8 ounces (1 cup) of alcohol. Pro Tip: Do not splurge on expensive, plump Grade A beans. Use Grade B (or “extract grade”) vanilla beans. They are drier, less pretty, and significantly cheaper, but their intense, concentrated flavor is absolutely perfect for making extract.
- Alcohol: You need one 750ml bottle of 80-proof (40% alcohol by volume) liquor. The choice is yours!
- Vodka: The most popular choice. It has a clean, neutral flavor that lets the pure vanilla shine through. Don’t waste your money on the top-shelf stuff; a good, clean, mid-range vodka like Smirnoff or Svedka is perfect.
- Bourbon, Brandy, or Dark Rum: For a more complex, warm, and smoky extract. These are incredible in chocolate desserts and holiday baking.
Tools & Kitchen Gadgets Used
Your main piece of equipment is a container and the passage of time.
- Glass Jars or Bottles with a Tight-Fitting Lid: You’ll need at least an 8-ounce bottle or jar. Amber-colored bottles are ideal as they protect the extract from sunlight, but clear glass is fine as long as you store it in a dark place.
- A Small, Sharp Knife or a pair of Kitchen Shears
- A Funnel (optional, but it makes pouring the alcohol much less messy)
Step-by-Step Instructions
This is less of a “recipe” and more of a “long-term science experiment in deliciousness.”
Step 1: Prep the Beans Take your vanilla beans and a sharp knife. Carefully slice each bean in half lengthwise, from top to bottom, leaving the ends intact if you like. This exposes all those glorious little seeds and the inner surface area of the pod to the alcohol. Alternatively, you can just snip them into 1-inch pieces with kitchen shears.

Step 2: Beans in the Bottle This is the hard part. Just kidding. Take your split or chopped vanilla beans and place them inside your clean, empty glass jar or bottle.
Step 3: Add the Alcohol Now, we drown them in glorious booze. Place a funnel in the mouth of your bottle and pour your chosen alcohol over the vanilla beans. Fill the bottle, making sure the beans are completely submerged.
Step 4: Seal, Shake, and Wait Screw the lid on tightly. Now, give the bottle a good, vigorous shake for about 15 seconds. Feel the power. You just made the beginnings of vanilla extract.
Step 5: The Hardest Part – The Waiting Game Now, you must practice the ancient and noble art of patience. Place the bottle in a cool, dark place, like the back of a pantry or a cupboard. And then… you wait.
Step 6: Shake It Up (Occasionally) Give the bottle a good shake once a week, or, let’s be honest, whenever you happen to remember it exists. This just helps to agitate the mixture and encourage the infusion.
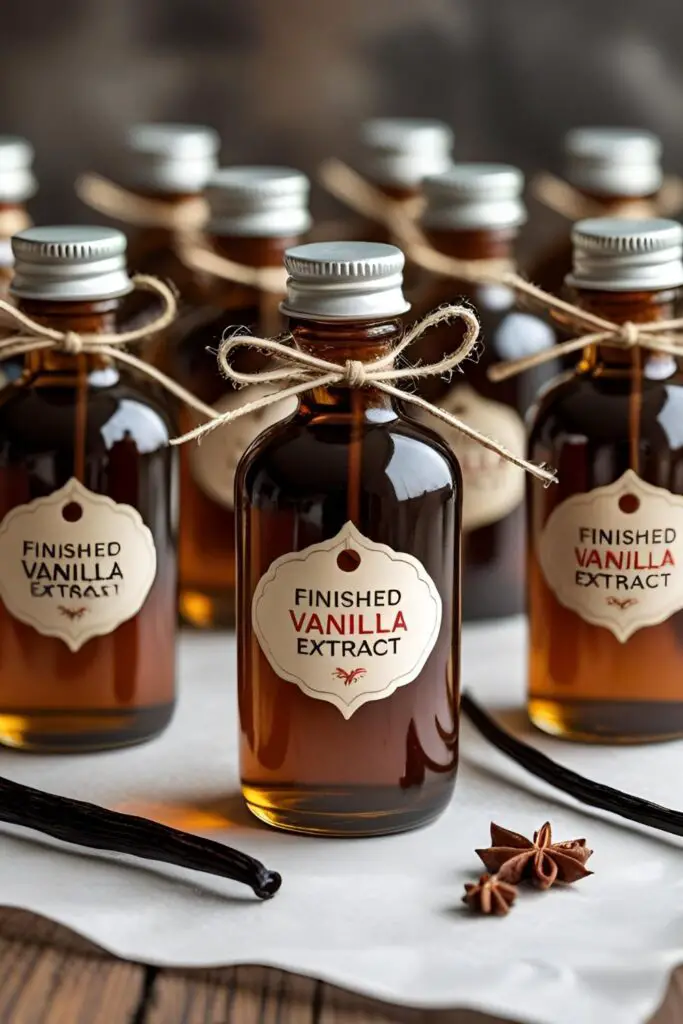
Step 7: When is it Done? Your vanilla extract needs to infuse for a minimum of 8 weeks, but it really doesn’t start getting amazing until around the 6-month mark. A year is even better. The longer it sits, the darker, richer, and more complex the flavor will become. It will be a dark amber color and smell intoxicatingly of vanilla, not just alcohol.
Calories & Nutritional Info
You use this by the teaspoon. The nutritional impact is essentially zero.
- Serving Size: 1 teaspoon
- Estimated Calories: Less than 5.
- Contains: A negligible amount of alcohol and an immeasurable amount of baking joy.
Common Mistakes to Avoid
This is almost impossible to mess up, but here are a few ways to get a less-than-perfect result.
- Using the Wrong Beans: I know I sound like a broken record, but don’t splurge on expensive, plump Grade A vanilla beans. They are actually too moist for a good extraction. Grade B beans are literally made for this job—they’re drier and will give you a much more intense and authentic vanilla flavor.
- Skimping on the Beans: This isn’t vanilla-flavored vodka; it’s a potent extract. If you only use one or two beans in a big bottle, your extract will be weak and sad. The standard is 6-8 vanilla beans per 8 ounces (1 cup) of alcohol.
- Being Wildly Impatient: I know you’re excited, but if you try to use your extract after only a couple of weeks, you will be disappointed. It will be pale and taste overwhelmingly of alcohol. You must wait at least 8 weeks, but longer is always better. Good things come to those who wait.
- Storing It in the Sunshine: Sunlight is the mortal enemy of your precious extract. It will degrade the delicate flavor compounds. Store it in a cool, dark place like a kitchen cabinet or the back of your pantry.
Variations & Customizations

Once you have your basic extract, you can get creative.
- The “Mother Jar” Method: This is the secret to a never-ending supply. Once your extract is ready, don’t use it all up! When it gets down to about halfway, simply top it off with more of the same alcohol. Every six months or so, toss in a fresh, split vanilla bean to keep the flavor going strong. You can literally keep this going for years.
- Spiced Vanilla Extract: For a warm, cozy twist perfect for holiday baking, add a single cinnamon stick, a few whole cloves, or a star anise to the jar along with your vanilla beans.
- The Ultimate Baker’s Blend: Get really fancy and use a mix of vanilla beans from different regions. For example, combine the creamy, buttery notes of Tahitian beans with the classic, bold flavor of Madagascar beans for a truly unique and complex extract.
FAQ Section
All your extract-related questions, answered.
1. What is the best alcohol to use for vanilla extract? 80-proof (40% ABV) vodka is the most popular choice because its neutral flavor really lets the vanilla shine. However, bourbon, brandy, and rum all make fantastic, more complex extracts with warmer notes of caramel and smoke.
2. How many vanilla beans should I use per cup of alcohol? The FDA standard for commercial extract is about 13.35 ounces of vanilla beans per gallon of liquid, which works out to roughly 6-8 beans per 8-ounce cup of alcohol.
3. How long does homemade vanilla extract last? Thanks to the alcohol content, it has an incredibly long shelf life. As long as the beans are kept submerged in the alcohol, it will last indefinitely. In fact, the flavor will only continue to improve and deepen over time.
4. Can I make vanilla extract without alcohol? You can make a non-alcoholic vanilla flavoring by using the same method with food-grade vegetable glycerin. However, it’s not a true “extract” and will have a shorter shelf life and a slightly different, sweeter flavor.
5. Why is my homemade extract cloudy? This is totally normal! It can happen due to natural sediments from the vanilla beans or temperature fluctuations. It’s not a sign of spoilage and is perfectly safe to use.
6. Should I cut the vanilla beans or leave them whole? Splitting them lengthwise or cutting them into smaller pieces is highly recommended. This exposes more of the bean’s surface area to the alcohol, which allows for a much faster and more thorough flavor extraction.

7. Can I reuse my vanilla beans to make more extract? Once your extract is made, the beans have given most of their flavor to the liquid. However, you can take them out, let them dry, and stick them in a jar of sugar to make incredible vanilla sugar!
Final Thoughts
And there you have it. You’ve just completed the easiest, most passive, and most rewarding DIY project in the entire food world. You’ve created a bottomless bottle of liquid gold that will elevate everything you bake from here on out. You have officially outsmarted the grocery store.
Go on, give that bottle another shake and tuck it away in a dark corner. In a few months, you’ll have the best vanilla extract you’ve ever tasted, and you’ll wonder why you ever paid for that tiny little bottle in the first place.