How to Make Vanilla Paste at Home (And Never Pay $20 a Jar Again!)
How to Make Vanilla Paste at Home (And Never Pay $20 a Jar Again!)
Picture this: you’re in the baking aisle, feeling fancy. You’re going to make that elegant panna cotta or a batch of sugar cookies that will finally win you the respect of your in-laws. You reach for a tiny, sophisticated jar of vanilla bean paste, imagining the beautiful black specks it will add. Then you see the price tag and have a small, private, wallet-related panic attack. For that price, it should come with a personal butler, right?
What if I told you that learning how to make vanilla paste is the ultimate kitchen hack? What if I told you it’s ridiculously easy, infinitely more flavorful, and will save you an absurd amount of money? Today, we are staging a rebellion against the tyranny of the tiny, overpriced jar.
Get ready to create your own liquid gold. Your baked goods (and your bank account) are about to send you thank-you notes.
Why This Recipe is Awesome
If the promise of saving a small fortune isn’t enough to sway you, let’s talk about the other glorious perks of this DIY project.
- It’s SO. MUCH. CHEAPER: I cannot stress this enough. The markup on store-bought vanilla paste is astronomical. A 4-ounce jar can easily set you back $20 or more. You can buy a whole bundle of vanilla beans online for that price and make triple, maybe even quadruple, the amount. It’s just smart math, people!
- The Flavor is Incredible: This is the best of both worlds. You get the deep, complex flavor and beautiful visual specks of a whole vanilla bean, with the convenient, scoop-able ease of an extract. It’s potent, pure, and tastes a million times better than anything that’s been sitting on a shelf.
- It Makes an Amazing Gift: Show up to a friend’s house with a small, beautifully labeled jar of your homemade vanilla bean paste. You will instantly be regarded as a domestic deity, a culinary wizard. People will think you’re incredibly fancy. They don’t need to know it only took you about 15 minutes of active work.
Ingredients
You’ll be shocked by the simplicity. This isn’t some complicated potion with eye of newt.
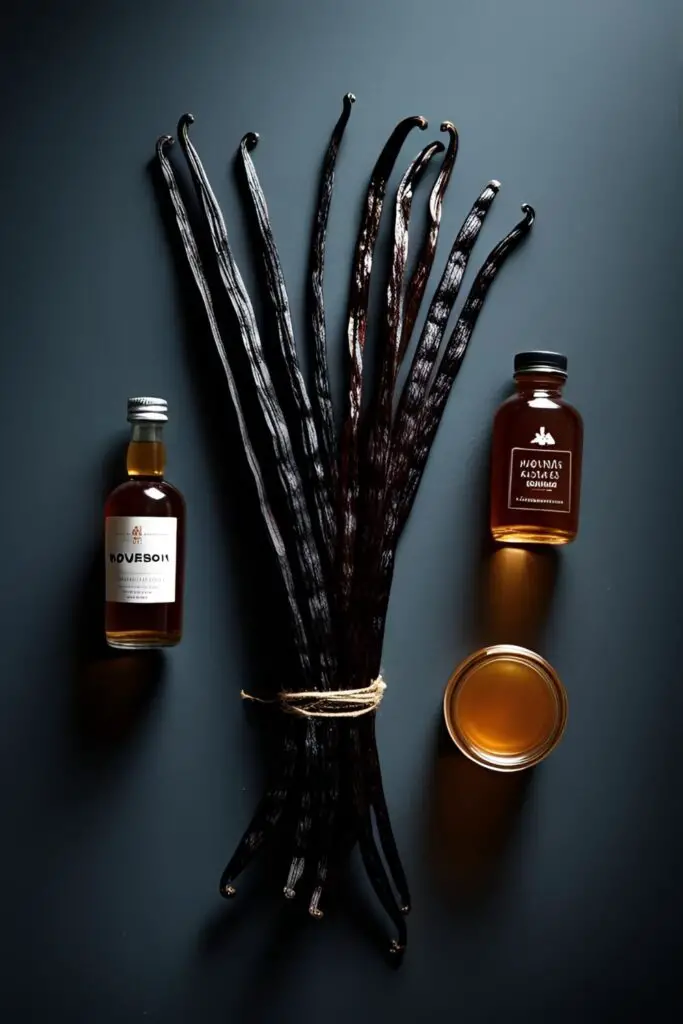
- 10 Grade B (Extract Grade) Vanilla Beans: Pro Tip: Do not waste your money on the expensive, plump Grade A beans for this. Grade B beans are drier and less pretty, but they have a super concentrated flavor that is absolutely perfect for this recipe and are much more affordable.
- ½ cup Agave Nectar or Light Corn Syrup: This provides the thick, syrupy base that makes it a “paste.”
- ⅓ cup Water
- 2 tablespoons Vodka or Bourbon: This acts as a preservative and helps extract the vanilla flavor. Vodka is clean and neutral, while bourbon adds a lovely warmth and complexity.
Tools & kitchen gadgets used
Your blender is the real MVP of this operation, doing all the hard work for you.
- A High-Powered Blender or a sturdy Food Processor (this is essential!)
- A Small, Sharp Paring Knife
- A Cutting Board
- A Small Saucepan
- A Silicone Spatula
- Small Glass Jars with Tight-Fitting Lids (for storing your precious creation)
Step-by-step instructions
Ready to feel like a brilliant, money-saving alchemist? Let’s do this.

Step 1: Perform Bean Surgery Lay your vanilla beans flat on the cutting board. Using the tip of your sharp paring knife, carefully split each bean in half lengthwise, from top to bottom. Use the back (dull side) of your knife to scrape out all of those tiny, precious seeds from inside each half. This glorious gunk is known as “vanilla caviar.” Collect all the seeds in a small pile.
Step 2: Don’t You Dare Waste the Pods! This is the most important part of the recipe. Do not throw away the scraped-out pods! They contain a massive amount of flavor. Take the empty pods and chop them into small, ½-inch pieces. This is where the magic really comes from.
Step 3: Create the Syrup In your small saucepan, combine the agave (or corn syrup), water, and vodka (or bourbon). Place it over low heat and warm it gently for just a couple of minutes, stirring until everything is combined and fluid. Do not let it boil! You’re just trying to warm it through to help the infusion process.
Step 4: Let the Flavors Mingle Remove the saucepan from the heat. Add the scraped vanilla seeds AND all of the chopped vanilla pods to the warm syrup. Give it a good stir. Now, let it sit and steep for at least 30 minutes. Let the flavors get to know each other. Let the magic happen.
Step 5: Blend It Like You Mean It Carefully pour the entire mixture—seeds, chopped pods, and all—into your high-powered blender or food processor. Secure the lid tightly. Now, blend this on high speed for a solid 2 to 3 minutes. You want to completely pulverize the tough pods until the mixture is as smooth as possible. It will be a thick, dark, beautifully speckled paste.
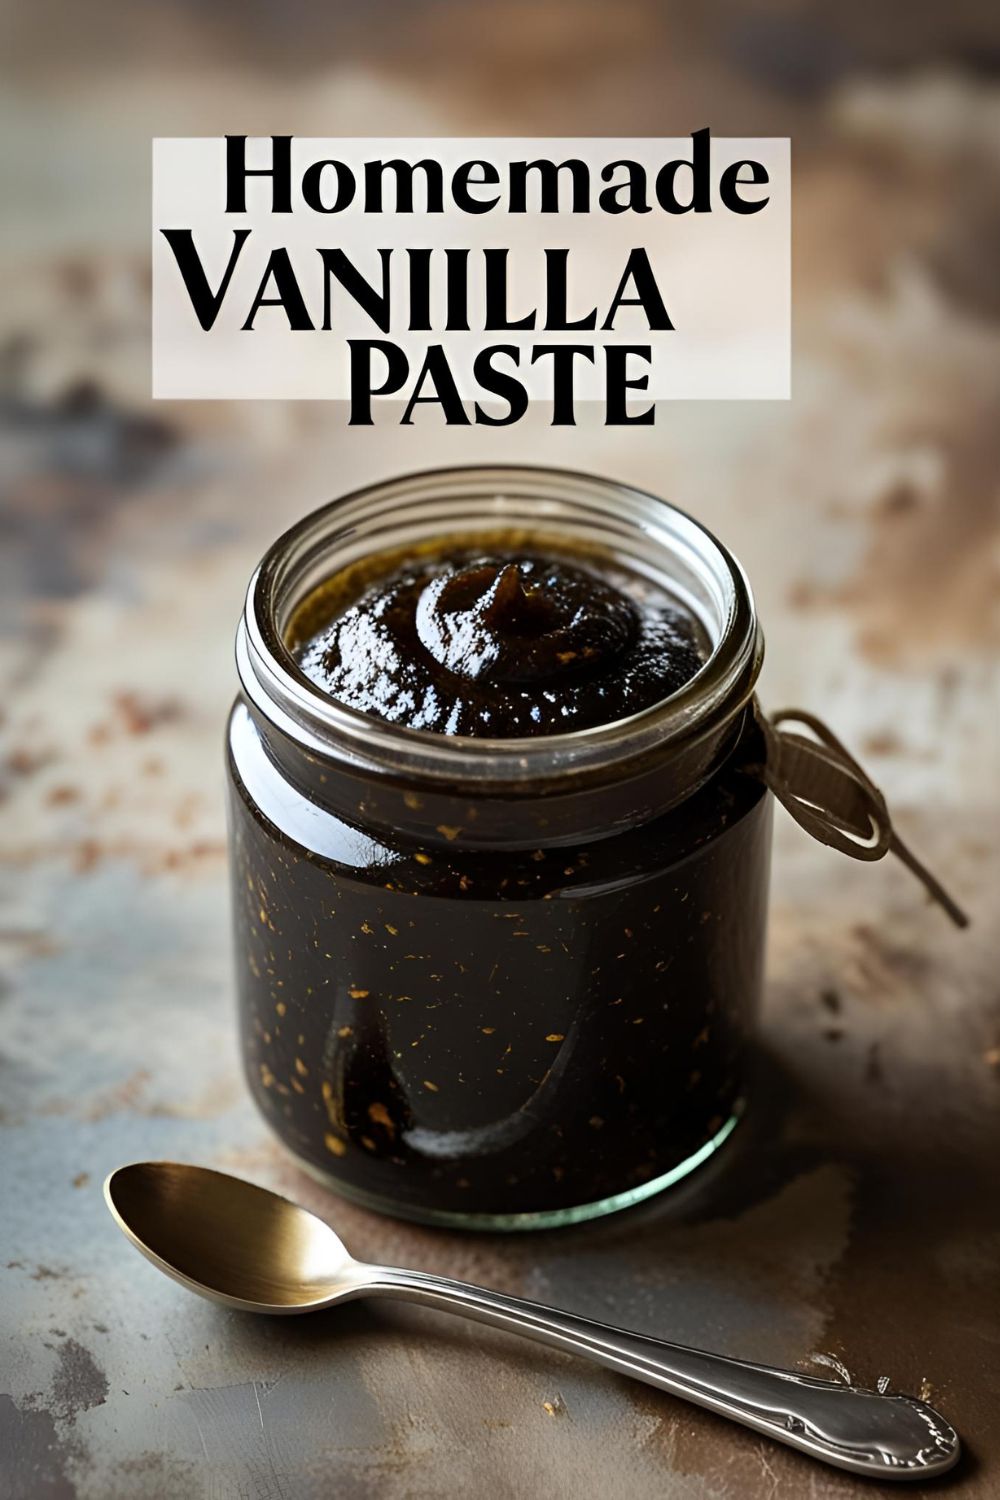
Step 6: Jar Your Liquid Gold Pour your finished vanilla bean paste into your clean, airtight glass jars. Seal them tightly. That’s it! You did it. You officially hacked the system. The paste will be fantastic to use right away, but the flavor will deepen and get even better after a week or two.
Calories & Nutritional Info
This is a flavor agent, not a meal. Let’s keep some perspective, shall we?
- Serving Size: 1 teaspoon
- Estimated Calories: Around 20-30 kcal, mostly from the sweetener.
- Contains: A powerful dose of deliciousness and smug satisfaction.
- Dietary Notes: Naturally gluten-free.
Common Mistakes to Avoid
Avoid these simple slip-ups for perfect paste every single time.
- Using Your Most Expensive Vanilla Beans: I know it’s tempting to use the best of the best, but save those plump, pretty, expensive Grade A beans for custards or crème brûlée where the whole bean is the star. Grade B beans are your best friend here—all the flavor, none of the fancy-pants price tag.
- Throwing Away the Pods: I will cry if you do this. This is a crime against baking. The majority of the vanilla flavor (vanillin) is actually in the pod itself, not just the seeds. You must use the whole bean to get the most intense, best-value paste.
- Under-Blending the Mixture: A quick 30-second pulse in the blender will not cut it. The vanilla pods are tough and fibrous. You need to let that blender run for several minutes to break them down into microscopic specks. If you don’t, you’ll have a chunky, unpleasant paste.
- Boiling the Syrup: You are gently warming the liquid to help it infuse. Boiling it is unnecessary, can make your syrup too thick, and will start to cook off the alcohol, which is needed for preservation. Low and slow is the tempo.
Variations & Customizations

Once you’ve got the basic technique down, you can start playing the artist.
- Sugar-Free / Keto Vanilla Bean Paste: This is an easy swap for low-carb bakers. Simply use a keto-friendly liquid sweetener like allulose syrup or monk fruit-based syrup in place of the agave or corn syrup.
- Bourbon & Maple Vanilla Bean Paste: For a deeper, richer, more complex flavor profile, use a good quality bourbon for your alcohol and pure maple syrup as your sweetener. This version is absolutely phenomenal in fall baking, bread pudding, or pecan pies.
- Warm Spiced Vanilla Bean Paste: Add a single cinnamon stick, a star anise, or a few whole cloves to the syrup during the steeping phase. Just be sure to remove the whole spices before blending. This is incredible for holiday cookies and spiced cakes.
FAQ Section
All your burning questions about this magical concoction, answered.
1. What’s the real difference between vanilla bean paste and vanilla extract? Extract is a thin, alcohol-based liquid with infused vanilla flavor. Paste is a thick, syrupy suspension that contains the actual vanilla seeds and the pulverized pods, giving it a more intense, full-bodied flavor and those beautiful signature black specks. As a general rule, 1 teaspoon of paste equals 1 teaspoon of extract.
2. What are Grade A vs. Grade B vanilla beans? Grade A beans (gourmet grade) have a higher moisture content and are plump and oily, best for cooking where the bean itself is the star. Grade B beans (extract grade) are drier and less pretty but have a very concentrated flavor that is perfect for making extracts and pastes.
3. How long does homemade vanilla bean paste last? Thanks to the sugar and alcohol, it’s very shelf-stable. Stored in a cool, dark place (like your pantry), it will last for at least a year, if not longer. The flavor will actually deepen and improve over the first few months.
4. Can I make this without alcohol? Yes, you can substitute the alcohol with water or more sweetener. However, this will significantly shorten its shelf life. An alcohol-free version should be stored in the refrigerator and used within one month.
5. My vanilla bean paste is too thick (or too thin). How do I fix it? Easy fix! If it’s too thick after blending, add another tablespoon of warm water and blend again until it reaches your desired consistency. If it’s too thin, return it to the saucepan and gently warm it for a few minutes to allow some liquid to evaporate (do not boil!).
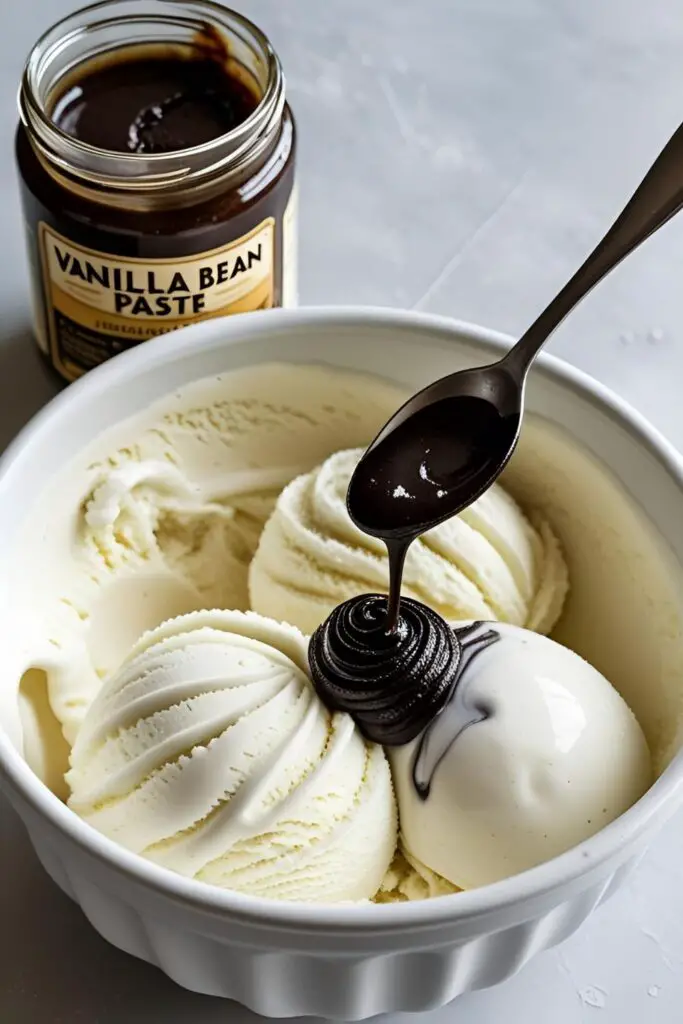
6. What can I use vanilla bean paste in? Anything and everything you would use vanilla extract in! It’s especially wonderful in light-colored desserts where you want to see the beautiful vanilla specks, like ice cream, panna cotta, shortbread cookies, sugar cookies, and buttercream frosting.

7. Is it really cheaper to make my own vanilla bean paste? YES. Emphatically, yes. It is significantly cheaper to make it yourself, especially if you buy your Grade B vanilla beans in bulk online. The initial investment in the beans will yield far more paste than you could buy for the same price.
Final Thoughts
Look at you, with your beautiful jar of speckled, fragrant, homemade magic. You have officially hacked the baking aisle. You’ve created a gourmet ingredient for a fraction of the cost, and it tastes better than the store-bought stuff anyway. You are a savvy, resourceful, culinary genius.
Now go forth and add those gorgeous vanilla specks to everything you bake. Put a spoonful in your coffee, stir it into your yogurt, whip it into your cream. You’ve earned it.