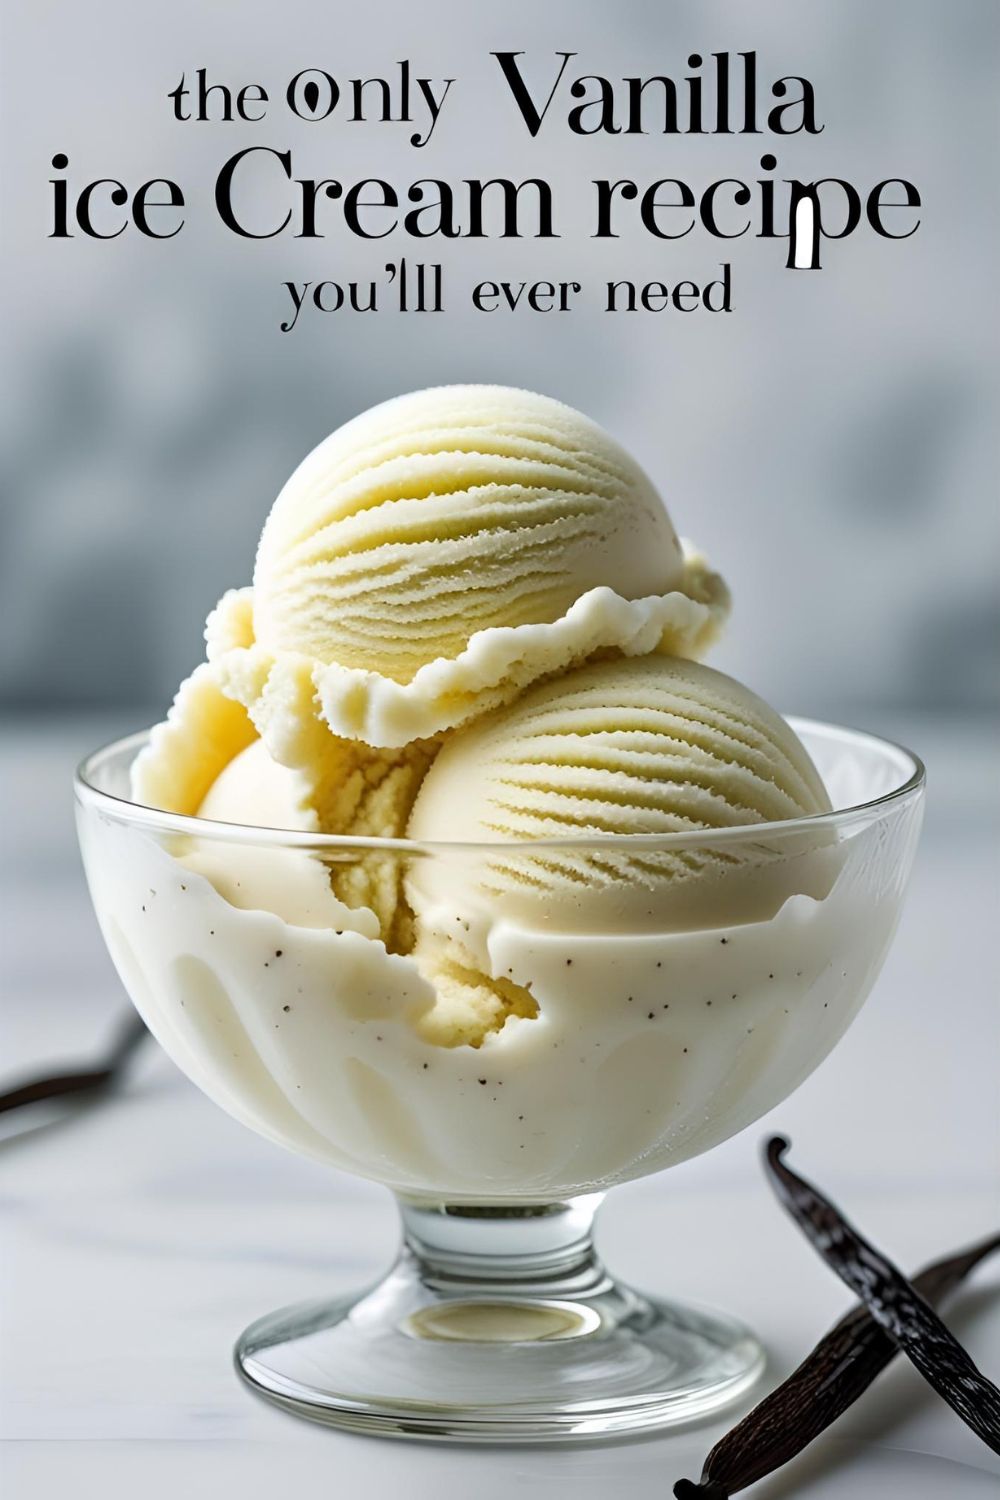
How to Make Vanilla Ice Cream That Will Ruin Store-Bought For You Forever
How to Make Vanilla Ice Cream That Will Ruin Store-Bought For You Forever
Let’s be brutally honest for a second. The term “vanilla” has gotten a bad rap. It’s become synonymous with “boring,” “plain,” and “uninspired.” And frankly, the sad, icy, artificially-flavored tubs in the freezer aisle have done nothing to help the cause. But I’m here to tell you that you’ve been lied to. Real, honest-to-goodness, homemade vanilla ice cream is anything but boring.
True vanilla is a complex, aromatic, and deeply luxurious flavor. And when you learn how to make vanilla ice cream from scratch—the real way, with a rich custard base and actual vanilla beans—you’ll realize you haven’t been eating vanilla ice cream at all. You’ve been eating a pale, frozen imitation.
This recipe is a weekend project that will fundamentally change your relationship with the world’s most popular ice cream flavor. Prepare to have your mind blown and your standards raised permanently. Sorry, not sorry.
Why This Recipe is an Absolute Game-Changer
Making your own ice cream sounds intimidating, but this recipe is worth every single step. Here’s why.
First and foremost, the texture is unbelievably, outrageously creamy. We’re making a French-style, custard-based ice cream. That means we’re using egg yolks to create a base that is incredibly rich, dense, and velvety smooth. This is the secret to scoop-shop quality ice cream with absolutely zero icy crystals.
Second, the flavor is deep and authentic. Using a real vanilla bean infuses the cream with hundreds of aromatic compounds that you just can’t get from extract alone. You’ll see the beautiful little black specks in every scoop, and the taste is warm, complex, and intoxicating. This is vanilla in glorious, high-definition technicolor.
Finally, it makes you a dessert superhero. Showing up to a dinner party with a pint of homemade vanilla bean ice cream is a serious power move. It’s the perfect accompaniment to literally any other dessert—pie, brownies, cobbler—and it’s so spectacular on its own that it deserves its own spotlight.
The Cream of the Crop: Ingredients
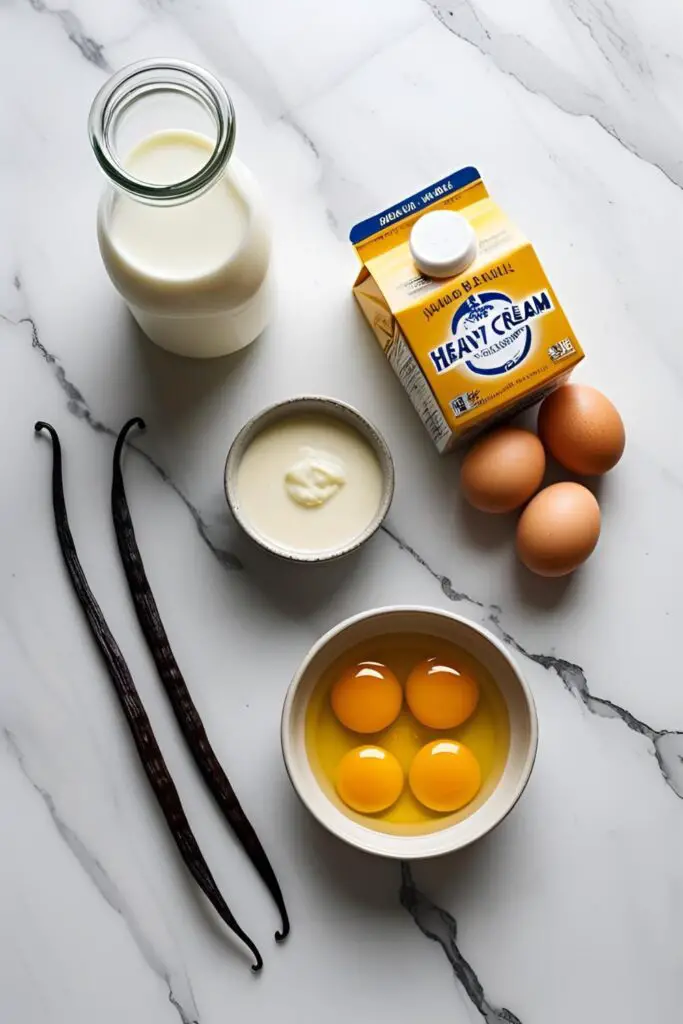

You only need a few simple, high-quality ingredients to create something truly magical.
- 2 cups (480ml) heavy cream, cold
- 1 cup (240ml) whole milk
- 43 cup (150g) granulated sugar, divided
- 6 large egg yolks
- 1 whole vanilla bean (or 1 tablespoon of vanilla bean paste or pure vanilla extract)
- A generous pinch of salt
The Churning Arsenal: Tools & Gadgets
This is a project, so you’ll need a few key pieces of equipment.
- An Ice Cream Maker: This is pretty crucial for the main recipe. Whether you have a compressor model or one with a freezer bowl, you’ll need it to churn the custard into ice cream.
- Medium Saucepan: For heating your cream and making the custard base.
- Mixing Bowls: One heatproof bowl for the egg yolks.
- Whisk & Silicone Spatula: Your trusty partners in crime.
- Fine-Mesh Sieve or Strainer: This is 100% non-negotiable for ensuring a silky-smooth custard.
- Instant-Read Thermometer (Optional but helpful): Takes all the guesswork out of cooking your custard to the perfect temperature.
- Airtight, Freezer-Safe Container: For storing your magnificent creation. A loaf pan covered in plastic wrap also works well.
Step-by-Step: The Path to Creamy Perfection
This is a process, but a deeply satisfying one. Let’s break it down.
H3: Part 1: Infusing the Cream
- Prep the Vanilla Bean: If using a whole bean, place it on a cutting board. Use a sharp paring knife to split it in half lengthwise. Use the back of the knife to scrape out all the tiny black seeds (the “vanilla caviar”).
- Warm the Liquids: In your medium saucepan, combine the heavy cream, whole milk, half of the sugar (41 cup plus 2 tbsp), and the salt. Add both the scraped vanilla seeds and the scraped-out pod to the pan.
- Heat Gently: Warm the mixture over medium heat, stirring occasionally, until it is hot and steamy but not boiling. Once it’s hot, remove it from the heat, cover the pan, and let it steep for at least 30 minutes to infuse that beautiful vanilla flavor.
H3: Part 2: Making the Custard (The Scary Bit That Isn’t Scary)
- Whisk the Yolks and Sugar: In a medium, heatproof bowl, whisk the egg yolks and the remaining sugar together until the mixture is pale yellow and thick. This should take about a minute.
- Temper the Eggs: This is the most important step. While whisking the egg yolk mixture constantly, slowly stream in about a cup of the hot cream mixture. By adding the hot liquid slowly, you’re gently raising the temperature of the eggs without scrambling them. This is called tempering.
- Combine and Cook: Pour the tempered egg mixture back into the saucepan with the rest of the cream. Cook over low-medium heat, stirring constantly with a spatula and scraping the bottom of the pan, for about 5-8 minutes. The custard is done when it has thickened enough to coat the back of your spatula. If you run your finger through it, the line should hold its shape.
- Do Not Boil! Whatever you do, do not let the mixture boil, or you will end up with sweet, vanilla-scented scrambled eggs.
H3: Part 3: The Big Chill and The Churn
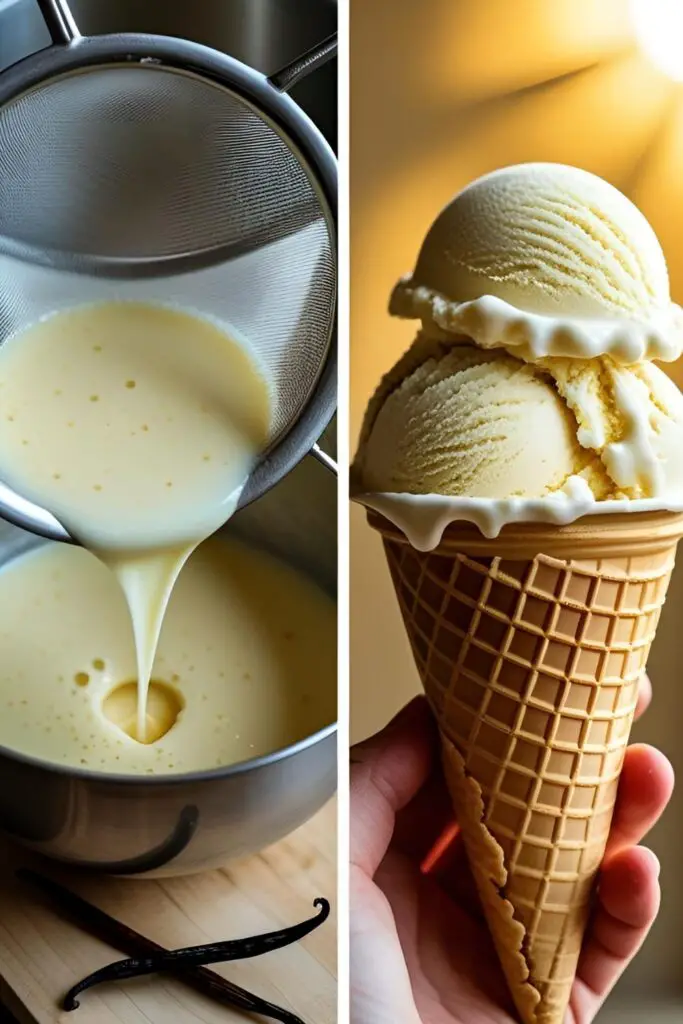
- Strain It: Immediately pour the hot custard through your fine-mesh sieve into a clean bowl. This will catch the vanilla pod and any tiny bits of egg that may have accidentally cooked, ensuring a perfectly smooth base.
- Chill Completely: Cover the bowl with plastic wrap, pressing it directly onto the surface of the custard to prevent a skin from forming. Place it in the refrigerator for at least 4 hours, but preferably overnight. The base must be completely, thoroughly cold before churning.
- Churn, Baby, Churn: Pour your cold custard base into your ice cream maker (make sure your freezer bowl is frozen solid if you have that kind!). Churn according to the manufacturer’s directions, usually for about 20-25 minutes. It should look like thick, creamy soft-serve.
- The Final Freeze (Ripening): Transfer the churned ice cream to your airtight, freezer-safe container. Cover and freeze for at least 4 hours to “ripen,” which allows it to firm up to a perfectly scoopable consistency.
Nutritional Info (The Delicious Data)
A look at the numbers behind the magic.
- Serving Size: A civilized 21 cup scoop
- Estimated Calories: Around 250-300 kcal of pure, unadulterated luxury.
- Key Nutrients: Calcium from the dairy and happiness from the experience.
- Note: This is a full-fat, full-custard, full-joy ice cream. It is a treat in the truest sense of the word.
Common Mistakes to Avoid (How Not to Ruin Perfection)
- Making Sweet Scrambled Eggs: This happens when you pour the hot cream into the egg yolks too quickly. You must temper the eggs by adding the hot liquid in a slow, steady stream while whisking constantly.
- Churning a Warm Base: If your custard base isn’t completely, bone-chillingly cold, it will not churn properly. The result will be a soupy, icy mess. Chill it for at least 4 hours. Don’t cheat on this step.
- Forgetting to Freeze Your Machine’s Bowl: This is the classic rookie mistake. If you have a freezer-bowl style ice cream maker, that bowl needs to be in the freezer for at least 24 hours before you use it. It must be frozen solid.
- Skipping the Strainer: You think your custard is smooth, but there might be tiny, invisible bits of cooked egg. Straining is your insurance policy for a perfectly silky texture.
- Over- or Under-Churning: Follow your machine’s instructions. It should be the consistency of thick soft-serve when it’s done. Under-churning leads to ice crystals, and over-churning can make the texture grainy.
Variations & Customizations (Remix Your Vanilla)
Vanilla is the perfect canvas for other flavors.
- No-Churn Vanilla Ice Cream (The “I Don’t Own an Ice Cream Maker” Hack): This is a fantastic alternative. In a large bowl, whip 2 cups of cold heavy cream until stiff peaks form. In a separate bowl, whisk one 14-ounce can of sweetened condensed milk with 1 tablespoon of vanilla extract or bean paste. Gently fold the whipped cream into the condensed milk mixture, transfer to a freezer-safe container, and freeze until firm.
- Coffee Bean Infusion: Instead of a vanilla bean, add 21 cup of coarsely crushed, high-quality coffee beans to the cream mixture in the first step. Let them steep for an hour for a deep, beautiful coffee flavor. Strain them out before tempering the eggs.
- Chocolate Freckles (Stracciatella): This is an Italian classic. Melt 4 ounces of good quality dark chocolate. During the last minute of churning, slowly drizzle the melted chocolate into the ice cream. It will harden instantly and break into delicious, crunchy chocolate “freckles.”
Frequently Asked Questions (Your Ice Cream Hotline)
Do I really, truly need an ice cream maker for the best results?
For the creamiest, custard-style ice cream, yes. The churning process incorporates air and breaks up ice crystals as they form. However, the No-Churn variation above is a fantastic and delicious alternative!
Why do I have to use egg yolks? Is there a substitute?
The egg yolks are what make this a rich, French-style custard. They act as an emulsifier, creating an incredibly creamy texture and preventing ice crystals. For an egg-free version (known as Philadelphia-style), you would typically use a mix of cream, milk, sugar, and a stabilizer like cornstarch, but the texture will be lighter and less rich.
My homemade ice cream is always icy. What am I doing wrong?
The most common culprits are a custard base that wasn’t chilled enough before churning, or not having enough fat or sugar in your recipe (fat and sugar are what keep it soft). This custard recipe is designed to combat iciness.
What is the difference between French-style and Philadelphia-style ice cream?

French-style has a cooked custard base containing egg yolks (like this recipe). Philadelphia-style has no eggs and is a simpler base of just cream, milk, and sugar. French-style is richer and creamier; Philly-style is lighter and quicker to make.
How do I stop my ice cream from getting rock hard in the freezer?
Commercial ice creams have stabilizers. For homemade, a little trick is to add 1 or 2 tablespoons of a neutral spirit like vodka or a tablespoon of corn syrup to your custard base before chilling. The alcohol/sugar slightly lowers the freezing point, keeping it more scoopable.
Can I just use vanilla extract instead of a whole bean?
Absolutely. A whole vanilla bean provides the most complex flavor and beautiful look, but 1 tablespoon of high-quality pure vanilla extract or vanilla bean paste is a great substitute. Add it to the custard base after you’ve taken it off the heat.
How long does homemade ice cream last?
It’s at its best within the first week or two. After that, it can start to pick up ice crystals or freezer odors. But let’s be real, it’s probably not going to last that long anyway.
Final Thoughts
You did it. You went on a culinary journey and came back with the holy grail of frozen desserts. You have now tasted vanilla ice cream as it was meant to be: rich, creamy, complex, and utterly divine. You’ve unlocked a new level of dessert mastery.
Go ahead, take a scoop. Enjoy it on its own. Put it on a slice of pie and watch it transform into something magical. You’ve earned it. And FYI, you may find that the freezer aisle at the grocery store suddenly seems a lot less appealing.