How to Make Edible Snow at Home (No Blizzard Required!)
How to Make Edible Snow at Home (No Blizzard Required!)
So, you want to know how to make snow? An ambitious goal! Let me guess, you’re looking out your window, it’s approximately a million degrees with 100% humidity, and you’re dreaming of a winter wonderland? I get it. As someone currently enjoying the balmy climate of Khulna, a real snowball fight is about as likely as seeing a penguin ride a rickshaw.
But what if I told you that you don’t need to be a weather god to experience a snow day? What if I told you that with a blender and a little bit of magic, you could create a bowl of fluffy, sweet, and deliciously edible snow right in your own kitchen? Today, my friend, we are making the ultimate “fake it ’til you make it” snowy dessert.
This isn’t just a recipe; it’s an act of defiance against the weather. Let’s make a blizzard in a bowl.
Why This Recipe is Awesome
If the sheer, unadulterated joy of making your own personal snow day isn’t enough, here are a few more reasons to love this project.
- It’s a Tropical Snow Day: You get to experience the fun and magic of “snow” even on the hottest, most humid day of the year. It’s a wonderfully refreshing, icy treat that is the ultimate way to beat the heat. It’s a paradox in a bowl, and it is delicious.
- It’s Insanely Easy and Fast: The active work time here is about 5 minutes. The hardest part is waiting for your ice to freeze. If you have a blender and some ice cube trays, you are now a certified, licensed snow-making machine.
- It’s a Blank Canvas for Flavor: The “snow” itself is a beautiful, blank slate. The real fun is in the toppings and mix-ins! You can turn this into a classic snow cone, a creamy “snow cream,” a fancy shaved ice dessert, or anything in between.
Ingredients
The ingredient list is wonderfully short. Your freezer and blender will do most of the heavy lifting.
For the “Snow” Base:
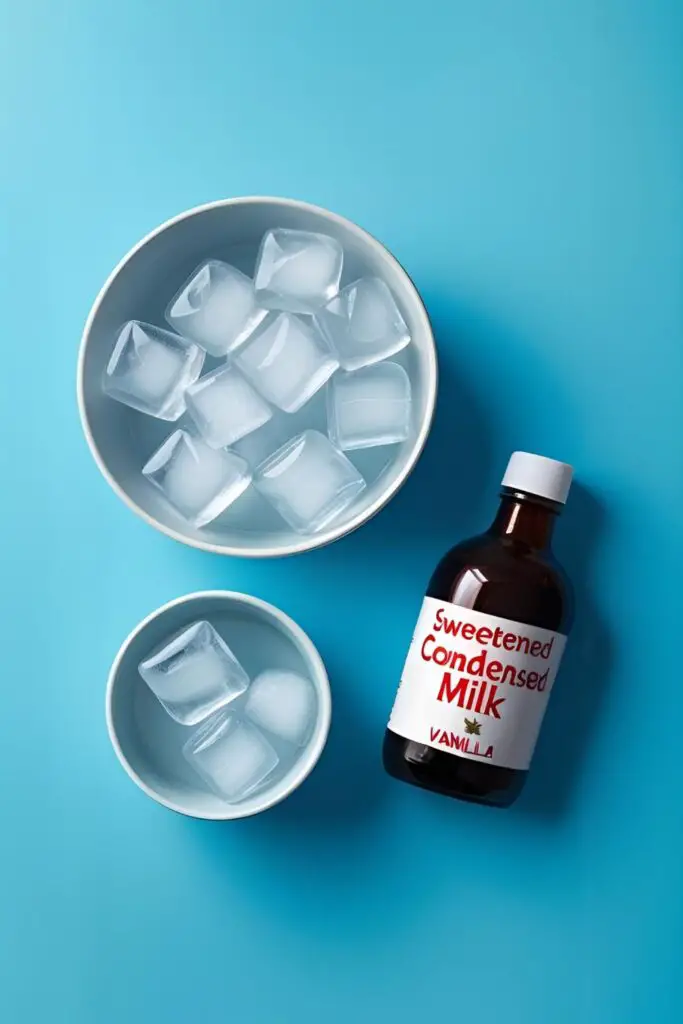
- 4 cups of ice cubes: Made from about 3 cups of water. Pro Tip: Stirring 2-3 tablespoons of granulated sugar into the water before freezing will result in a softer ice that blends into a fluffier “snow.”
- A large, very chilled mixing bowl: Pop it in the freezer for at least 15 minutes. This is crucial!
For the “Snow Cream” Flavor:
- ½ cup sweetened condensed milk, cold
- 1 teaspoon pure vanilla extract
- A tiny pinch of salt

For Toppings & Garnishes (The Fun Part!):
- Your favorite fruit syrups (like Rooh Afza, strawberry, or mango)
- Sprinkles
- Fresh chopped fruit (mango, pineapple, berries)
- Chocolate sauce or caramel sauce
- Toasted coconut flakes
Tools & kitchen gadgets used
To create a blizzard in your kitchen, one tool is more important than all the others.
- A High-Powered Blender or a powerful Food Processor: This is the key to success. You need a machine with a strong motor that can pulverize solid ice into a fine, fluffy powder.
- Ice Cube Trays
- A Large, Chilled Mixing Bowl (metal or glass is best)
- A Sturdy Silicone Spatula
- Serving Bowls, Cups, or Glasses
Step-by-step instructions
This is a fast and furious process. Get your station ready, work quickly, and prepare for some frosty magic.
Step 1: The Cloud Seeding (The Day Before) This is your only prep work. If you’re going for the “fluffy snow” option, stir your sugar into the water until it’s mostly dissolved. Pour the water (sugared or plain) into your ice cube trays and freeze until rock solid, preferably overnight.
Step 2: Prepare Your Flavor Base Right before you’re ready to make your snow, prepare your “snow cream” base. In your large, chilled mixing bowl, whisk together the cold sweetened condensed milk, the vanilla extract, and the pinch of salt. Place this back in the fridge while you make the snow.
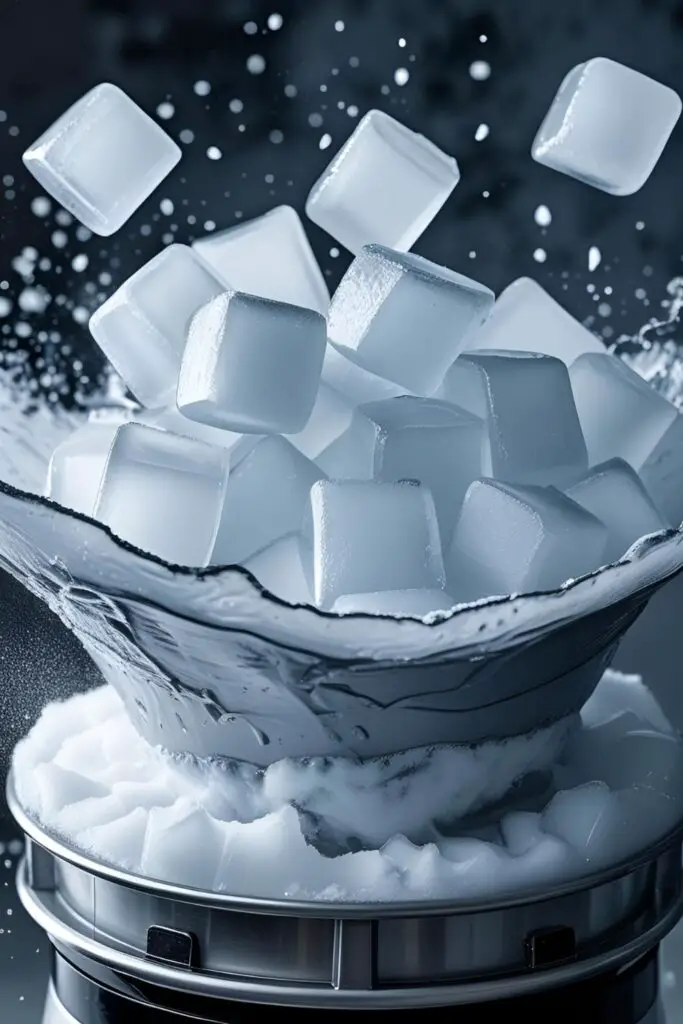
Step 3: Unleash the Blizzard! Now for the main event. Place your frozen ice cubes into the canister of your high-powered blender or food processor.
Step 4: From Ice Cubes to Snowflakes Secure the lid tightly. Pulse the blender in short, sharp bursts. You will see the solid cubes begin to break down. After a few pulses, you can turn the blender on to a high speed, using the tamper if you have one to push the ice down. Blend just until the ice is transformed into a fine, white, fluffy powder that looks exactly like freshly fallen snow. You must work fast before it starts to melt back into a slushy mess!
Step 5: The Grand Combination Immediately dump your freshly blended ice-snow into your chilled bowl containing the condensed milk mixture.

Step 6: Stir Like Mad and Serve Immediately! Using your spatula, quickly but gently fold the fluffy snow into the condensed milk mixture. It will transform from a pile of snow into a creamy, scoop-able, magical dessert in about 30 seconds. This is a fleeting pleasure! Scoop your snow cream into serving bowls right away.
Step 7: The Topping Extravaganza Go wild! Drizzle with your favorite fruit syrups, douse it in sprinkles, top it with fresh fruit, or add a decadent swirl of chocolate sauce. Enjoy your personal snow day immediately!
Calories & Nutritional Info
This is for the “snow cream” base only. The toppings are your own delicious adventure.
- Serving Size: 1 cup
- Estimated Calories: Around 150-200 kcal.
- Rich in: The ability to cool you down on a hot day and make you feel like a kid again.
Common Mistakes to Avoid
Avoid these simple slip-ups for the fluffiest, most delicious bowl of “snow.”
- Using a Weak, Wimpy Blender: I know it’s tempting to try this with any old blender, but a less powerful machine will just make crunchy, sad, gravel-like ice chunks, not the light, fluffy snow we’re dreaming of. You need a powerful blender or food processor that can really pulverize the ice into a fine powder.
- Letting Your Precious Snow Melt: This is a race against the clock (and the thermostat, especially here in Bangladesh!). The moment your ice is blended into snow, it wants to start melting back into water. Have your chilled bowl and flavor base ready to go so you can mix and serve it the second it’s ready.
- Adding the Liquid to the Blender: Do not pour the condensed milk into the blender with the ice! You will make a thin, milky smoothie, not a bowl of fluffy snow. The secret to the texture is to blend the ice by itself first, then fold that dry, fluffy snow into your creamy base.
- Trying to Store It: I know it’s tempting to make a big batch and save it for later. You cannot. This is a dessert that exists only in the present moment. If you put it in the freezer, it will freeze into a solid, impenetrable block of sweetened ice. It must be made and eaten immediately.
Variations & Customizations
Your snow-making machine is ready. Here are a few ways to customize your blizzard.
- The Classic “Snow Cone” Experience: This is the simplest variation. Just make the plain “snow” by blending the ice. Skip the condensed milk mixture entirely. Pile the fluffy snow into a paper cone or a cup and douse it with your favorite colorful fruit syrups.
- Tropical Snow Storm: For the ice cubes, freeze coconut water or a light pineapple juice instead of regular water. Make the snow cream as directed and serve it in a hollowed-out pineapple or coconut shell. Top with fresh, diced mango, pineapple, and a generous sprinkle of toasted coconut flakes.
- “Halo-Halo” Inspired Snow Bowl: For a fun twist inspired by the classic Filipino dessert, layer your finished snow cream in a tall glass with other delicious ingredients like sweetened red beans, jackfruit, macapuno (coconut sport), and a drizzle of ube (purple yam) jam.
FAQ Section
All your frosty, flakey questions, answered.
1. Can I really make fluffy snow from regular ice cubes? Yes, but the key is a very powerful blender or food processor. The machine needs to be strong enough to shave the ice into a fine powder before its own motor heat starts melting it.
2. What’s the secret to getting fluffy, not chunky, blended ice? A powerful blender is secret #1. Secret #2 is to use the pulse function at the beginning to break up the large cubes before going to a full, high-speed blend.

3. Can I make the snow base with just plain ice? You can, but adding a little sugar to the water before freezing (as mentioned in the ingredients) lowers the freezing point slightly. This creates a “softer” ice that is easier to blend into a fine, fluffy powder.
4. How is this different from a smoothie or a slushy? The technique! For a smoothie, you blend ice with liquid. For this “snow,” you blend the solid ice first to create a dry, powdery base, and then you fold that into your flavorings. This results in a much lighter, fluffier texture.
5. Can I really not store this in the freezer? You really, truly cannot. The unique, light texture comes from the finely shaved ice crystals. Once they melt even slightly and re-freeze, they will fuse together into a solid, dense block of ice.
6. What other liquids can I freeze to make the “snow”? You can get creative! Light-colored fruit juices like white grape or apple juice work well. Coconut milk or almond milk can also be frozen, but they might create a slightly denser base.
7. Is this the same as real snow cream made with actual snow? It’s a delicious and clever tribute! The texture is remarkably similar—light, creamy, and instantly melts in your mouth. It’s the perfect way for those of us in warmer climates to enjoy a beloved winter tradition.
Final Thoughts
And there you have it. You have successfully defied meteorology. You have laughed in the face of a hot, sunny day and created a personal snow day in your very own kitchen. Who needs a blizzard when you have a blender and a dream?
Now go on, grab a spoon, and enjoy your frosty, delicious creation before it disappears. You are the master of your own weather now.