How to Make Chips at Home (Crispy Fried & Baked Recipe!)
How to Make Homemade Potato Chips (They’re Worth It!)
So, why on earth would you go to the trouble of making your own chips when you can just buy a bag? Oh, my sweet summer child, let me enlighten you. First, the flavor. The taste of a still-warm, freshly fried potato, kissed with the perfect amount of salt, is a culinary experience that cannot be packaged. It’s a revelation.
Second, you are the master of your own destiny. You control the oil, the salt level, the thickness, and the seasonings. Want rosemary and garlic chips? Done. Craving a spicy BBQ kick? You got it. And third, the sheer, unadulterated “wow” factor. Placing a bowl of genuinely homemade, crispy-as-heck potato chips on the table for your friends or family? That’s a power move. That’s how you win at snacks, forever.
Ingredients
Prepare to be underwhelmed by the simplicity of this list.
- Potatoes: About 2-3 medium-sized potatoes. High-starch potatoes like Russets (or Idaho potatoes) are the absolute best choice for crispy chips. Waxy potatoes will give you a sad, chewy result.
- Oil for frying or baking: For frying, you need a neutral oil with a high smoke point, like canola, vegetable, or peanut oil. For baking, a couple of tablespoons of olive oil or avocado oil will do.
- Salt: Fine sea salt is perfect for this.
- Cold Water: For the crucial soaking step.
Tools & Kitchen Gadgets Used:
The right tools make this process a breeze.
- A Mandoline Slicer: This is the MVP for getting those paper-thin, uniform slices. I’m not saying it’s impossible with a knife, but… it’s basically impossible with a knife. Please use the safety guard and respect the blade!
- A large bowl: For soaking the potato slices.
- A heavy-bottomed pot or Dutch oven: For deep-frying.
- A Candy/Deep-Fry Thermometer: This takes the guesswork out of getting the oil temperature just right.
- A Spider Strainer or Slotted Spoon: For safely removing the chips from the hot oil.
- Baking Sheets and Parchment Paper: If you’re going the baked route.
- Paper Towels or a clean kitchen towel: For drying the potatoes. This is non-negotiable.
Step-by-Step Instructions
We’ll cover the crispy deep-fried method and the easier baked method. But first, the prep work is the same for both, and it is the key to success.
Part 1: The All-Important Prep Work
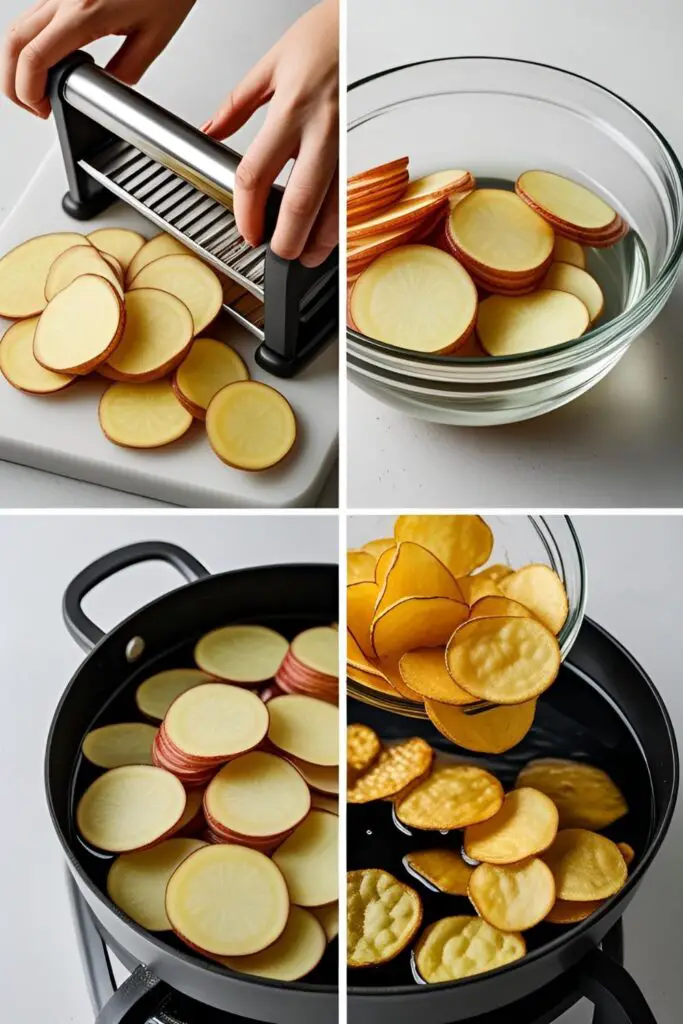
- Slice ’em Thin: Wash and dry your potatoes. There’s no need to peel them unless you really want to; the skin adds flavor! Set your mandoline slicer to a very thin setting (about 1/16th to 1/8th of an inch). Carefully slice your potatoes into uniform rounds.
- The Magic Soak: Immediately place the potato slices into a large bowl of cold water. This is the most important secret to crispy chips! The cold water rinses away the excess starch on the surface of the potato, which is what prevents them from getting truly crispy. Let them soak for at least 30 minutes, or up to a couple of hours.
- Dry, Dry, and Dry Again: Drain the potatoes completely. Lay them out in a single layer on a clean kitchen towel or several layers of paper towels. Place another towel on top and pat them as dry as you possibly can. Seriously. Water is the enemy of crispy, whether you’re frying or baking.
Part 2: Choose Your Path to Chip Heaven
Method A: The Deep-Fried Dream (Maximum Crunch)
- Heat the Oil: Pour about 2-3 inches of your high-smoke-point oil into your heavy-bottomed pot. Attach your thermometer to the side and heat the oil over medium-high heat until it reaches 325-350°F (160-175°C).
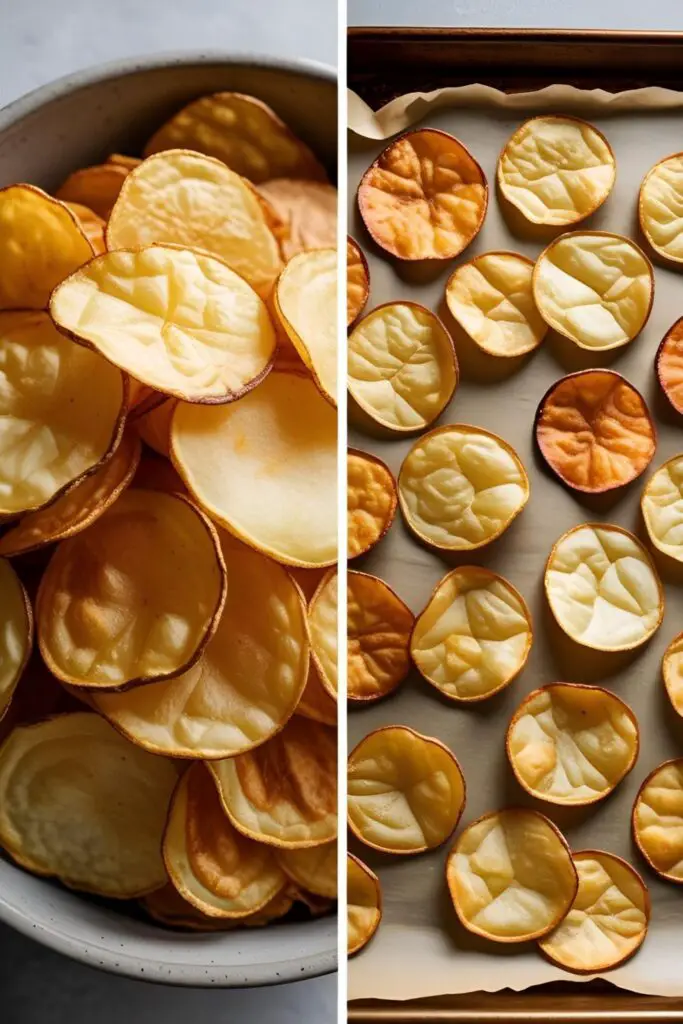
- Fry in Batches: Carefully add a single handful of your dry potato slices to the hot oil. Do not overcrowd the pot! This will drop the oil temperature and result in greasy, soggy chips. Fry for about 3-4 minutes, stirring gently, until they are golden brown and crispy.
- Drain and Season: Using your spider strainer, immediately remove the chips from the oil and transfer them to a paper towel-lined plate or wire rack. Immediately sprinkle them with salt. The salt will only stick while they are still hot and glistening with oil.
- Repeat: Bring the oil back up to temperature and repeat the process with the remaining potato slices.

Method B: The Baked & Beautiful (Healthier & Easier)
- Prep the Oven: Preheat your oven to 400°F (200°C). Line two large baking sheets with parchment paper.
- Toss with Oil: In a large bowl, toss your super-dry potato slices with 1-2 tablespoons of olive oil and a pinch of salt until they are lightly coated.
- Arrange, Don’t Crowd: Arrange the potato slices in a single layer on the prepared baking sheets. Make sure they are not overlapping, or they will steam instead of crisp. You will likely need to do this in batches.
- Bake to Perfection: Bake for 15-20 minutes, flipping the chips halfway through, until they are golden brown and crispy around the edges. Keep a close eye on them, as they can go from golden to burnt very quickly. Season with a little more salt the moment they come out of the oven, if desired.
Calories & Nutritional Info (Estimated)
Let’s be real, this is a potato snack. But homemade gives you options! (Per 1 oz serving, about 15 chips).
- Deep-Fried Chips: Approx. 160-180 kcal, 10-12g fat.
- Baked Chips: Approx. 120-140 kcal, 4-6g fat.
- Awesomeness: 100% in both cases.
Common Mistakes to Avoid
Avoid these pitfalls to save yourself from the tragedy of a limp, greasy chip.
- Skipping the Soak: I will say it again: soaking removes the starch. If you skip this, your chips will be less crispy. End of story.
- Not Drying the Slices: This is the #1 cause of soggy chips and, if frying, a dangerous, splattering oil situation. They must be bone dry.
- Incorrect Oil Temperature (Frying): If the oil is too cool, the chips will absorb it and become greasy. If it’s too hot, they’ll burn before they cook through. Use a thermometer!
- Overcrowding the Pan: Frying or baking too many chips at once lowers the temperature and causes them to steam. Work in small batches. Patience is a virtue, especially in the pursuit of crispiness.
Variations & Customizations
Once you’ve mastered the basic chip, you become a flavor god.
- Ultimate Seasoning Blends: Before salting, toss your hot chips in a bowl with your favorite seasoning. Try a mix of smoked paprika, garlic powder, onion powder, and a pinch of sugar for a killer BBQ flavor. Or try some finely grated Parmesan and black pepper.
- Sweet Potato or Veggie Chips: Use the exact same methods with other vegetables! Thinly sliced sweet potatoes, beets, parsnips, or even zucchini make for delicious and colorful chips.
- The “Proper” British Chip (aka Fries): Want to make the other kind of chips? Cut your potatoes into thick batons. Fry them once at a lower temperature (around 325°F/160°C) for 5-6 minutes until soft but not browned. Remove and drain. Then, crank up the heat to 375°F/190°C and fry them again for 2-3 minutes until golden brown and crispy. This double-fry method is the secret!
FAQ Section
You’ve got chip queries? I’ve got crispy answers.
Q1: What are the absolute best potatoes for making chips? High-starch potatoes like Russet, Idaho, or Maris Piper (in the UK) are the champions. They have a low moisture content, which helps them crisp up beautifully.
Q2: Can I make homemade chips in an air fryer? Yes! Prepare the slices exactly the same way (slice, soak, dry). Toss with a tiny bit of oil, place in a single layer in the air fryer basket, and cook at 375°F (190°C) for 10-15 minutes, shaking the basket a few times, until golden and crisp.
Q3: How do I get seasonings like BBQ or sour cream powder to stick? The key is to toss the hot chips with the seasoning in a large bowl the second they come out of the oil or oven. The residual heat and oil will help the powder adhere.

Q4: My chips are chewy, not crispy. What did I do wrong? This is usually due to using the wrong type of potato (a waxy one), not soaking them long enough to remove the starch, or not getting them fully dry before cooking.
Q5: How thin should the potato slices be? For classic, crispy chips, aim for about 1/16th of an inch. A mandoline is really the only way to achieve this consistently.
Q6: How do I store homemade potato chips? Let them cool completely, then store them in an airtight container or paper bag at room temperature. Honestly though, they are a million times better eaten within a few hours of being made.
Q7: Why do my chips turn brown but stay soft? This often happens when the starch on the outside caramelizes too quickly before the moisture inside has a chance to evaporate. The solution? The cold water soak! It rinses off that surface starch.
Final Thoughts
And there you have it. You are now fully armed with the knowledge to transform a humble potato into a snack of legend. You’ve learned the secrets, you know the pitfalls, and you are ready to experience the life-changing crunch of a truly homemade chip. So go on, get slicing, and prepare to ruin bagged chips for yourself forever. You’re welcome.