How to make your own candle packaging for homemade gifts or small businesses.
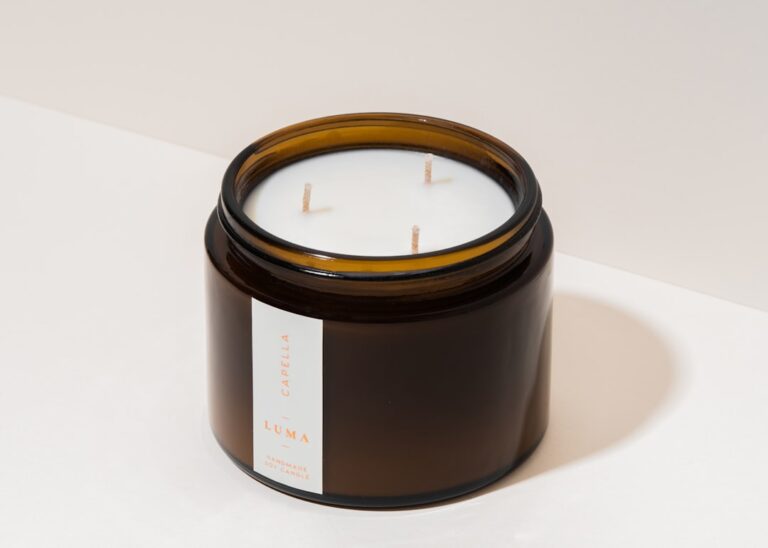
Selecting the appropriate materials for candle packaging is a critical step that can significantly influence both the aesthetic appeal and functional integrity of the product. The choice of materials should align with the type of candle being packaged, as well as the target market. For instance, glass containers are often favored for premium candles due to their ability to enhance the visual appeal while providing a sturdy vessel that can withstand heat.
On the other hand, tin containers offer a lightweight and portable option, making them ideal for travel-sized candles or those intended for outdoor use. Additionally, the use of biodegradable or recyclable materials is becoming increasingly popular among environmentally conscious consumers, prompting brands to explore options such as kraft paper, recycled cardboard, or even plant-based plastics. Beyond the container itself, the choice of filler materials is equally important.
For example, shredded paper or biodegradable packing peanuts can provide cushioning and protection during transit while also enhancing the unboxing experience. The texture and color of these fillers can complement the overall design of the packaging, creating a cohesive look that resonates with customers. Furthermore, it is essential to consider the compatibility of materials with the candle’s ingredients.

For instance, certain waxes may react adversely with specific plastics, leading to degradation or leaching of harmful substances. Therefore, conducting thorough research and testing is vital to ensure that the selected materials not only protect the product but also maintain its quality and safety.
Designing Your Packaging
The design of your candle packaging plays a pivotal role in attracting customers and conveying the essence of your brand. A well-thought-out design should reflect the identity of your brand while also appealing to your target audience. For example, if your candles are marketed as luxurious and high-end, a minimalist design featuring elegant typography and a monochromatic color palette can evoke sophistication.
Conversely, if your candles are aimed at a younger demographic or are intended for a more casual setting, vibrant colors and playful graphics may be more effective in capturing attention. Incorporating unique shapes and structures into your packaging can also set your product apart from competitors. Custom die-cut boxes or uniquely shaped containers can create a memorable unboxing experience that encourages customers to share their purchases on social media platforms.
Additionally, considering the functionality of the packaging is crucial; it should be easy to open yet secure enough to protect the candle during shipping. The balance between aesthetics and practicality is essential in ensuring that your packaging not only looks good on the shelf but also performs well in real-world conditions.

Incorporating Branding and Personalization

Branding is an integral aspect of any product’s success, and candle packaging offers a unique opportunity to communicate your brand’s story and values. Incorporating your logo prominently on the packaging helps establish brand recognition and fosters a sense of trust among consumers. Beyond just the logo, using consistent color schemes, fonts, and imagery across all packaging materials reinforces brand identity and creates a cohesive look that customers can easily identify.
Personalization is another powerful tool in candle packaging that can enhance customer engagement and loyalty. Offering customizable options, such as personalized labels or messages for special occasions like weddings or birthdays, can create a deeper emotional connection with consumers. This approach not only makes the product feel more special but also encourages customers to share their experiences with friends and family, effectively turning them into brand ambassadors.
Additionally, including a handwritten note or a thank-you card within the package can further enhance the personal touch, making customers feel valued and appreciated.
Adding Protective Elements
When it comes to shipping candles, ensuring their safety during transit is paramount. Candles are often fragile and can be easily damaged if not properly protected. One effective way to add protective elements is by using inserts or dividers within the packaging.
These can help keep candles securely in place, preventing them from shifting during transportation. For instance, custom foam inserts can be designed to fit snugly around each candle, providing cushioning while also preventing breakage. Another consideration is the use of outer packaging that can withstand external pressures.
Corrugated boxes are an excellent choice for shipping candles as they offer durability and strength. Additionally, using bubble wrap or air pillows as cushioning material can further safeguard against impacts. It’s also wise to consider temperature fluctuations during shipping; using thermal liners can help maintain a stable environment for candles made from sensitive waxes that may melt or warp under extreme heat.
Including Care Instructions and Safety Information
Providing clear care instructions and safety information on your candle packaging is essential for ensuring customer satisfaction and safety. Many consumers may not be familiar with proper candle care practices, so including detailed instructions on how to burn the candle safely can prevent accidents and enhance their overall experience. For example, advising customers to trim the wick before each use can help prevent excessive soot and ensure an even burn.
In addition to care instructions, it’s crucial to include safety warnings on your packaging. This may include reminders to never leave a burning candle unattended or to keep it away from flammable materials. By being transparent about potential hazards, you not only protect your customers but also build trust in your brand.
Including this information in an easily readable format—such as bullet points or icons—can make it more accessible and user-friendly.
Creating Eco-Friendly Packaging Options

As sustainability becomes an increasingly important consideration for consumers, creating eco-friendly packaging options for candles is not just a trend but a necessity. Brands are now exploring various sustainable materials such as recycled paper, biodegradable plastics, and even compostable options for their packaging needs. For instance, using recycled cardboard for boxes not only reduces waste but also appeals to environmentally conscious consumers who prioritize sustainability in their purchasing decisions.
Moreover, brands can take their commitment to sustainability a step further by implementing practices such as minimalistic packaging designs that reduce material usage without compromising quality. This approach not only lowers production costs but also minimizes environmental impact. Additionally, offering refillable or reusable containers encourages customers to return for refills rather than purchasing new candles each time, fostering a circular economy model that benefits both the environment and the brand’s bottom line.
Adding Decorative Elements for a Personal Touch
Incorporating decorative elements into candle packaging can elevate the overall presentation and create a memorable experience for customers. Simple touches such as ribbons, twine, or decorative seals can add an artisanal feel that resonates with consumers looking for unique products. For example, using natural jute twine to tie around a kraft paper box can evoke a rustic charm that appeals to those who appreciate handmade goods.
Furthermore, custom labels featuring artistic designs or seasonal themes can enhance visual appeal while also providing an opportunity for storytelling. Seasonal collections could feature holiday-themed graphics or colors that resonate with specific times of the year, encouraging customers to purchase gifts for loved ones or themselves during festive seasons. These decorative elements not only enhance the aesthetic value but also create an emotional connection with consumers who appreciate thoughtful details in their purchases.
Tips for Shipping and Storing Your Candles
When it comes to shipping candles, careful planning is essential to ensure they arrive at their destination in perfect condition. One key tip is to always pack candles upright whenever possible; this minimizes the risk of breakage and ensures that any wax drippings do not compromise other items in the package. Using appropriate cushioning materials such as bubble wrap or packing peanuts around each candle can provide additional protection against impacts during transit.
For storage purposes, it’s important to advise customers on how to keep their candles in optimal condition until they are ready to use them. Storing candles in a cool, dry place away from direct sunlight helps prevent fading of colors and scents while also reducing the risk of melting or warping. Providing this information on your packaging or through accompanying literature can enhance customer satisfaction by ensuring they enjoy their candles at their best quality when they finally light them.
In conclusion, thoughtful consideration of each aspect of candle packaging—from material selection to design elements—can significantly impact customer experience and brand perception. By prioritizing functionality alongside aesthetics and sustainability, brands can create packaging that not only protects their products but also resonates with consumers on multiple levels.
If you’re looking to enhance your candle-making skills, you may want to check out this article on how to dye candle wax with food coloring. This technique can add a pop of color to your candles and make them even more visually appealing. Pairing this with your own custom candle packaging, as discussed in the main article, can really take your homemade gifts or small business to the next level. And if you’re interested in learning more about the history of candles, you can also read this article on the history of candles from ancient to modern times. Understanding the origins of this beloved item can provide you with inspiration and a deeper appreciation for the craft.
FAQs
What are the benefits of making your own candle packaging?
Making your own candle packaging allows for customization and personalization, which can make your candles stand out as unique gifts or products for your small business. It also gives you the opportunity to be more environmentally friendly by using sustainable materials.
What materials are commonly used for homemade candle packaging?
Common materials for homemade candle packaging include cardboard, kraft paper, tissue paper, twine, ribbon, stickers, and labels. These materials are often chosen for their eco-friendly and recyclable properties.
What are some design ideas for homemade candle packaging?
Design ideas for homemade candle packaging can include using natural and earthy colors, incorporating botanical or floral motifs, and adding personalized labels or tags. You can also consider using eco-friendly packaging such as reusable tins or jars.
How can I ensure that my homemade candle packaging is eco-friendly?
To ensure that your homemade candle packaging is eco-friendly, you can use recyclable materials, minimize the use of plastic or non-biodegradable elements, and consider reusable or biodegradable packaging options. It’s also important to communicate the eco-friendly aspects of your packaging to your customers.
Are there any regulations or guidelines to consider when making candle packaging for small businesses?
When making candle packaging for small businesses, it’s important to consider any regulations or guidelines related to labeling, safety, and product information. For example, candles may need to include warning labels for safety purposes, and certain ingredients may need to be listed for transparency. It’s important to research and comply with any relevant regulations in your area.