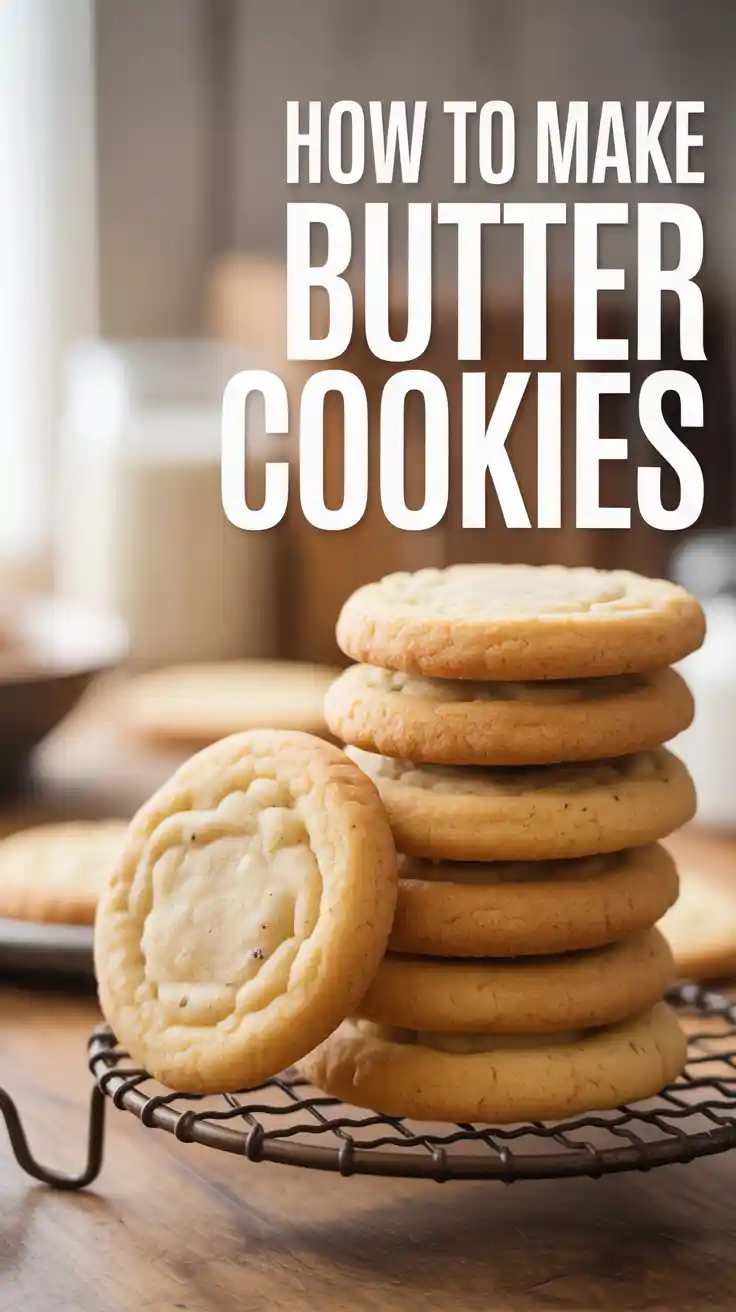
How to Make Box Cake Taste Like a Bakery Cake (7 Genius Hacks!)
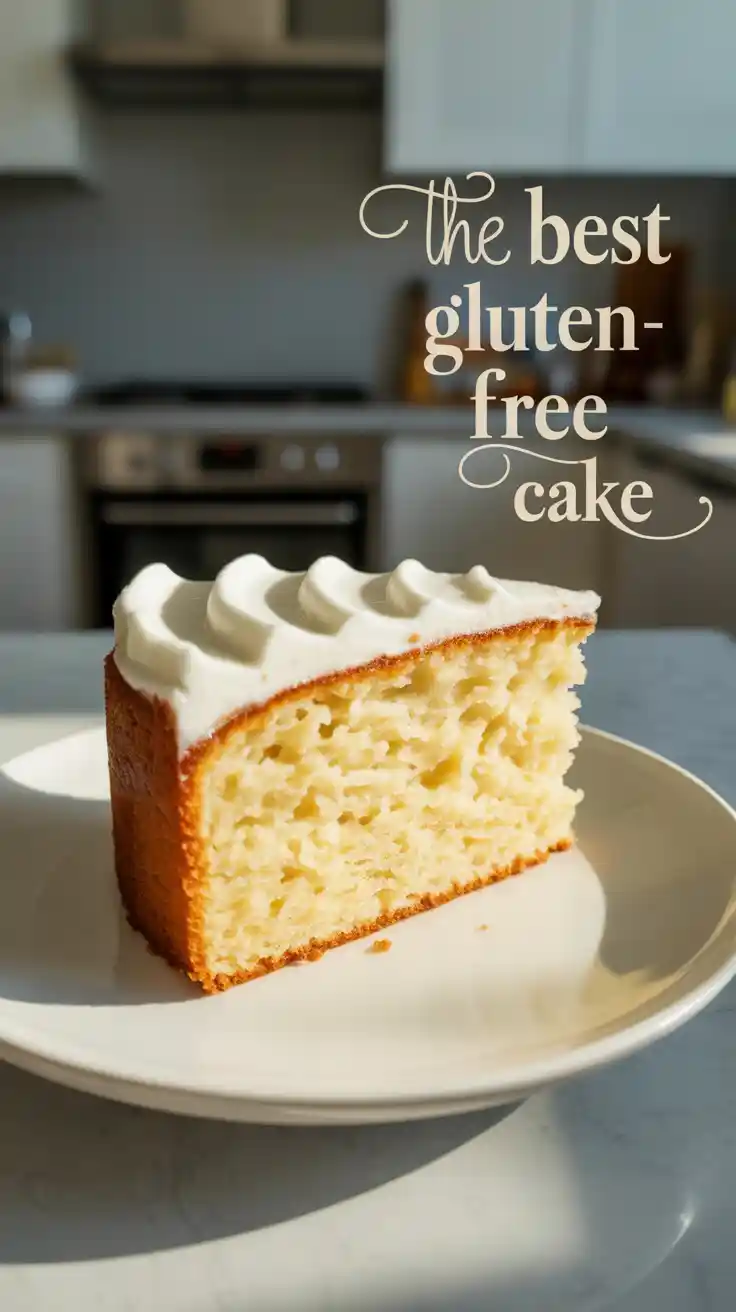
The Best Gluten-Free Cake Recipe (So Moist & Fluffy, No One Will Know!)
Let’s be brutally honest for a moment. The words “gluten-free cake” can strike fear and disappointment into the hearts of dessert lovers everywhere. We’ve all been there. You’re at a party, someone proudly offers you a slice of their homemade creation, whispering, “It’s gluten-free!” You take a bite, and your mouth is filled with the texture of dry, crumbly, slightly sandy packing material that tastes vaguely of good intentions. It’s the reason so many of us have uttered the damning phrase, “Oh, it’s good… for being gluten-free.”
Well, I am here today to tell you that we are done with that nonsense. We are done with sad, apologetic cakes. Today, we’re making a gluten free cake that is so unbelievably moist, so tender, so fluffy, and so downright delicious that it will fool the most discerning gluten-eaters in your life. This isn’t just a “good for gluten-free” cake; this is a fantastically delicious cake, period.
Why This Recipe Is Your New Secret Weapon
So, what makes this recipe the one that will finally restore your faith in gluten-free baking? I’m so glad you asked.
First, this cake is specifically engineered to be moist and tender. We are actively fighting back against the dry, crumbly stereotype with a few key ingredients and one crucial, game-changing step. The end result is a cake with a beautiful, soft crumb that holds together perfectly. No sandy texture here, my friends.
Second, it’s inclusively delicious. This is the perfect cake to bring to a potluck or serve at a birthday party. It’s a dessert that everyone can enjoy, whether they are gluten-free or not. There’s no feeling of a “special” or “lesser” option; it’s just a fantastic cake that happens to be gluten-free.
Finally, it’s surprisingly easy to make. The real magic is in using a good quality, pre-made gluten-free flour blend. There are no complicated techniques or weird science experiments here. If you can make a regular cake from scratch, you can absolutely nail this one.
The A-List Ingredients
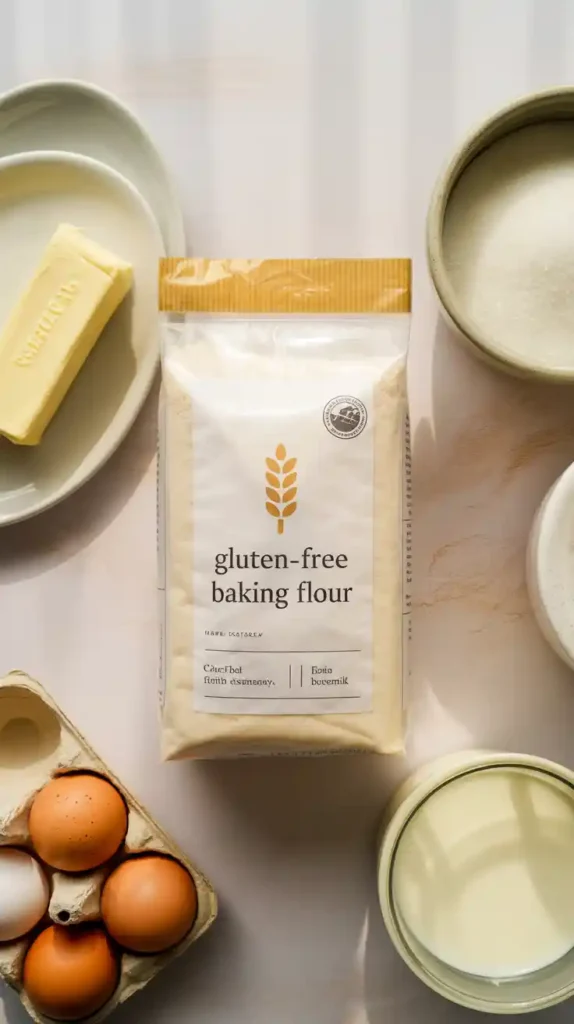
The secret to great gluten-free baking isn’t a long list of strange ingredients; it’s about using the right ones.
- A Good Quality 1-to-1 Gluten-Free Flour Blend: 2 cups. This is the most important ingredient on the list. Do not try to use just almond flour or coconut flour. You need a balanced, “measure-for-measure” or “1-to-1” blend that is designed for baking. Great brands like Bob’s Red Mill (in the blue bag) or King Arthur Flour’s Measure for Measure already contain xanthan gum, which is crucial for structure.
- Granulated Sugar: 1 ½ cups.
- Baking Powder: 2 ½ teaspoons.
- Salt: ½ teaspoon.
- Unsalted Butter: 1 cup (2 sticks), softened to room temperature.
- Large Eggs: 4 of them, at room temperature.
- Buttermilk or Full-Fat Sour Cream: 1 cup, at room temperature. This is a secret weapon for adding incredible moisture and a tender crumb.
- Vanilla Extract: 1 tablespoon. Use the good stuff!

Don’t have buttermilk? No problem! Make your own in two minutes. Pour 1 tablespoon of white vinegar or fresh lemon juice into a liquid measuring cup. Add enough regular milk to reach the 1 cup line. Give it a quick stir and let it sit for 5-10 minutes. It will curdle slightly and be ready to use!
The Baker’s Toolkit
You don’t need any specialty gluten-free gadgets, just your standard baking gear.
- An Electric Mixer: A Stand Mixer with the paddle attachment or a reliable Hand Mixer is essential for properly creaming the butter and sugar.
- Two 8-inch or 9-inch Round Cake Pans: For a classic layer cake.
- Mixing Bowls: For your wet and dry ingredients.
- A Whisk and a Sturdy Spatula: Your trusty sidekicks.
- Parchment Paper: To ensure your precious gluten-free cakes don’t stick.
- A Wire Cooling Rack: For letting your cakes cool properly.
Step-by-Step: Your Path to Gluten-Free Glory
The process is simple, but there’s one unusual (and crucial) step. Don’t skip it!
Step 1: Prep Your Pans and Oven Preheat your oven to 350°F (175°C). Grease your cake pans thoroughly, line the bottoms with parchment paper, and then grease the parchment too. Finally, dust the pans with a little of your gluten-free flour blend.
Step 2: The Dry Bowl In a medium bowl, whisk together your gluten-free flour blend, baking powder, and salt. Whisking helps to aerate the flour and distribute the leaveners evenly.
Step 3: The Creaming Method In a large bowl, using your electric mixer, beat the softened butter and granulated sugar together on medium-high speed for a good 3-4 minutes. The mixture should become very pale, light, and fluffy. This step whips air into the batter, which is crucial for a light texture.
Step 4: Add the Eggs and Vanilla With the mixer on medium speed, add your room-temperature eggs one by one, beating well for about 30 seconds after each addition until it’s fully incorporated. Scrape down the sides of the bowl, then mix in the vanilla extract.
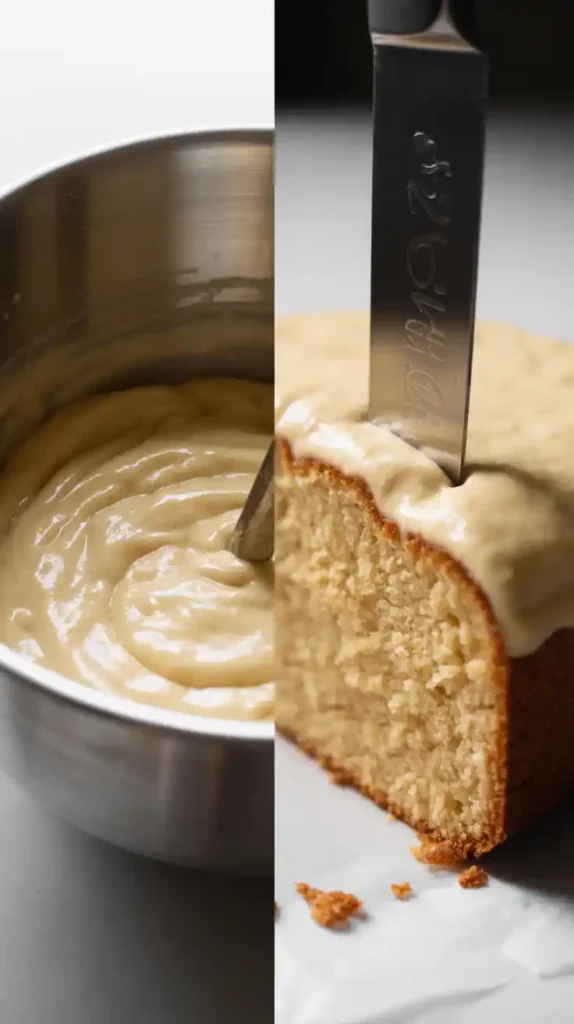
Step 5: Alternate the Wet and Dry Turn the mixer to its lowest speed. Add about one-third of the dry ingredient mixture, and mix until it’s almost combined. Add half of the buttermilk or sour cream, and mix until just combined. Repeat this process, ending with the final addition of the dry ingredients. Mix only until you no longer see streaks of dry flour. Do not over-mix.

Step 6: THE MOST IMPORTANT STEP – Let the Batter Rest! Turn off your mixer and cover the bowl. Let the cake batter sit on your counter at room temperature for 20 to 30 minutes. This is a non-negotiable, game-changing step in gluten-free baking. This “nap time” allows the gluten-free flours to properly absorb the liquid in the batter, which dramatically improves the texture of the final cake and prevents that dreaded gritty, sandy mouthfeel.
Step 7: Bake and Cool After the batter has rested, give it one final, gentle stir. Divide the batter evenly between your two prepared pans. Bake for 30 to 35 minutes, or until the cakes are lightly golden and a toothpick inserted into the center comes out clean. Let the cakes cool in the pans on a wire rack for 15 minutes before carefully inverting them onto the rack to cool completely.
Calories & Nutritional Info (The Goodness Within)
Here’s a rough idea of what you’re looking at for an unfrosted slice of this delicious cake.
- Estimated Calories: Around 350-400 kcal per slice (assuming 1/12th of the total cake).
- Naturally Gluten-Free: Perfect for those with celiac disease or gluten sensitivity.
- A Tender Treat: This cake is a fantastic way to enjoy a classic dessert without compromise.
Common Gluten-Free Baking Blunders to Avoid
Gluten-free baking is a science, and it has its own set of rules. Ignore them at your own peril.
- Using the Wrong Flour or Flour Blend. I cannot say this enough. You cannot just swap wheat flour for a single gluten-free flour like almond or coconut and expect a cake. You absolutely must use a balanced, 1-to-1 or measure-for-measure gluten-free flour blend that contains xanthan gum. This is the secret to success.
- Skipping the Batter’s “Nap Time.” I know you’re eager to get your cakes in the oven, but that 20-30 minute rest is not a suggestion; it’s a command. It is the single most effective step to prevent a gritty texture in your final cake. The flours need time to hydrate. Let the batter chill out.
- Over-baking the Cake. Gluten-free cakes are much more prone to drying out than their wheaty cousins. The moment that toothpick comes out with a few moist crumbs attached, it’s time to take them out of the oven. A minute or two can be the difference between moist and disastrously dry.
- Making Wild Substitutions. Gluten-free baking is a delicate balance of starches, flours, and gums. Unless you’re a seasoned gluten-free baker, it’s best to stick to the recipe exactly as written the first time you make it.
Variations & Customizations
This lovely vanilla cake is the perfect canvas for your creative flavor ideas.
- Gluten-Free, Dairy-Free Cake: This is an easy swap! Replace the unsalted butter with a good quality vegan butter stick or an equal amount of neutral oil. For the buttermilk, use a plant-based milk (like almond or oat milk) and add the tablespoon of vinegar or lemon juice as directed.
- Gluten-Free Lemon Blueberry Cake: Add the finely grated zest of two lemons to the sugar before you cream it with the butter. Gently fold in 1 ½ cups of fresh or frozen (don’t thaw!) blueberries into the batter right after its rest, just before pouring it into the pans.
- The Best Gluten-Free Chocolate Cake: To make a chocolate version, reduce the gluten-free flour blend to 1 ½ cups and add ½ cup of high-quality, unsweetened cocoa powder to the dry ingredients. A little bit of instant espresso powder will also deepen the chocolate flavor beautifully.
Your Burning Gluten-Free Questions, Answered
Let’s clear up some of the most common questions about baking without gluten.
What is the best gluten-free flour blend to use for cakes?
Look for a blend that is marketed as a “1-to-1” or “Measure for Measure” substitute for regular flour. My personal favorites are Bob’s Red Mill 1-to-1 Baking Flour (in the blue bag) and King Arthur Flour’s Measure for Measure Gluten Free Flour. Both provide consistently excellent results.
What is xanthan gum and why do I need it?
Xanthan gum is a binder that mimics the role of gluten. It provides elasticity and structure to the cake, helping to hold it together and preventing it from being a crumbly mess. Most good 1-to-1 blends already have it included.
Why are gluten-free cakes often so dry and crumbly?

This is usually because the ratio of flours and starches is off, or because the flours haven’t had enough time to absorb moisture (hence our crucial resting step!). Over-baking is also a major culprit.
Can I make this cake without xanthan gum?
If your flour blend doesn’t contain it, you will need to add it yourself. A general rule of thumb is to add 1 teaspoon of xanthan gum per cup of gluten-free flour for cakes.
How should I store a gluten-free cake to keep it moist?
Gluten-free cakes are best enjoyed within a day or two, but they can be stored in an airtight container at room temperature. They tend to firm up in the fridge, so if you must refrigerate (due to frosting), let the slices come to room temperature before serving.
Can I just swap GF flour into my favorite regular cake recipe?
Sometimes it works, and sometimes it’s a disaster. Regular recipes are balanced for wheat flour. The best way to start is by using a recipe, like this one, that was specifically developed to be gluten-free.
Does gluten-free cake really taste different?
A decade ago, the answer was a resounding yes. But today, with the incredible quality of gluten-free flour blends available, a well-made gluten-free cake can be indistinguishable from its gluten-containing counterpart. This recipe will make believers out of the skeptics!
Final Thoughts
You’ve done it. You have officially baked a gluten-free cake that doesn’t require a disclaimer. You haven’t made something that’s “good for being gluten-free”; you have made a cake that is just plain good. You’ve conquered the world of alternative flours and created a tender, moist, delicious masterpiece that everyone can enjoy.
So go on, frost this beautiful cake with your favorite buttercream, slice it with pride, and offer it to your most skeptical, gluten-loving friend. Watch their face as they take a bite. That moment of delicious shock? That’s your victory.