Baby Shower Board: A Fun, Festive Snack Platter for the Ultimate Celebration
Introduction: So, you’re hosting a baby shower, and you’ve got the whole “everything-pink-or-blue” thing covered. But wait, what about the snacks? A snack board for a baby shower is your new best friend. Why? Because it’s stylish, customizable, and can be as cute as that little one on the way. Plus, it’s way less work than a full-on buffet, and we’re all about saving time (and energy) these days, right?
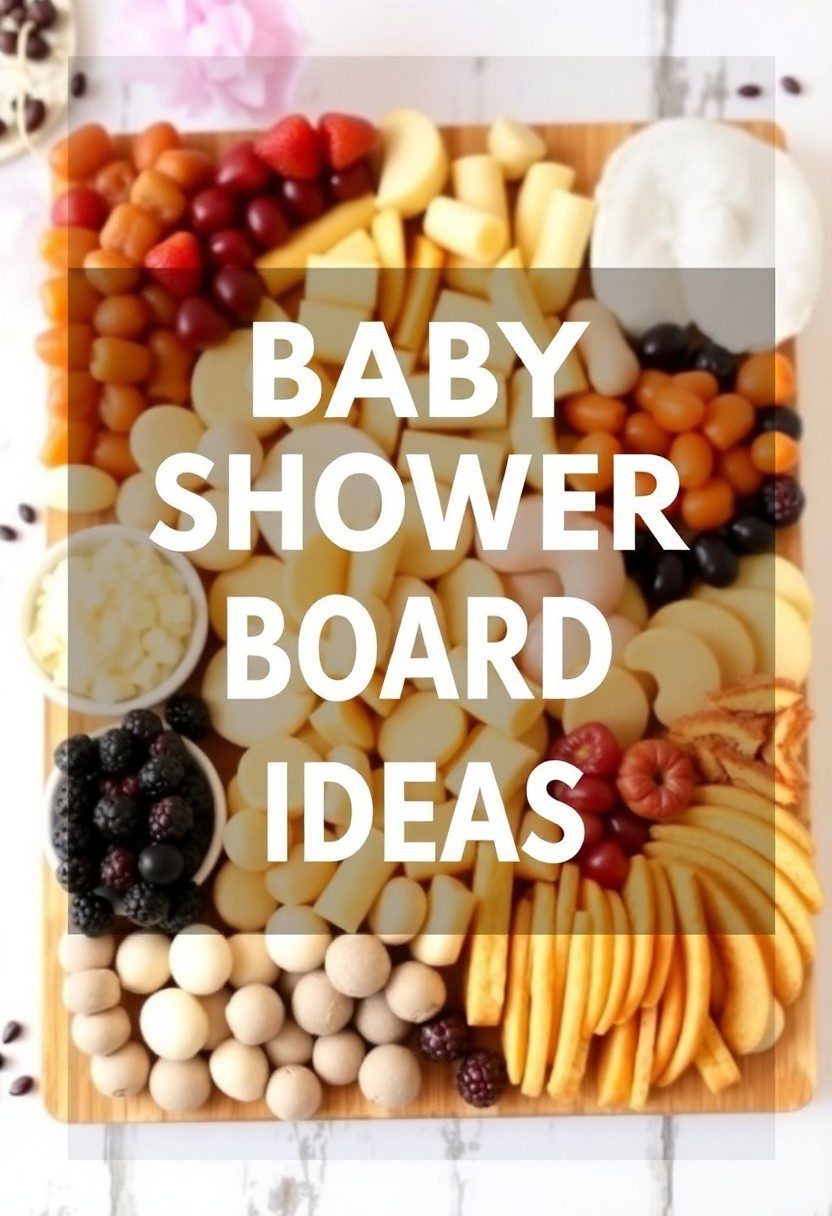
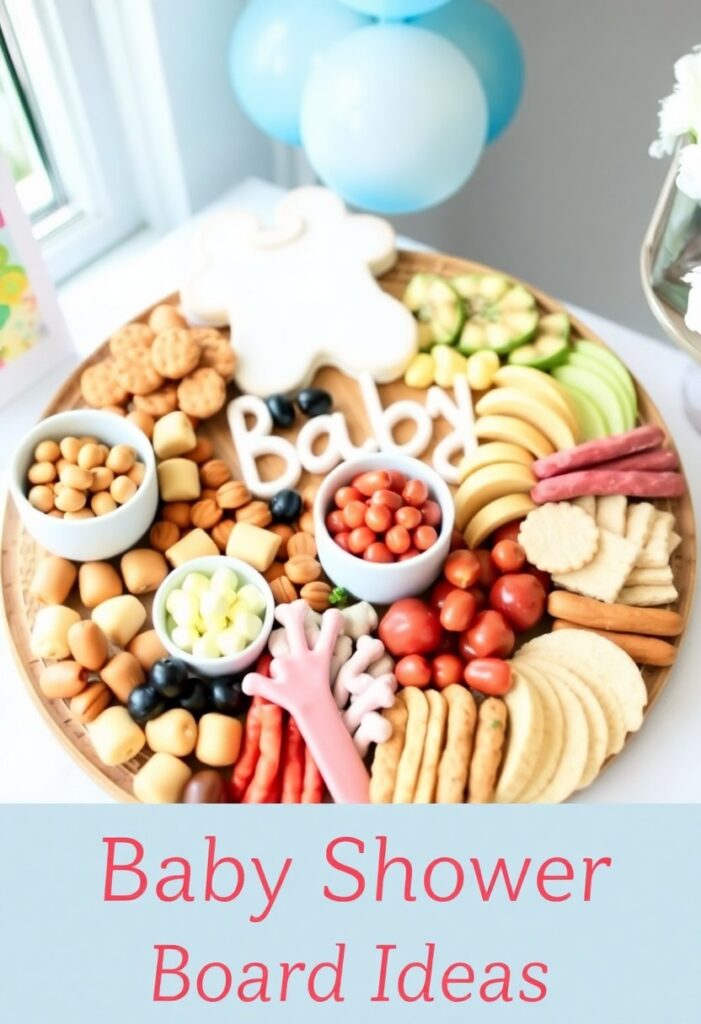
Picture this: You walk into the room, and there’s a beautifully arranged board overflowing with fresh fruits, adorable mini sandwiches, sweet treats, and colorful snacks—basically, a Pinterest dream come true. Sounds good, doesn’t it? Well, buckle up, because here’s how to make a Baby Shower Board that will wow your guests (and maybe make you the most popular person in the room).
Why This Recipe is Awesome:
Let’s be real for a second: No one wants to slave away in the kitchen for hours when there’s a party to be had. Enter the baby shower board—quick to assemble, totally customizable, and just too cute for words. Whether you’re hosting a small get-together or a blow-out celebration, this snack board is your ticket to food-related fame.
You can pile it high with things like:
- Mini sandwiches (because who doesn’t love finger food?)
- Cheese and charcuterie (classy, yet simple)
- Fresh fruit (because babies are cute, so why not have something cute on the board too?)
- Sweet treats (let’s be real, dessert is life).
And best of all, it looks like you’ve spent hours crafting a masterpiece. But really, you just did what any sensible human would do: throw everything together in a cute way and pray it’s Instagram-worthy.
Ingredients:
Let’s break down the ingredients. No need to get fancy; we’re here to have fun and make life easy.
- Mini sandwiches: Think bite-sized rolls, with fillings like turkey, cheese, and hummus (sub for veggie, chicken, or whatever you fancy).
- Cheese platter: A selection of cheeses—soft brie, sharp cheddar, creamy goat cheese (You know, the fancy stuff that makes you feel like you’re at a wine-tasting event).
- Fresh fruit: Strawberries, blueberries, grapes, pineapple—something colorful to add life to the board.
- Sweet treats: Cookies, cupcakes, or mini donuts. Yes, please.
- Nuts: Think pistachios or almonds to balance out the sweet with some savory goodness.
- Dip: Maybe a creamy ranch dip or hummus. Your choice.
- Edible flowers: Optional but soooo cute for the perfect Instagram shot.

Key Substitutions:
- Mini sandwiches: Swap in gluten-free bread if needed.
- Fruit: Can’t find strawberries? Use raspberries or watermelon instead.
- Sweet treats: If cupcakes aren’t your thing, go for cake pops or mini brownies.
Tools & Kitchen Gadgets Used:
Before we get into the step-by-step, here’s what you’ll need to make the magic happen.
- Serving board or tray: If you’re feeling extra, a wooden board works wonders for that rustic vibe.
- Knife for cutting fruit: (Because we don’t want to serve whole, uncut grapes, right?)
- Mini cookie cutters: To cut sandwiches or cheese into cute shapes (baby bottle, anyone?).
- Small bowls or ramekins: For dips and nuts—because things look cuter when they’re in little bowls.
- Tongs or small serving utensils: For easy grabbing.
You can easily find most of these items on Amazon (I mean, we’ve all spent hours scrolling, right?).
Step-by-Step Instructions:
- Pick Your Base: Choose a tray or board. You don’t have to get fancy here, but if you’ve got one of those wooden platters you keep for fancy occasions—now’s the time to break it out.
- Create Sections: Start by arranging your larger items, like cheese and mini sandwiches, in sections. You want a nice spread that’ll keep people reaching back for more.
- Add the Fruits: Fill in the gaps with fresh fruit. Go for colorful options like strawberries, grapes, and pineapple. Nothing screams “baby shower” more than a rainbow of fruit.
- Add Sweet Treats: Now for the fun part—add your sweet treats like cookies, cupcakes, or those mini donuts. Place them near the center of the board so they’re front and center.
- Nuts & Dips: Fill in the gaps with a small bowl of dip and scatter some nuts around. Bonus points if you add edible flowers around the edges for a touch of elegance.
- Final Touches: Arrange everything in a pleasing way. Think of it like Tetris—if you leave any gaps, fill them with smaller items like nuts or herbs.
And voilà, you’ve got a Baby Shower Board that will be the talk of the party.
Calories & Nutritional Info:

Let’s talk about the important stuff: Calories. Calories per serving depend on how much you indulge, but here’s an estimate for a typical serving size (let’s call it a “plateful”).
- Mini sandwiches: ~100 calories per sandwich.
- Cheese: ~120 calories per ounce (but who’s counting?)
- Fruit: ~50-80 calories for a decent serving (depending on your choices).
- Sweet treats: ~200 calories per cupcake (but we all need some indulgence, right?)
Overall, this snack board is a delightful mix of savory and sweet, with plenty of healthy options to balance out the indulgent treats.
Common Mistakes to Avoid:
- Overcrowding: More isn’t always better. Keep things balanced; you don’t want to overwhelm the board.
- Not cutting fruit properly: Don’t leave people struggling with whole grapes. Cut them into bite-sized pieces, please.
- Forgetting the variety: You don’t want a board full of only sweet treats. Mix it up with some savory snacks and cheese to keep things interesting.
- Using cheap cheese: I get it, cheese is expensive. But trust me—paying a little extra for good cheese makes all the difference.
Variations & Customizations:
- Keto-friendly: Use keto-friendly bread for the sandwiches, add in some olives, and keep the fruits low-carb (think berries).
- Spicy version: Add some spicy hummus or jalapeño cheddar cheese for that extra kick.
- Vegetarian swap: Ditch the meat and go for veggie-filled sandwiches, roasted chickpeas, and veggie dips.
FAQ Section:
- What should I include in a baby shower snack board?
You should have a good mix of sweet, savory, and fresh options like mini sandwiches, cheese, fruit, and sweet treats like cookies or cupcakes. - How many people will a baby shower snack board serve?
It depends on the size of the board and your guest list. Generally, one large board can serve about 8-10 people. - Can I make the baby shower board in advance?
Yes, you can assemble it a few hours before the event, just keep it covered in the fridge to maintain freshness. - What are some non-traditional items I can add to the board?
Try adding mini quiches, meatballs, or bite-sized cupcakes. Get creative with the theme! - How do I make my baby shower board look pretty?
Focus on color! Add fruits, edible flowers, and arrange everything neatly. Make it look effortless (even if it took you forever). - Can I make this baby shower board vegan?
Absolutely! Swap out the cheese for vegan cheese, ditch the meat, and load up on veggies and fruits. - How long does a baby shower snack board last?
It’s best eaten within a few hours, but if covered properly, it can last up to 4 hours at room temperature.
Final Thoughts:
And there you have it—a Baby Shower Board that’s not only easy to make, but also a total crowd-pleaser. So, go ahead and throw one together, impress your guests, and don’t be afraid to take a million pictures (because, let’s be real, this thing is basically art). Enjoy!