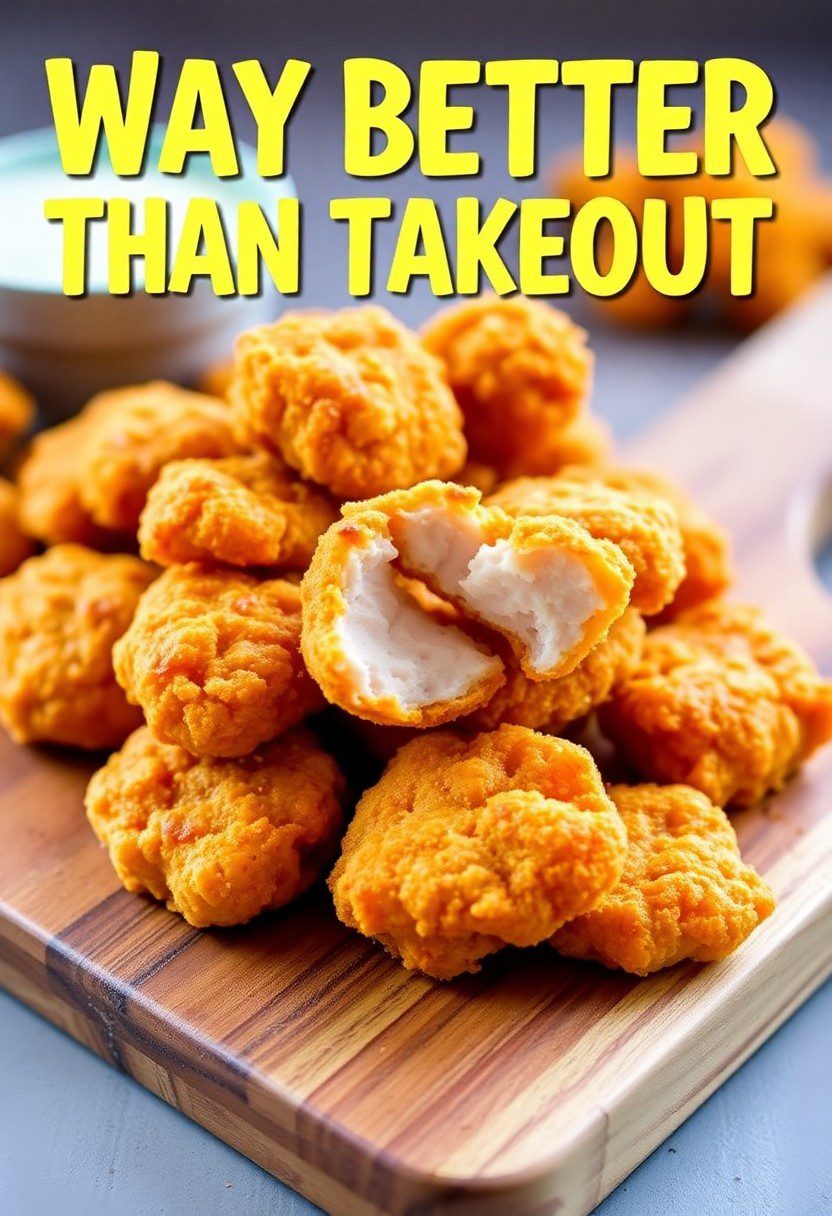
How to Make Chicken Nuggets From Scratch (Easy & Crispy!)
How to Make Chicken Nuggets That Are Actually, You Know, Chicken
It’s 1:42 AM here in Barishal. You know what that means. The house is quiet, the city is sleeping, and a primal, undeniable craving has just crept up on you. You need something crispy, savory, and dippable. You need nuggets. You could raid the freezer for that sad, frosty bag of mystery-meat discs, but you’re better than that, aren’t you? Today, my friend, I’m going to show you how to make chicken nuggets from scratch that will ruin all other nuggets for you, in the best way possible. Let’s turn that late-night craving into a culinary triumph.
Why This Recipe Is a Certified Banger
Why would you bother making your own chicken nuggets when you can just get them from a drive-thru? Because you have self-respect, that’s why! These homemade nuggets are on a completely different level. First, you know what’s in them: 100% actual chicken, seasoned to perfection from the inside out. No weird fillers, no mysterious pastes. Second, the texture is unbeatable. We’re talking a super crispy, golden-brown Panko crust that shatters when you bite into it, revealing a tender, juicy chicken interior.
They’re also surprisingly easy to whip up, and let’s be real, nothing says “I’m an adult who is winning at life” like serving up a platter of homemade chicken nuggets. They are the universal crowd-pleaser, beloved by picky kids and discerning adults alike. Plus, you can make a giant batch and freeze them, so future you can have gourmet-level nuggets on demand. It’s a win-win-win.
The Nugget Dream Team (aka The Ingredients)
This is all about simple, real ingredients coming together to create something magical.
For the Nugget Mixture:
- Ground Chicken (1 lb / 450g): Using ground chicken gives you that classic, tender nugget texture. You can also use boneless, skinless chicken breasts and pulse them in a food processor.
- Panko Breadcrumbs (⅓ cup): A little bit mixed into the chicken keeps them light and tender.
- Egg (1 large): The binder that holds our beautiful nuggets together.
- Garlic Powder & Onion Powder (1 teaspoon each): For that savory, all-day flavor.
- Salt & Black Pepper (½ teaspoon each, or to taste): The essential flavor enhancers.
For the Epic Crispy Breading:
- All-Purpose Flour (½ cup): The first layer of our three-part breading system.
- Paprika (1 teaspoon): Adds a lovely color and a hint of smoky flavor to the crust.
- Eggs (2 large): Beaten, for the second layer.
- Panko Breadcrumbs (2 cups): Panko is the secret to superior crispiness. Regular breadcrumbs will work, but Panko gives you that light, airy, ultra-crunchy coating.
- Neutral Oil for Frying: About 3-4 cups of canola, vegetable, or peanut oil.
Your Nugget-Making Arsenal (Tools & Kitchen Gadgets)
Having the right setup makes this process clean, easy, and fun.
- A Food Processor: Optional, but necessary if you want to grind your own chicken breasts.
- Large Mixing Bowl: For combining your nugget mixture.
- Three Shallow Dishes: Pie plates, shallow bowls, or baking dishes work perfectly for setting up your breading station.
- A Heavy-Bottomed Pot or Dutch Oven: Essential for maintaining a stable oil temperature for even frying.
- A Kitchen Thermometer: This is the most important tool for successful frying. It takes all the guesswork out of getting the oil temperature just right.
- Tongs or a Spider Strainer: For safely adding and removing the nuggets from the hot oil.
- A Baking Sheet and Wire Rack: The professional setup for draining fried food to ensure it stays crispy all around.
Step-by-Step Instructions to Nugget Nirvana
Follow these simple steps, and you’ll be on your way to crispy, golden perfection.
Step 1: Create the Nugget Base
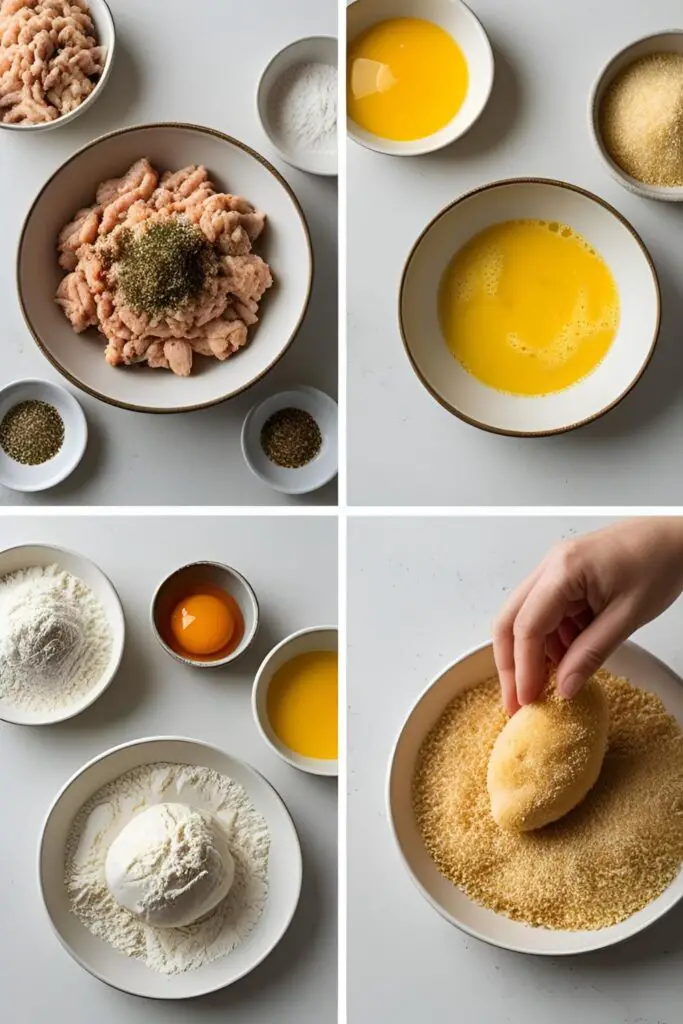
In your large mixing bowl, combine the ground chicken, ⅓ cup of Panko, 1 egg, garlic powder, onion powder, salt, and pepper. Mix gently with your hands until everything is just combined. Don’t overmix! Overworking the meat will make your nuggets tough.
Step 2: Shape Your Masterpieces

Lightly wet your hands to prevent sticking and shape the chicken mixture into small, 1-inch thick nugget shapes. Now is your chance to get creative. Will you make the classic boot? The bell? The ball? The fate of the nugget shape is in your hands. Place the formed nuggets on a parchment-lined plate.
Step 3: The Breading Station Assembly
Set up your three-dish assembly line. In the first dish, whisk together the flour, paprika, and a pinch of salt and pepper. In the second dish, beat the remaining 2 eggs. In the third dish, pour in your glorious Panko breadcrumbs.
Step 4: The Triple-Dip to Crispiness
Working with one nugget at a time, follow this sacred process:
- Dredge it in the seasoned flour, shaking off the excess.
- Dip it into the beaten egg, letting the excess drip off.
- Press it firmly into the Panko breadcrumbs, making sure it’s completely coated. Place the breaded nugget on a clean baking sheet and repeat with the rest.
Step 5: Bring the Heat
Pour your oil into your heavy-bottomed pot until it’s about 1.5 inches deep. Attach your kitchen thermometer to the side and heat the oil over medium-high heat until it reaches a steady 350°F (175°C). This temperature is your golden ticket.
Step 6: Fry to Golden Glory
Carefully place 5-6 nuggets into the hot oil, making sure not to overcrowd the pan. Fry for about 3-4 minutes per side, until they are a deep golden brown and cooked through.
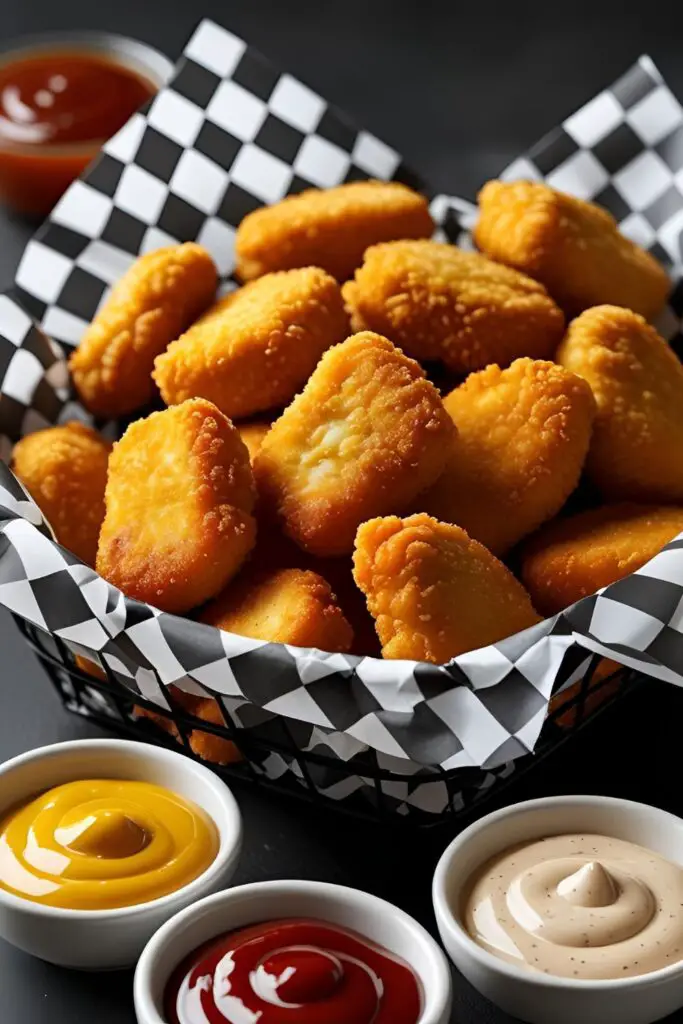
Step 7: Drain, Season, and Admire
Using your tongs or spider strainer, remove the cooked nuggets from the oil and place them on the wire rack set over a baking sheet to drain. Immediately sprinkle them with a little more salt while they’re still hot. Repeat the frying process with the remaining nuggets, making sure your oil comes back up to temperature between batches.
Calories & Nutritional Info (A Slightly Better Indulgence)
While they are fried, you can feel a bit better about these than their fast-food cousins.
- Serving Size: 6 nuggets
- Calories: Approximately 350-450 kcal (this will be lower if you bake or air fry them).
- Protein: A solid 25-30g. They are made of real chicken, after all!
- Fat: The majority of the fat comes from the frying oil.
- The Verdict: Healthier than the alternative because you control the quality of the chicken, the oil, and the amount of salt. So, it’s basically health food, right? 🙂
Common Mistakes to Avoid (Don’t Wreck Your Nugs)
Steer clear of these common pitfalls to ensure nugget success.
- Incorrect Oil Temperature: If the oil is too cool, your nuggets will be pale and greasy. If it’s too hot, the breading will burn before the chicken inside is cooked. Use a thermometer! It’s the only way to be sure.
- Crowding the Pan: Tossing too many nuggets in at once will drastically drop the oil temperature, leading to soggy, oily results. Fry in small batches.
- Draining on Paper Towels: This is a classic mistake that steams the bottom of your nuggets, making them lose their hard-earned crispiness. A wire rack allows air to circulate, keeping them crispy all over.
- Skipping the Flour Dredge: That first coating of flour is what helps the egg (and therefore the Panko) stick to the chicken. Don’t skip it!
Variations & Customizations (Remix Your Nuggets)

The classic nugget is perfect, but sometimes you want to get a little wild.
- Spicy Firecracker Nuggets: Add 1-2 teaspoons of your favorite hot sauce (like sriracha) to the chicken mixture and ½ teaspoon of cayenne pepper to your flour dredge for a spicy kick.
- Healthier Air Fryer or Baked Nuggets: For a less-guilty pleasure, bread the nuggets as directed, give them a good spritz with cooking spray, and either bake them at 400°F (200°C) for 15-20 minutes, or air fry at 380°F (190°C) for 10-12 minutes, flipping halfway through for both methods.
- Parmesan Herb Nuggets: Add ¼ cup of grated Parmesan cheese and 1 tablespoon of Italian seasoning to your Panko breadcrumbs for a savory, cheesy crust.
FAQ: Your Nugget Questions, Answered
Let’s solve the mysteries of the homemade chicken nugget.
1. Can I use chicken breasts or thighs instead of ground chicken?
Yes! Just cut boneless, skinless chicken breasts or thighs into 1-inch chunks and pulse them in a food processor until coarsely ground. Don’t turn it into a paste!
2. How can I make sure the breading sticks?
The three-step flour-egg-Panko process is key. Also, after breading, you can let the nuggets rest on the baking sheet for 10-15 minutes before frying. This helps the coating “set” and adhere better.
3. Can I make these ahead and freeze them?
Absolutely! This recipe is perfect for freezing. Fully cook the nuggets, let them cool completely, then place them on a baking sheet to flash freeze. Once solid, transfer them to a freezer-safe bag. They’ll last for up to 3 months.
4. How do I reheat frozen homemade nuggets?
The best way is in an oven or air fryer to get them crispy again. Bake at 400°F (200°C) for about 15-20 minutes until hot and crispy.
5. How do I know when the chicken is cooked through?
The most reliable way is with a meat thermometer; the internal temperature should be 165°F (74°C). Visually, the juices should run clear when you cut one open.
6. Are these gluten-free?
As written, no. But you can easily make them gluten-free by using gluten-free Panko breadcrumbs and a gluten-free all-purpose flour blend for dredging.
7. What are the best dipping sauces?

The possibilities are endless! Classic honey mustard, tangy BBQ, sweet and sour, creamy ranch, or even a spicy sriracha mayo are all fantastic choices.
Final Thoughts
You’ve done it. You have stared into the face of a late-night craving and emerged victorious, armed with a platter of golden, crispy, homemade chicken nuggets. You are no longer a slave to the drive-thru or the freezer aisle. You are a nugget master.
Go ahead, dunk those beauties in your favorite sauce and take a bite. That’s the taste of real food and pure, unadulterated triumph. Just be warned: once your friends and family taste these, you will be expected to bring them to every single gathering for the rest of your life. It’s a crispy, delicious cross to bear.