How to Make Cake at Home Without an Oven (A Stovetop Miracle!)
How to Make Cake at Home Without an Oven (A Stovetop Miracle!)
You’ve got a fierce, undeniable craving for a fresh, warm, homemade cake. The need is real. There’s just one tiny problem: your oven is currently broken, you live in a cozy apartment that considers an oven a “luxury amenity,” or it’s the middle of a sweltering August day here in Khulna and turning on that 350-degree heat box sounds like a form of cruel and unusual self-torture. Your cake dreams, it would seem, are dashed.
But what if I told you that your cake aspirations don’t have to die? What if I told you that your humble stovetop and a trusty, heavy-bottomed pot are the only tools you need to create a baking masterpiece? Today, my friend, you’re going to learn how to make cake at home without oven, and it’s going to feel like you’ve discovered a delicious, world-altering secret. Prepare to have your mind blown.
Why This Method Is Your New Best Friend
So, why should you embrace this seemingly strange, oven-less baking revolution? Let me tell you, the perks are real, and they are spectacular.
First and foremost, this is the ultimate act of kitchen resourcefulness. This technique proves that you don’t need a kitchen full of big, expensive, energy-guzzling appliances to enjoy homemade baked goods. It’s a testament to good old-fashioned ingenuity. Knowing you can bake a cake with just a pot and a stovetop makes you feel like a culinary MacGyver.
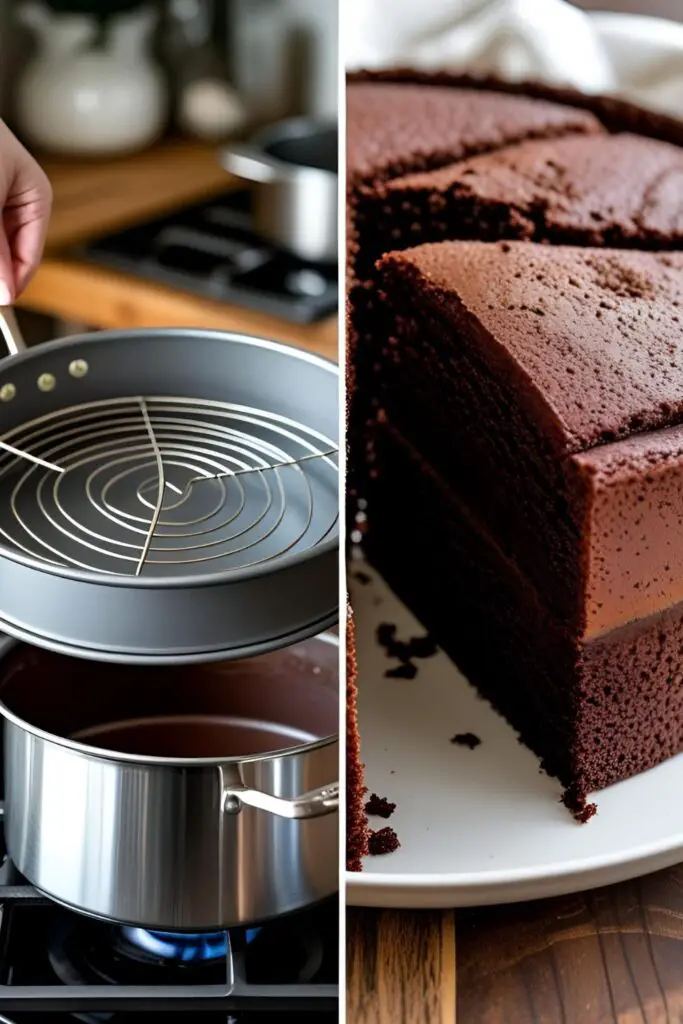
Second, the result is a shockingly moist and unbelievably tender cake. The enclosed, sealed environment of the pot traps a significant amount of steam, creating a super humid little atmosphere. This bakes the cake gently and prevents it from drying out, resulting in a crumb so soft and moist, you’ll wonder why you ever baked any other way.
Finally, this method won’t turn your kitchen into a sweltering sauna. This is the ultimate summer baking hack. You can have a fresh, warm, from-scratch cake without heating up your entire living space. It’s a small victory against the tyranny of a hot climate, and a delicious one at that.
The Ingredients for Your Stovetop Masterpiece
For this stovetop method, we’re going to use a simple but fantastic eggless chocolate cake recipe. Eggless cakes are often more forgiving with the gentle, steamy heat of this method, resulting in a wonderfully soft and foolproof crumb.
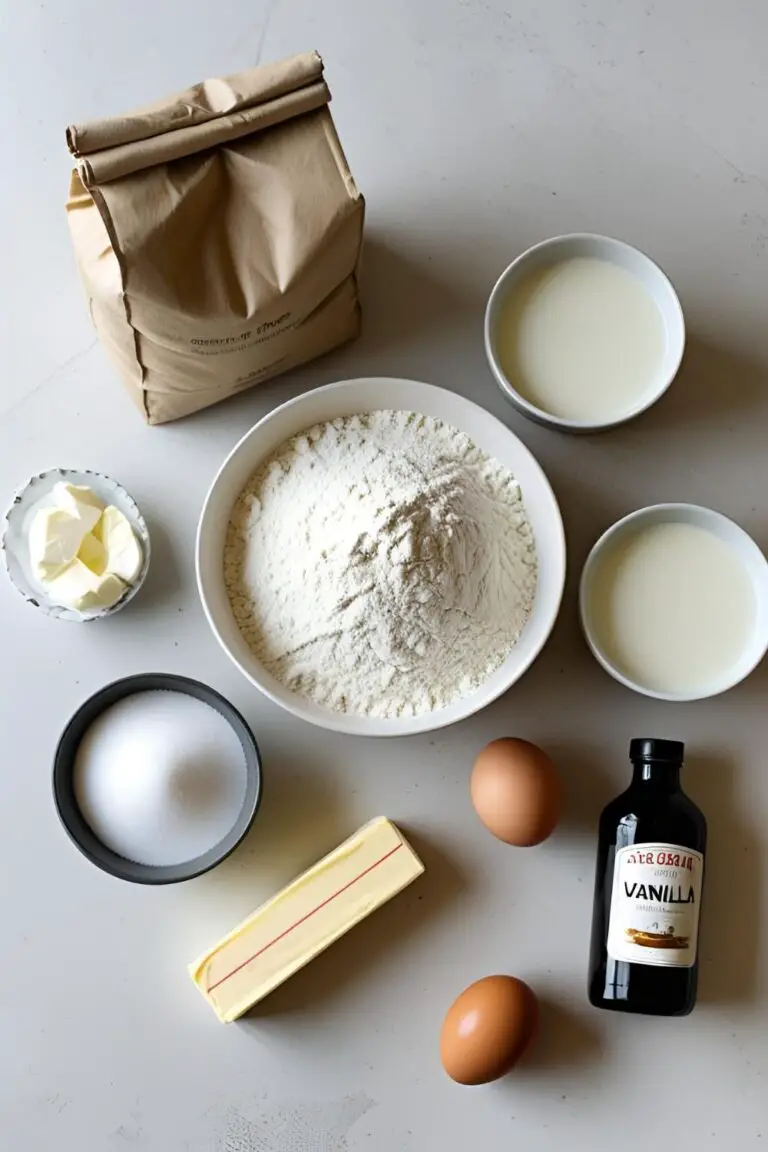
For the Chocolate Cake Batter:
- All-Purpose Flour: 1 ½ cups.
- Unsweetened Cocoa Powder: ¼ cup. Use a good quality one for a richer chocolate flavor.
- Granulated Sugar: 1 cup.
- Baking Powder: 1 teaspoon.
- Baking Soda: ½ teaspoon.
- Salt: ½ teaspoon.
- Milk: 1 cup, at room temperature.
- Vegetable Oil (or any neutral oil): ½ cup.
- White Vinegar: 1 tablespoon. This is our secret leavening weapon! You won’t taste it, I promise.
- Vanilla Extract: 1 teaspoon.
For the “Oven” Setup:
- Salt or Sand: About 1 to 2 cups. This creates a crucial heat-diffusing layer at the bottom of your pot.
The Tools for This Kitchen Hack

Your regular kitchen gear is about to become a high-tech baking chamber. Here’s what you need.
- A Large, Heavy-Bottomed Pot with a Tight-Fitting Lid: This is your “oven.” A Dutch oven, a sturdy stockpot, or even a large pressure cooker (used without the whistle/weight) will work perfectly. The key is a heavy base that distributes heat well and a lid that traps heat effectively.
- A Wire Rack or Trivet: This must be able to fit flat on the bottom of your pot. Its crucial job is to elevate the cake pan so it doesn’t touch the hot surface of the pot directly.
- A Cake Pan: A 6-inch or 7-inch round cake pan is ideal. It must fit inside your large pot with at least a 1-inch gap all the way around for heat to circulate.
- The usual suspects: A couple of mixing bowls, a whisk, a rubber spatula, and parchment paper.
Step-by-Step: Building Your Stovetop Oven
This process is simple, but the setup is key. Read through the steps first to get the lay of the land, and then embrace your inner culinary innovator.
Phase 1: Create the Cake Batter
- Prep Your Pan: Grease your 6 or 7-inch cake pan thoroughly with oil or butter. Line the bottom with a circle of parchment paper, then grease the parchment too. This ensures your beautiful cake comes out without a struggle.
- Mix the Dry Stuff: In a large bowl, whisk together the flour, cocoa powder, sugar, baking powder, baking soda, and salt. Make sure it’s well combined and free of any major lumps.
- Mix the Wet Stuff: In a separate medium bowl, whisk together the milk, oil, vinegar, and vanilla extract.
- Combine and Stop: Pour the wet ingredients into the dry ingredients. Mix with your whisk until just combined. A few small lumps are perfectly fine. Over-mixing is the enemy of a tender cake, so stop the moment you no longer see streaks of dry flour.
- Pour it Up: Immediately pour the finished batter into your prepared cake pan and set it aside for just a moment while you prepare your “oven.”
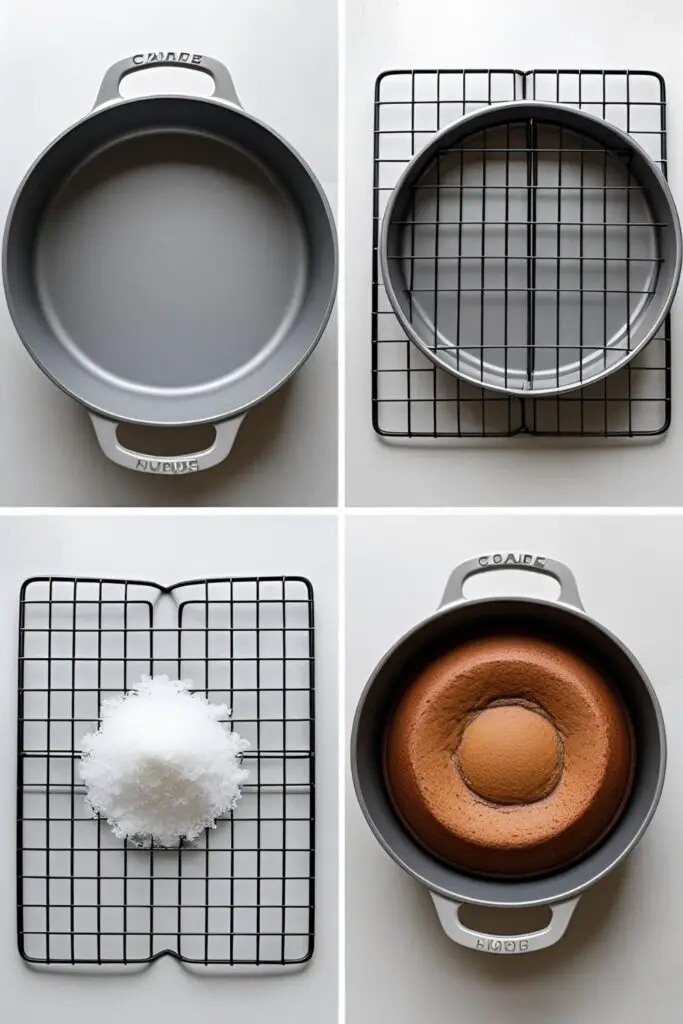
Phase 2: “Bake” in Your Stovetop Oven
- Set Up Your “Oven”: Take your large, heavy-bottomed pot. Pour the 1-2 cups of salt or sand into the bottom and spread it into an even layer. This salt bed will act as a buffer, absorbing the direct heat and distributing it more evenly. Place your wire rack or trivet on top of the salt layer.
- Preheat the Pot: Put the lid on the pot and place it on your stovetop over medium-low heat for exactly 10 minutes. This preheating step is just as important as preheating a regular oven. It gets the internal environment up to temperature.
- Time to “Bake”: Carefully remove the hot lid (use oven mitts!). With great care, place your filled cake pan onto the wire rack inside the pot. Make sure the pan is not touching the sides of the pot.
- Cover and Wait: Immediately place the lid back on as tightly as you can. If your lid has a steam vent, you can plug it with a small piece of foil or a ball of dough to trap as much heat and steam as possible. Turn the heat down to LOW and let the cake “bake” for 45 to 55 minutes.
- THE MOST IMPORTANT RULE: NO PEEKING! I know you’re curious. I know you want to see what’s happening in there. But you must resist. Every time you lift that lid, you’re releasing all the precious trapped heat and steam, which can cause your cake to sink and become dense. Trust the process and the timer for at least the first 45 minutes.
- Check for Doneness: After 45 minutes, you can quickly lift the lid and check the cake. Insert a long wooden skewer or toothpick into the center. If it comes out clean, your cake is done! If it has wet batter on it, cover the pot and cook for another 5-10 minutes before checking again.
- Cool It Down: Once done, carefully remove the cake pan from the hot pot and place it on a wire rack to cool for about 20 minutes. Then, run a knife around the edges and invert the cake onto the rack to cool completely before you even think about frosting it.
Calories & Nutritional Info (A Rough Guide)
This is for the unfrosted cake, assuming you cut it into 8 slices.
- Estimated Calories: Around 320-360 kcal per slice.
- Wonderfully Moist: The oil and the steamy cooking environment make this cake incredibly moist.
- Egg-Free & Easily Vegan: This cake is naturally egg-free and can be made fully vegan by using your favorite plant-based milk (like soy or almond milk).
Common No-Oven Baking Blunders to Avoid
This method is easy, but you have to respect the slightly unconventional physics of it. Avoid these common blunders.
- The Sin of Constant Peeking. I know it’s tempting, but you have to resist. Lifting the lid releases all the trapped heat, dramatically increases your baking time, and is the number one cause of a dense, sunken, and undercooked cake. Do not peek for at least the first 40-45 minutes.
- Using a Flimsy, Thin-Bottomed Pot. A thin pot will create a scorching hot spot right on the bottom and will burn your cake to a crisp long before the center has a chance to cook. You need a heavy, sturdy, thick-bottomed pot to distribute the stovetop’s direct heat more evenly.
- Letting the Pan Touch the Pot. The wire rack is not optional; it is your cake’s life support system. It creates a crucial air gap. If your cake pan sits directly on the bottom of the pot, it will burn. If it touches the sides, it will cook unevenly.
- Blasting the Heat Like a Jet Engine. This is a “low and slow” baking method. If you use medium or high heat, you will have a cake that is burnt on the outside and completely raw and gooey in the middle. Keep the flame on its lowest possible setting for the entire baking duration.
Variations & Customizations (The Oven-Free Universe)
Once you realize you can bake a cake in a pot, you’ll want to experiment!
- Classic No-Oven Vanilla Cake: This is an easy swap to make a delicious vanilla cake. Simply omit the cocoa powder and increase the all-purpose flour to 1 ¾ cups. It will be a beautifully pale and tender cake.
- The Pressure Cooker Method: This is a very popular variation, especially in South Asia. You can use the exact same setup and recipe in your pressure cooker. The key is to remove the gasket (the rubber ring) and the whistle/weight from the lid. This turns your pressure cooker into a heavy-duty, perfectly sealed pot. “Bake” on low heat for the same amount of time.
- Fruity No-Oven Cake: Add a fun twist to the vanilla version. Gently fold in a cup of chopped fruits like mangoes or bananas into the batter before baking. You could also place a layer of pineapple slices at the bottom of the pan for a stovetop pineapple upside-down cake!
Your Burning No-Oven Questions, Answered
Let’s tackle some of the most common questions about this unique baking method.
Is the salt or sand at the bottom of the pot really necessary?

Yes, it’s highly recommended. It acts as a heat buffer and diffuser. It absorbs the direct, intense heat from the flame and radiates it more gently and evenly throughout the pot, preventing the bottom of your cake from burning.
My cake turned out dense and gooey in the middle. What went wrong?
This usually means it was under-cooked. This could be because your flame was too low, your lid wasn’t tight enough, or you peeked too many times, letting all the heat escape.
Can I use a different cake recipe for this method?
You can, but dense, moist recipes (like oil-based cakes or eggless cakes) tend to work much better than light, airy ones (like a chiffon or angel food cake). The steamy environment is perfect for moisture-rich cakes.
Why does this take longer than a regular oven?
A stovetop “oven” is less efficient at circulating hot air than a real oven. It takes longer to build up and maintain the ambient heat needed to bake the cake all the way through, which is why you need a longer, slower baking time.
The bottom of my cake is too dark or burnt! How do I prevent this?
Your flame was too high. Even if it looks low, it might be too powerful for your pot. Try using the smallest burner on your stove on its absolute lowest setting. Also, make sure you have a thick enough layer of salt/sand at the bottom.
Can I make cupcakes this way?
Yes! You can place a silicone or metal muffin tin inside your pot (as long as it fits on the rack with clearance). The baking time will be shorter, likely around 25-30 minutes.
What’s the best way to frost this incredibly moist cake?
A simple chocolate ganache (made from equal parts melted chocolate and warm heavy cream) or a classic fudge frosting are fantastic choices that complement the rich, moist texture of this chocolate cake.
Final Thoughts
You have just defied culinary convention. You have bent the laws of baking to your will. You have stared at an empty oven and laughed. You made a cake in a pot on your stove. You are a resourceful, brilliant, and unstoppable culinary innovator.

So go on, let it cool, frost it if you feel fancy, and then cut yourself a giant slice. Take a bite of that ridiculously moist and delicious badge of honor. You didn’t just make a cake; you made magic.