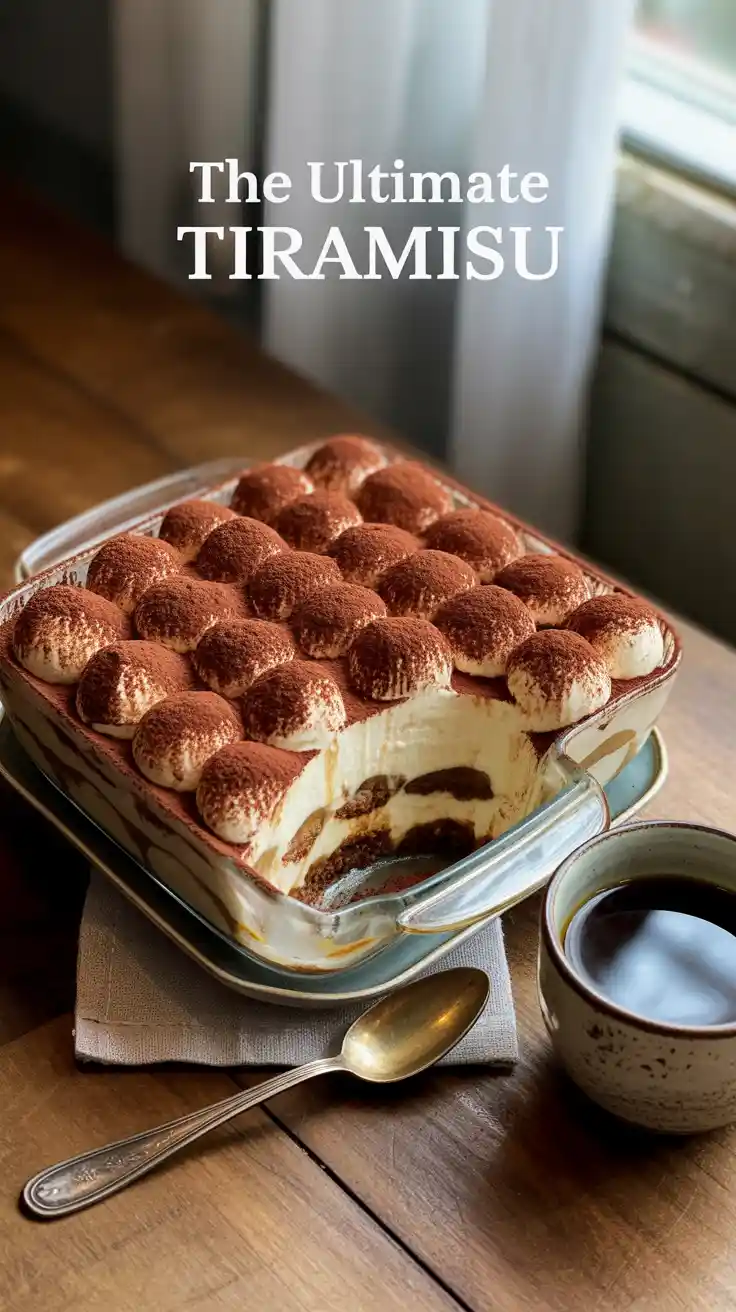
How to Make Tiramisu: The Best Authentic (and Easy!) Recipe
How to Make Tiramisu: The Best Authentic (and Easy!) Recipe
Tiramisu. Even the name sounds elegant, doesn’t it? It’s the dessert you order at a fancy Italian restaurant to feel sophisticated. It’s the “little black dress” of the dessert world—timeless, classy, and it never fails to impress. It seems like a complex, mysterious creation whispered into existence by a council of Italian grandmothers.
Well, I’m here to pull back the velvet curtain and let you in on a little secret: that legendary dessert is a magnificent fraud. It’s a no-bake wonder that’s built on simple, elegant steps. It’s more of an assembly project than a baking marathon. Today, you’re going to learn how to make tiramisu from scratch, and your dinner party game will be forever changed. Prepare to accept compliments.
Why This Recipe Is Your New Secret Weapon
So, why should you, a person with a busy life, take the time to layer some coffee-soaked biscuits and cheese? Oh, the reasons are as rich and layered as the dessert itself.
First, it requires absolutely no oven. Let me repeat that. No preheating. No worrying about hot spots. No turning your kitchen into a sauna in the middle of August. This is a dessert of pure, unadulterated assembly, making it the undisputed champion of stress-free entertaining.
Second, it is unbelievably elegant and delicious. The combination of bitter coffee, rich and tangy mascarpone cream, a hint of booze, and delicate ladyfingers is a symphony of textures and flavors. It’s light yet decadent, complex yet comforting. It tastes like it took you days to make.
Finally, it’s the ultimate make-ahead dessert. In fact, tiramisu isn’t just good when made ahead; it’s better. It needs time for the flavors to meld and the ladyfingers to soften into a cake-like texture. This means you can have a show-stopping dessert chilling in your fridge, ready to go, while you focus on the main course. It’s the smartest way to party.
The A-List Ingredients
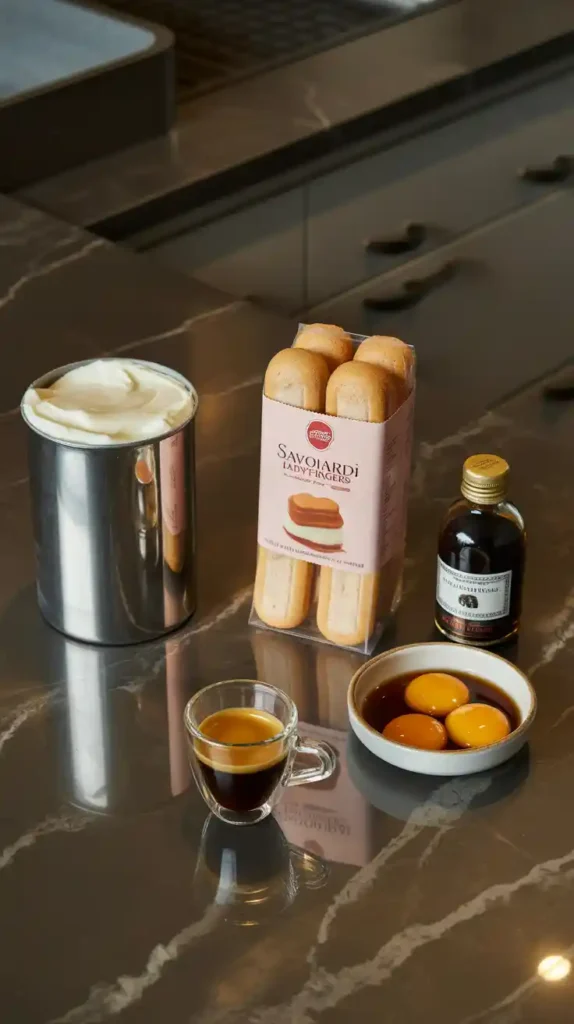
The beauty of tiramisu lies in its simplicity, which means the quality of your ingredients is paramount. Don’t skimp here!
- Ladyfingers (Savoiardi): 1 package (about 7 ounces or 200g). You need the crispy, hard Italian-style ladyfingers, not the soft, spongy cake-like ones. The crispy ones are essential for absorbing the coffee without turning to complete mush.
- Mascarpone Cheese: 16 ounces (2 cups), at room temperature. This is the heart of tiramisu. It’s a rich, slightly sweet Italian cream cheese. Make sure it’s full-fat and at room temperature to prevent a lumpy cream.
- Large Egg Yolks: 6 of them. We’re going to gently cook them, so don’t worry about the raw egg situation.
- Granulated Sugar: ¾ cup.
- Heavy Whipping Cream: 1 ½ cups, very cold.
- Strong Brewed Coffee or Espresso: 1 ½ cups, cooled to room temperature. It needs to be strong to stand up to the rich cream.
- Dark Rum, Brandy, or Marsala Wine: 2 tablespoons. This is optional, but it adds a traditional, warming depth of flavor.
- Unsweetened Cocoa Powder: For that iconic, velvety dusting on top.
- Vanilla Extract: 1 teaspoon.
The Tiramisu-Making Toolkit

No oven, no problem. But a few key tools will make this process a breeze.
- An 8×8 or 9×9 inch Square Baking Dish: A 2-quart dish is perfect for building your beautiful layers.
- A Double Boiler (or a heatproof bowl and a saucepan): This is for gently cooking the egg yolks to create a safe and stable cream base.
- An Electric Mixer: A stand mixer with the whisk attachment or a reliable hand mixer is essential for whipping the cream and egg yolks.
- A Whisk: For the egg yolk mixture.
- A Rubber Spatula: Your best friend for gently folding everything together.
- A Fine-Mesh Sieve or Sifter: For a perfect, even dusting of cocoa powder at the end.
Step-by-Step: Building Your Masterpiece
This is a dessert of stages. None are difficult, but they all work together. Let’s build.
Phase 1: Get Your Components Ready
- Prep the Coffee: Brew your coffee or espresso and let it cool down completely. Once cool, stir in the rum or brandy (if using) and pour it into a shallow dish that’s wide enough to dip the ladyfingers in.
- Whip the Cream: In the bowl of your electric mixer, whip the very cold heavy cream on high speed until it forms stiff peaks. Stiff peaks mean that when you lift the beaters, the peak stands straight up without flopping over. Gently transfer the whipped cream to another bowl and pop it in the fridge.
Phase 2: The Creamy Mascarpone Base
- Create a Double Boiler: Fill a medium saucepan with about an inch of water and bring it to a gentle simmer.
- Cook the Egg Yolks (Zabaglione style): In a large heatproof bowl, whisk together the 6 egg yolks and the ¾ cup of sugar. Place this bowl over the simmering water (make sure the bottom of the bowl isn’t touching the water). Whisk constantly for about 8-10 minutes. The mixture will transform, becoming pale, thick, and doubling in volume. It’s done when it can hold a ribbon-like trail for a few seconds when you lift the whisk.
- Cool it Down: Remove the bowl from the heat and continue to whisk for another minute to help it cool slightly. Let it sit for about 10 minutes until it’s room temperature.
- The Mascarpone Moment: Add your room-temperature mascarpone cheese to the cooled egg yolk mixture. Use a rubber spatula to gently fold them together until just combined and smooth. Do not over-mix, or the mascarpone can curdle and become grainy.
- The Final Fold: Gently fold the chilled whipped cream into the mascarpone mixture in two or three additions. Fold until just combined and no white streaks remain. You now have the most luxurious, airy cream imaginable.
Phase 3: The Grand Assembly
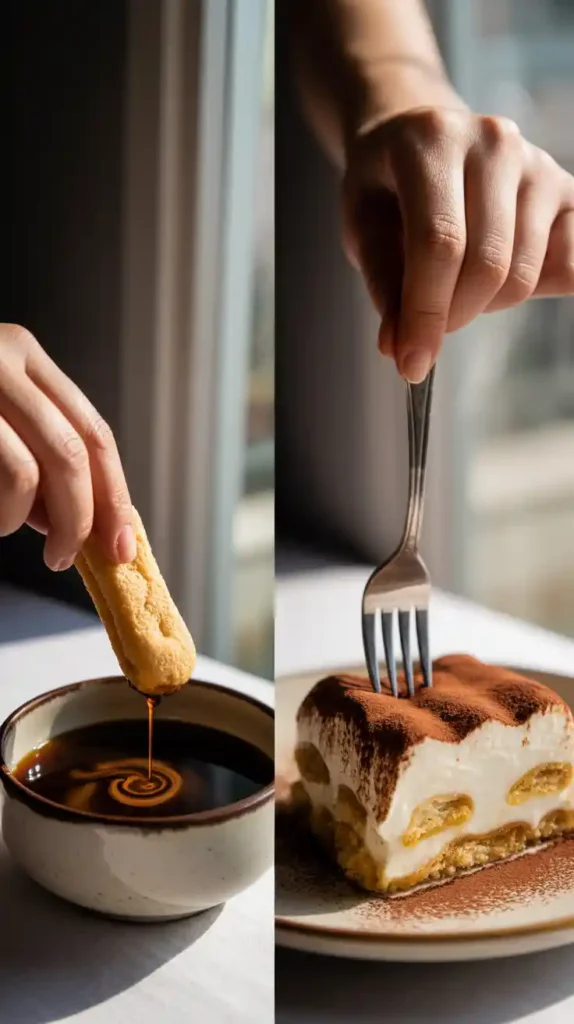
- The Quick Dip: Working one at a time, take a ladyfinger and dip it very quickly (1-2 seconds per side) into the coffee mixture. You want it to absorb the flavor, not become a soggy sponge.
- The First Layer: Arrange the dipped ladyfingers in a single, tight layer at the bottom of your baking dish. You may need to break a few to fit perfectly.
- The Cream Layer: Spread half of the mascarpone cream mixture evenly over the ladyfingers.
- Repeat: Create a second layer of coffee-dipped ladyfingers, followed by the remaining mascarpone cream, smoothing the top into a beautiful, even surface.
- THE CRUCIAL CHILL: Cover the dish with plastic wrap and refrigerate it for at least 6 hours, but preferably overnight (24 hours is even better). This is not a suggestion. This is when the magic happens: the ladyfingers soften into a cake-like texture, and all the flavors meld together into perfect harmony.
- The Final Flourish: Right before serving, use your fine-mesh sieve to dust the top of the tiramisu generously with unsweetened cocoa powder.
Calories & Nutritional Info (A Decadent Reality)
This is a rich, classic dessert meant for pure indulgence.
- Estimated Calories: Around 450-550 kcal per serving (assuming 9 servings).
- Rich and Creamy: It’s high in fat and sugar from the mascarpone, cream, and egg yolks. This is what makes it so luxurious.
- A Coffee Kick: A slice of tiramisu contains a bit of caffeine from the coffee, making it a perfect “pick-me-up” (which is what “tiramisu” literally means!).
Common Tiramisu Tragedies to Avoid
Don’t let these simple mistakes ruin your elegant masterpiece.
- The Soggy Bottom Disaster. This is the most common crime. You must dip the ladyfingers, not drown them. A super-quick, one-two-three dip is all they need. Any longer, and they will disintegrate into a sad, watery, mushy layer at the bottom of your beautiful dessert.
- The Grainy, Curdled Cream. This happens from one of two things: your mascarpone was too cold, or you over-mixed it. Mascarpone is a delicate cheese that can break and become oily if it’s handled too aggressively. Ensure it’s at room temperature and fold it in gently.
- The Runny, Weeping Tiramisu. If your tiramisu is watery, it’s likely that you didn’t cook the egg yolks until they were thick enough, you under-whipped your cream, or you didn’t let it chill long enough to set properly. Patience is a key ingredient in this recipe.
- The Blotchy Cocoa Catastrophe. If you dust the tiramisu with cocoa powder the night before, it will absorb moisture from the cream in the fridge, leaving you with a dark, damp, and blotchy surface. Always dust with cocoa powder right before you serve it for that perfect, velvety, professional finish.
Variations & Customizations
Once you’ve mastered the classic, you can play with the formula.
- Summer Berry Tiramisu: Ditch the coffee and cocoa. Make a simple puree of strawberries or raspberries (sweetened to taste) and mix it with a little orange liqueur like Cointreau. Use this to dip your ladyfingers and layer with fresh berries between the cream.
- Decadent Chocolate Tiramisu: Add about 4 ounces of melted and cooled high-quality dark chocolate to the mascarpone mixture. You can also add chocolate shavings between the layers for an even richer chocolate experience.
- Lemon Tiramisu: A bright and zesty version perfect for spring. Create a syrup of lemon juice, water, and sugar to dip the ladyfingers in, and add lemon zest to the mascarpone cream. A splash of Limoncello in the syrup is highly recommended.
Your Burning Tiramisu Questions, Answered

Let’s clear up some of the most common queries.
Do I have to use raw eggs to make tiramisu?
Not with this recipe! We gently cook the egg yolks over a double boiler, which not only makes them safe to eat but also creates a richer, more stable cream base called a zabaglione.
What can I use if I can’t find mascarpone cheese?
Authentic tiramisu really needs mascarpone. However, in a desperate pinch, you can create a substitute by beating 8 ounces of full-fat, brick-style cream cheese (softened) with ¼ cup of heavy cream and 2 tablespoons of softened butter until smooth. The flavor will be tangier and less rich, but it will work.
Can I make tiramisu without alcohol?
Yes, absolutely. Just omit the rum, brandy, or Marsala. The dessert will still be delicious. You can add an extra teaspoon of vanilla to the coffee to give it a little more flavor complexity.
What kind of ladyfingers are best? The soft or hard ones?
You must use the hard, crispy, Italian-style ladyfingers called Savoiardi. The soft, cakey kind will turn to complete mush the second they touch the coffee.
Why is my tiramisu watery or runny?
This is usually due to one of three things: 1) you soaked the ladyfingers for too long, 2) your cream wasn’t whipped to stiff peaks, or 3) you didn’t chill it long enough for the cream to set fully.
Can I make tiramisu a few days ahead of time?
Yes! Tiramisu is the perfect make-ahead dessert. It is best made 24 hours in advance, but it will keep beautifully in the fridge for up to 3 days.
How do I store leftovers?
Keep it tightly covered with plastic wrap in the refrigerator. It will stay fresh for about 3-4 days.
Final Thoughts

Look at you. You have just created Italy’s most iconic and beloved dessert. No oven, no complicated baking, just layers of pure, creamy, coffee-kissed perfection. You’ve tamed the mascarpone, you’ve mastered the zabaglione, and you’ve constructed an edible masterpiece.
So go on, grab a spoon. Pierce through that velvety layer of cocoa and sink into the cloud-like cream and coffee-soaked ladyfingers. You’ve earned it. Now go ahead and say “Ciao” to ever ordering this at a restaurant again. Yours is better.