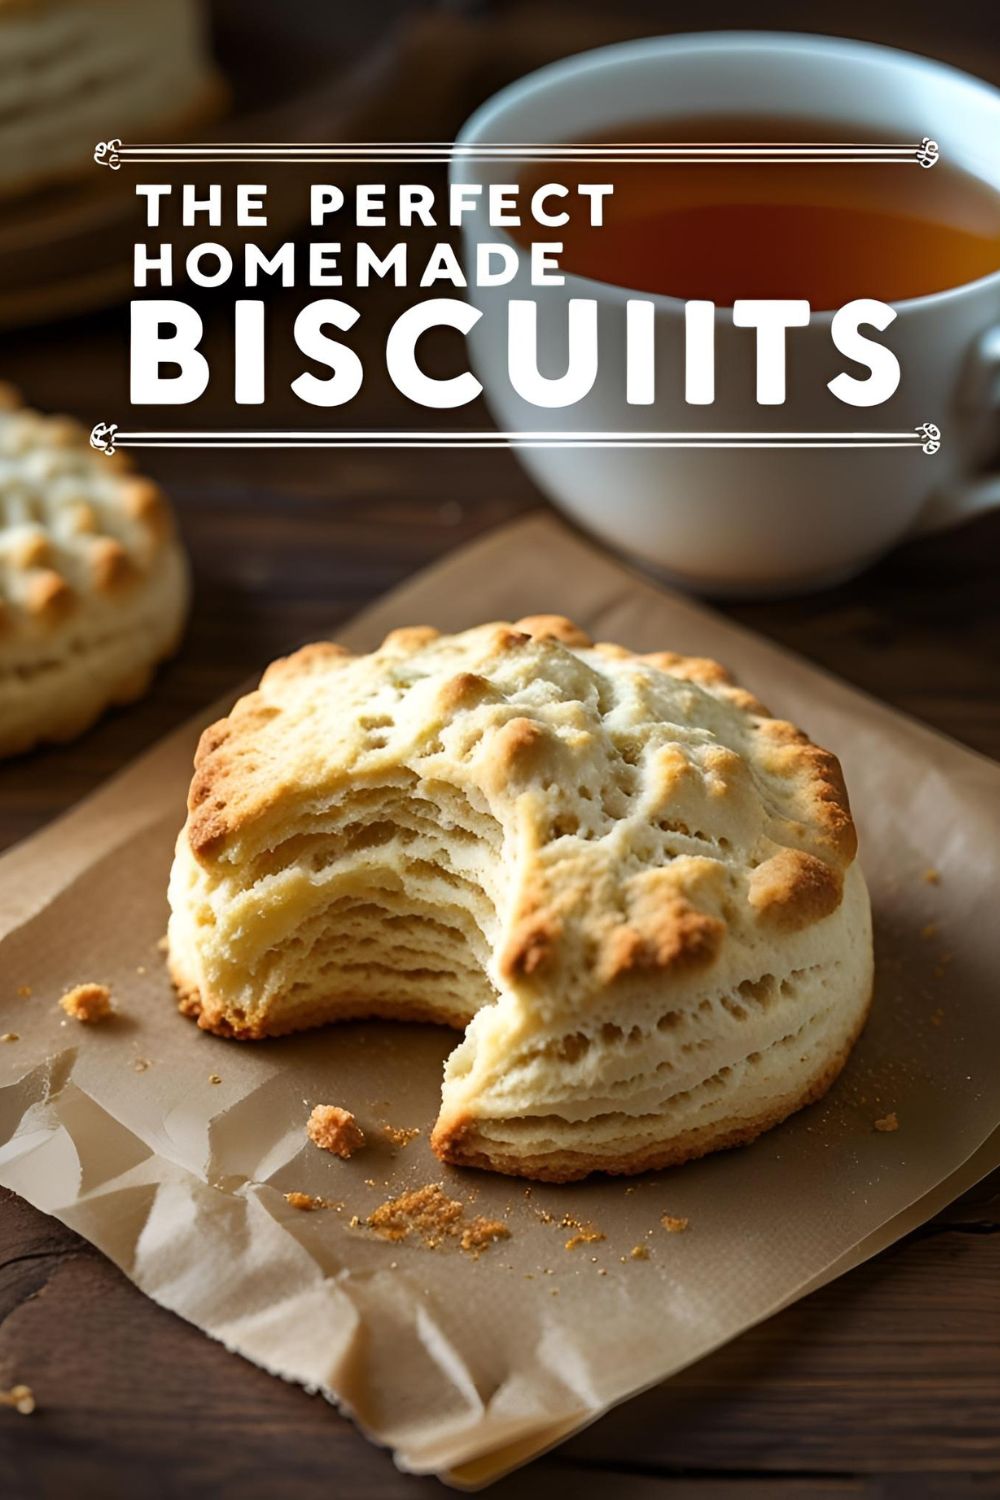
How to Make Biscuits (The Perfect Buttery & Crisp Recipe!)
How to Make Biscuits (The Perfect Buttery & Crisp Recipe!)
Okay, let’s have a quick chat before we dive in, because the world needs clarity. If you’re from America, you might be expecting a recipe for a fluffy, scone-like thing you’d serve with gravy. That’s a lovely thought, but that’s not what we’re doing today. Here in Bangladesh, and in much of the world, we’re talking about proper biscuits—the crisp, buttery, glorious cookies that are the undisputed champion of tea time.
So, if you’ve been wondering how to make biscuits that are so tender they melt in your mouth, so buttery they’re practically a religious experience, and a million times better than anything you can buy in a package, you have come to the right place. We are about to master the art of the classic shortbread biscuit, and it’s so much easier than you think.
Your afternoon cup of cha is about to get a serious upgrade.
Why This Recipe is Awesome
In a world full of complicated cookies with a million ingredients, the humble shortbread biscuit is a true hero. Here’s why.
- It’s a Masterclass in Simplicity: This recipe uses just three, maybe four, core ingredients. It is the purest, most beautiful expression of butter, sugar, and flour. It’s so simple it’s almost poetic, and it’s the perfect recipe for beginners to build their confidence.
- The Texture is Absolutely Sublime: Forget those hard, tooth-breaking biscuits from a packet. A perfect homemade shortbread is a textural masterpiece. It’s crisp, it has a fine, sandy crumb, and it quite literally melts in your mouth with a rich, buttery flavor that is absolutely to die for.
- It’s the Perfect “Base” Recipe: Once you master this simple, classic dough, you can customize it in a million different ways. Add spices, citrus zest, or dip it in chocolate. This one recipe is the foundation of your future biscuit empire.
Ingredients
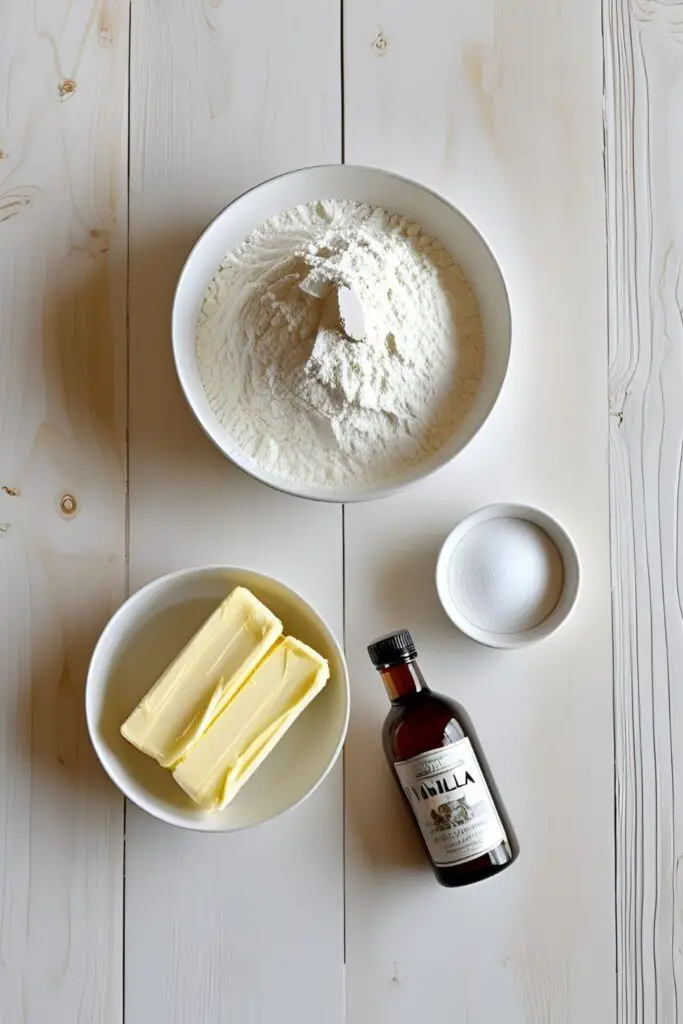
The ingredient list is short, which means the quality of each one truly shines. Use the good stuff!
- 1 cup (2 sticks) unsalted butter, softened to room temperature (but not melty!)
- ½ cup powdered sugar, sifted (also known as icing sugar)
- 2 cups all-purpose flour (maida)
- ½ teaspoon pure vanilla extract
- ¼ teaspoon salt
- Optional Secret Weapon: ¼ cup cornflour (corn starch) – swapping this for ¼ cup of the all-purpose flour will make your biscuits even more tender and melt-in-your-mouth!
Tools & kitchen gadgets used
You don’t need a lot of fancy gear for this, just some basic baking equipment.
- A Large Mixing Bowl
- A Stand Mixer with the paddle attachment, or a powerful Hand Mixer
- A Silicone Spatula
- A Rolling Pin
- Cookie Cutters of your desired shape (or just a sharp knife)
- Baking Sheets
- Parchment Paper
- A Wire Cooling Rack
Step-by-step instructions
The secret to perfect shortbread is all in the technique. Follow these steps, and you’ll be a biscuit boss.

Step 1: The Usual Prep Work Preheat your oven to 350°F (175°C). Line two large baking sheets with parchment paper. This ensures your delicate biscuits don’t stick and helps them bake evenly.
Step 2: The Creaming Ceremony This is the most important step for that perfect, melt-in-your-mouth texture. In your large bowl, place the softened butter and the sifted powdered sugar. Using your mixer, beat them together on medium-high speed for a good 3-4 minutes. The mixture should become very pale, light, and fluffy, almost like a cloud.
Step 3: Add the Flavor Beat in the vanilla extract and the salt until they are just combined. Scrape down the sides of the bowl with your spatula to make sure everything is incorporated.
Step 4: The Flour Dump (Be Gentle!) Add the flour (and the cornflour, if you’re using it) to the butter mixture all at once. Turn your mixer on to the lowest possible speed and mix just until a soft, crumbly dough begins to form. The moment it comes together, STOP MIXING.
Step 5: The Mandatory Chill Use your hands to gently bring the dough together into a cohesive ball. It shouldn’t be sticky. Flatten the ball into a 1-inch thick disk, wrap it tightly in plastic wrap, and let it chill in the refrigerator for at least 30 minutes. This step is crucial for making the dough easy to roll out and for preventing your biscuits from spreading in the oven.
Step 6: Roll and Cut On a lightly floured surface, take your chilled dough and roll it out gently until it’s about ¼-inch thick. Use your favorite cookie cutters to cut out your biscuit shapes. Re-roll the scraps gently to cut out more biscuits.
Step 7: The Second Chill (The Pro Move!) Yes, again. This is the secret to biscuits that hold their shape perfectly. Place your cut-out biscuits on the prepared baking sheets and pop the entire sheet back into the refrigerator for another 15 minutes while the oven finishes preheating.
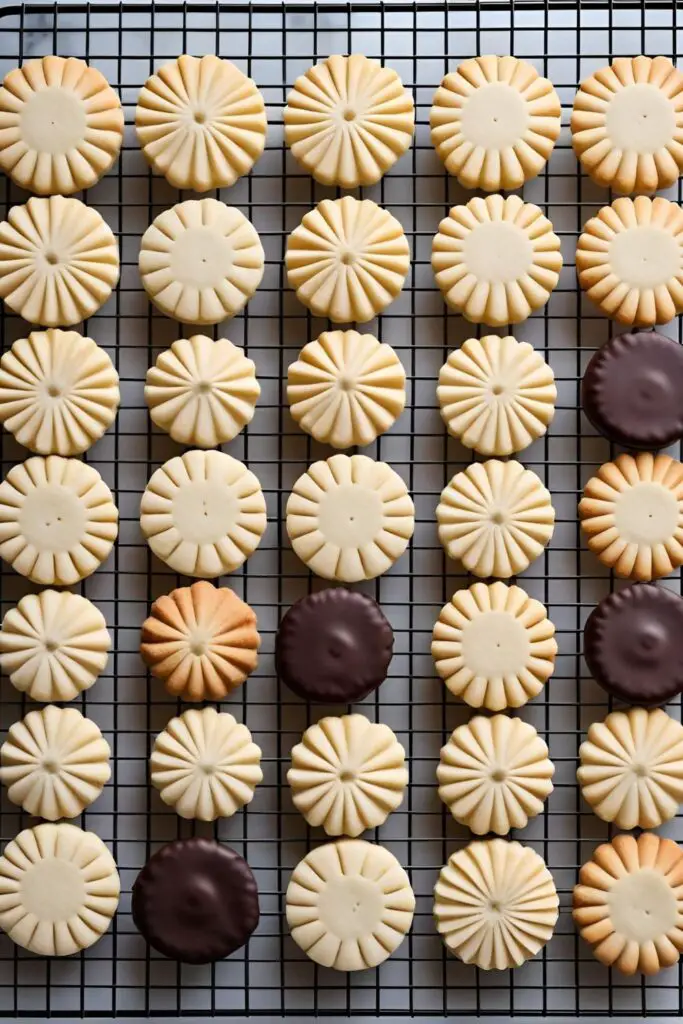
Step 8: Bake to Pale Perfection Bake the chilled biscuits for 12 to 15 minutes. The perfect shortbread biscuit should be pale and blonde, with just the slightest hint of golden brown on the very edges. Do not let them get dark brown all over!

Step 9: The Cool Down Let the biscuits cool on the baking sheets for about 5 minutes before carefully transferring them to a wire cooling rack to cool completely. They will be delicate when they are warm, but will crisp up as they cool.
Calories & Nutritional Info
It’s a buttery, delicious biscuit. Let’s enjoy it for what it is.
- Serving Size: 1 biscuit (assuming the recipe makes about 24)
- Estimated Calories: Around 100-120 kcal per biscuit.
- Contains: A delightful amount of butter, happiness, and the perfect excuse to put the kettle on.
Common Mistakes to Avoid
Avoid these simple slip-ups for the most tender, buttery biscuits of your life.
- Using Melted or Rock-Hard Butter: Your butter must be softened to room temperature, but not greasy or melted. Cold butter won’t cream properly with the sugar, and melted butter will make your biscuits oily, dense, and sad.
- Overworking the Dough: This is the #1 enemy of a tender, melt-in-your-mouth biscuit. The moment the flour is combined and a soft dough forms, STOP MIXING. Overworking the dough develops gluten, which will make your biscuits tough and hard instead of delicate and short.
- Skipping the Chilling Steps: I know you’re impatient. I get it. But chilling the dough is non-negotiable. The first chill makes the buttery dough firm enough to roll out easily. The second chill prevents your beautiful biscuit shapes from spreading into sad, buttery, unrecognizable blobs in the oven.
- Overbaking Them into Rocks: The perfect shortbread biscuit is a pale beauty. You are looking for a biscuit that is pale in the center with just slightly golden edges. If the whole thing is a deep golden brown, you’ve gone too far, and it will be hard and crunchy instead of tender and crisp.
Variations & Customizations
This classic shortbread is a perfect base. Feel free to get creative!
- Chai Spice Biscuits: For a wonderful local twist, add 1-2 teaspoons of your favorite chai masala spice blend to the dry ingredients. The warm spices of cardamom, cinnamon, and ginger are absolutely incredible with the buttery biscuit and a hot cup of spiced tea.
- Lemon & Cardamom Biscuits: Add the finely grated zest of one large lemon and ½ teaspoon of ground cardamom (elachi) to the butter and sugar when you are creaming them together. The bright citrus and fragrant spice is an incredibly elegant combination.
- Classic Chocolate-Dipped Shortbread: Once the biscuits have cooled completely, melt some good-quality dark chocolate. Dip half of each biscuit into the melted chocolate, let the excess drip off, and place it on parchment paper to set.
FAQ Section
All your buttery, biscuit-related questions, answered.
1. What is the secret to a good, tender biscuit? The two secrets are: 1) Using good quality, softened butter and creaming it well with the sugar, and 2) Not overmixing the dough once the flour is added.
2. Why are my biscuits hard instead of tender? You either overworked the dough, which developed too much gluten, or you overbaked them. Remember to bake them until they are just barely golden on the edges.
3. Should I use powdered sugar or regular granulated sugar? For the ultimate melt-in-your-mouth texture, powdered sugar (icing sugar) is the best choice. It dissolves into the butter more easily and creates a finer, more delicate crumb. You can use granulated (caster) sugar, but the texture will be slightly crunchier.

4. Why did my biscuits spread so much in the oven? You most likely skipped the second chilling step! Chilling the cut-out biscuits on the baking sheet before they go into the hot oven is the key to helping them hold their sharp, beautiful shape.
5. Can I make the dough ahead of time? Yes! This dough is perfect for making ahead. You can store the wrapped disk of dough in the refrigerator for up to 3 days, or in the freezer for up to 3 months.
6. How do I properly store homemade biscuits? Once they are completely cool, store them in an airtight container at room temperature. They will stay fresh and crisp for up to a week.
7. Can I make these without cookie cutters? Absolutely! You can roll the dough into a log, chill it, and then slice it into rounds. Or, you can press the entire dough into a round or square pan, prick it all over with a fork, bake it, and then cut it into wedges or fingers while it’s still warm.
Final Thoughts
And there you have it. A tray of perfect, buttery, crisp, and impossibly tender biscuits, made by you. You’ve officially mastered a timeless classic that will make you the undisputed hero of any tea time gathering. You’ve learned that the best things in life are often the simplest.
Now go on, put the kettle on, grab your favorite book, and enjoy a biscuit (or three). Your afternoons will never be the same again.