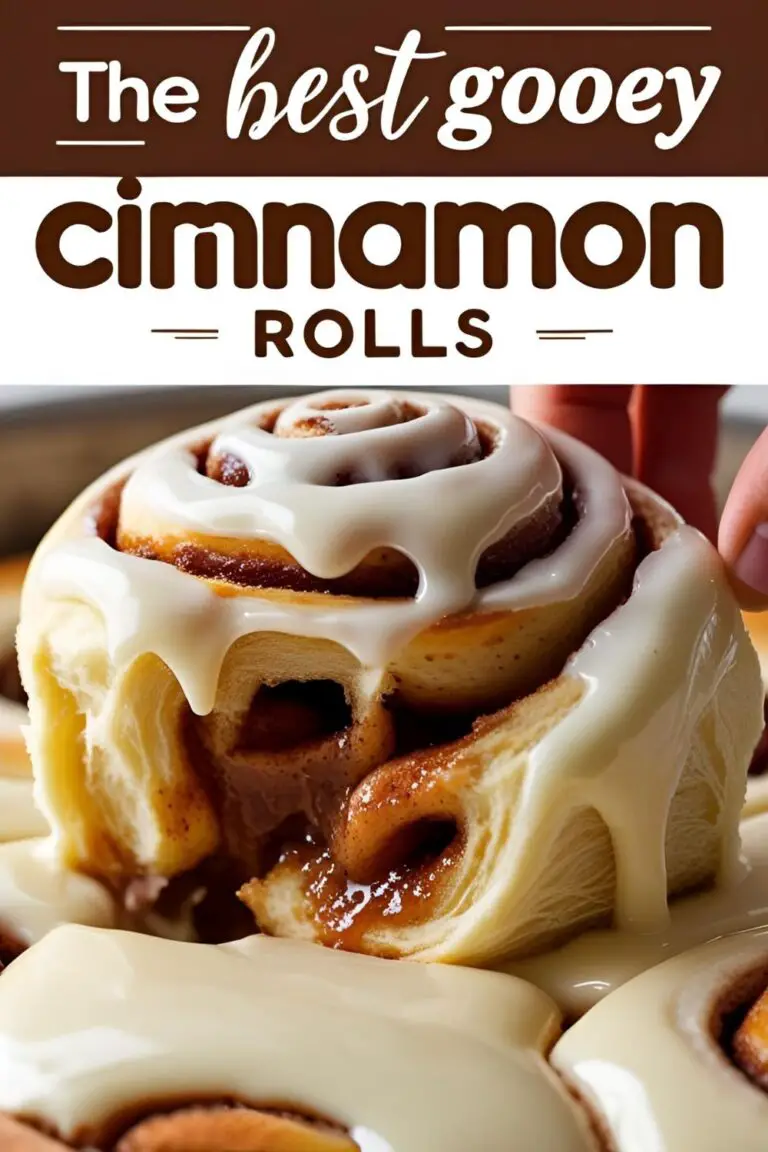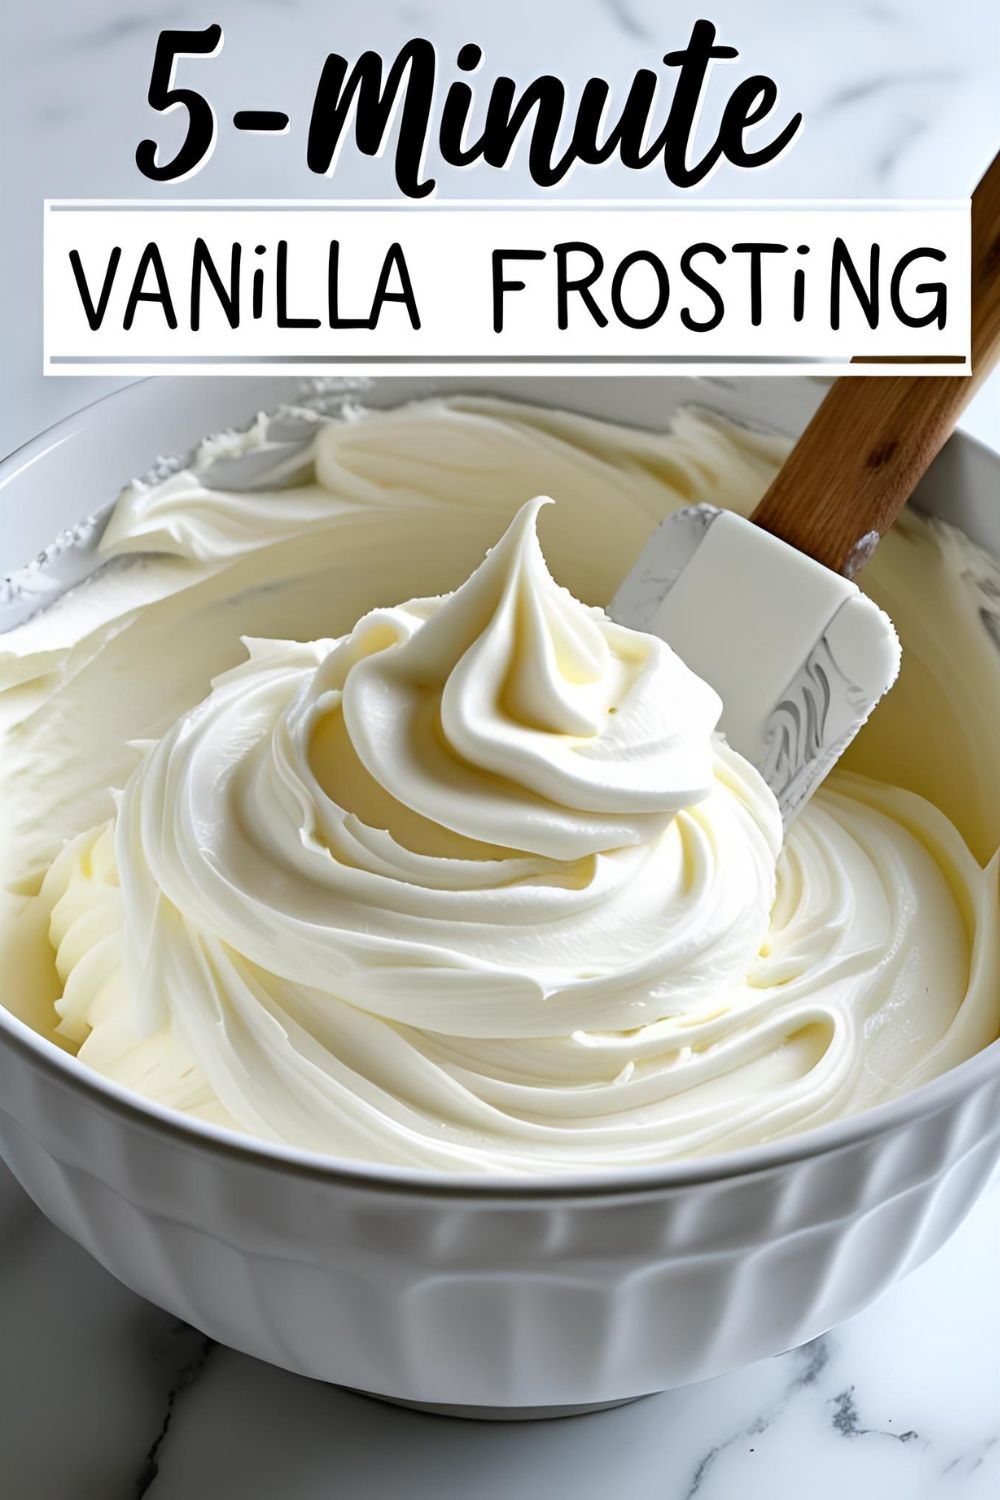
How to Make Vanilla Frosting (That’s 100x Better Than Store-Bought!)
How to Make Vanilla Frosting (That’s 100x Better Than Store-Bought!)
Let’s have a heart-to-heart about that can of frosting sitting in your pantry. You know the one. It has the texture of wall spackle, a vaguely chemical-vanilla scent, and a list of ingredients longer than a CVS receipt. Today, my friend, we are staging an intervention. We are going to learn how to make vanilla frosting from scratch in about five minutes, and I promise you, you will never look at that sad can the same way again.
You might think homemade frosting is fussy or complicated. That is a lie perpetuated by the Big Frosting industry to keep you in their clutches. The truth is, if you can operate a mixer and measure things, you possess all the necessary skills to create a cloud of fluffy, buttery, vanilla-laced perfection.
So, are you ready to break free from the tyranny of the can? Are you ready to taste what real frosting is supposed to taste like? Let’s do this.
Why This Recipe is Awesome
If you’re still not convinced to ditch the can, let’s break down the glorious reality of homemade frosting.
- It’s Unbelievably Easy: I am not kidding when I say this is a “dump and beat” situation. There are no complicated steps. There’s no cooking. It takes less time to make this than it does to wrestle the foil seal off a new can of the store-bought stuff.
- The Flavor is Infinitely Better: This is the most important part. Homemade frosting tastes like real butter, real cream, and real vanilla. It’s rich, decadent, and creamy, not just a cloyingly sweet, vaguely flavored paste.
- You Are the Frosting Master: You are in complete control. Want it sweeter? Add more sugar. Want it fluffier? Whip it longer. Want it thicker for piping? Use less liquid. Want it flavored with peppermint or lemon instead? You can do that! You are the captain of this glorious frosting ship.
Ingredients

You only need four main ingredients. Four! It’s practically magic.
- 1 cup (2 sticks) unsalted butter, softened to room temperature (Seriously, don’t use it cold!)
- 3-4 cups powdered sugar, sifted (The sifting is not optional!)
- ¼ cup heavy cream or whole milk, at room temperature
- 2 teaspoons pure vanilla extract (Use the good stuff, it makes a difference)
- ¼ teaspoon salt (This is the secret weapon that balances the sweetness)
Tools & Kitchen Gadgets Used
Your trusty mixer is the hero of this story. The rest are just its loyal sidekicks.
- Stand Mixer with the paddle attachment, or a powerful Hand Mixer
- Large Mixing Bowl
- A Sifter or Fine-Mesh Sieve (for lump-free success)
- Silicone Spatula (for scraping the bowl, because you won’t want to waste a drop)
- Measuring Cups and Spoons
Step-by-Step Instructions
This is so easy, you can do it with your eyes closed. (Please don’t actually do that.)
Step 1: Beat the Butter into Submission Place your softened butter in the bowl of your stand mixer or a large mixing bowl. Beat the butter on its own on medium-high speed for a good 2-3 minutes. You want it to get very pale, creamy, and fluffy. This step whips air into the butter and is the foundation for a light, airy frosting.

Step 2: Start Adding the Sugar With the mixer on low speed, gradually add about half of your sifted powdered sugar (about 2 cups). Mix until it’s just combined. It will look a bit thick and pasty. This is fine.
Step 3: Add the Liquids and Salt Now, pour in the heavy cream (or milk), the vanilla extract, and the salt. Continue to mix on low speed until everything is moistened.
Step 4: Add the Rest of the Sugar Gradually add the remaining 1-2 cups of powdered sugar and mix on low speed until it’s fully incorporated. Scrape down the sides and bottom of the bowl with your spatula to make sure everything is mixed in.
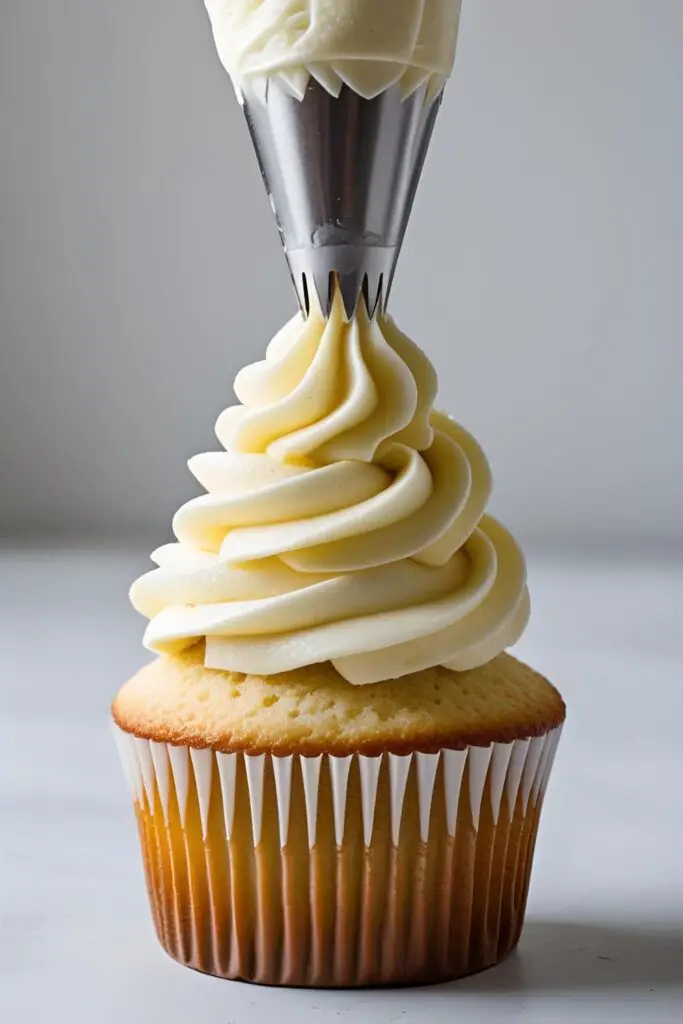
Step 5: The Final, Glorious Whip This is the magic step. Turn the mixer up to medium-high speed and let it go for a full 3 to 5 minutes. The frosting will transform. It will go from being dense and heavy to incredibly light, airy, and cloud-like. It will also visibly lighten in color. This is what separates good frosting from great frosting.
Step 6: Check Your Consistency After the final whip, check the texture. Is it too thick to spread easily? Beat in another tablespoon of cream. Is it too thin and runny? Beat in another ½ cup of sifted powdered sugar. Adjust until it’s perfect for your needs.
Calories & Nutritional Info
It’s butter and sugar. Let’s just be honest with ourselves and enjoy the moment.
- Serving Size: 2 tablespoons (enough to generously frost one cupcake)
- Estimated Calories: Around 130-150 kcal.
- Main food group: Happiness.
- Rich in: The ability to make any cake or cookie approximately 1000% better.
Common Mistakes to Avoid
Avoid these simple mistakes, and you’ll have perfect frosting every single time.
- Not Sifting the Powdered Sugar: I see you, thinking about skipping this step. Don’t do it. Powdered sugar is famously clumpy. Unless you enjoy a lumpy, gritty frosting with weird little sugar pebbles in it, you must sift your powdered sugar.
- Using Cold or Melted Butter: Your butter must be softened to room temperature—soft enough that your finger leaves an indent, but not so soft that it’s greasy or melting. Cold butter will create lumps that will never beat out. Melted butter will result in a soupy, greasy mess.
- Skipping the Final Whip: If you just mix the ingredients until they’re combined, your frosting will be dense, heavy, and overly sweet. That final 3-5 minute high-speed whip is what makes it light and fluffy. It’s the most important step for texture. Don’t skip it!
- Forgetting the Salt: It seems like such a tiny, insignificant amount, but that pinch of salt is the secret ingredient. It perfectly balances the sweetness of the sugar and makes the vanilla flavor pop. Without it, the frosting can taste flat and cloying.
Variations & Customizations
Once you’ve mastered this basic vanilla, you can create a whole universe of flavors.
- Dreamy Cream Cheese Frosting: This is a classic for a reason. Replace half of the butter (1/2 cup or 1 stick) with one 8-ounce block of softened, full-fat cream cheese. Beat the butter and cream cheese together until smooth before adding the other ingredients. It’s tangy, rich, and perfect for red velvet or carrot cake.
- Nutty Brown Butter Frosting: Before you start, take your 2 sticks of butter and melt them in a light-colored saucepan over medium heat. Let it cook, swirling occasionally, until it foams up and little brown bits form at the bottom and it smells incredibly nutty. Pour it into a heatproof bowl and let it cool completely until it’s solid but soft again at room temperature. Then, use this brown butter to make the frosting as directed. The flavor is out of this world.
- Any-Flavor-You-Want Frosting: The vanilla is just a starting point! Swap the vanilla extract for any other extract you like. Try 1 teaspoon of almond extract for a classic wedding cake flavor, 1-2 teaspoons of lemon extract for a zesty kick, or ½ teaspoon of peppermint extract for holiday treats.
FAQ Section

All your frosting-related fears, addressed.
1. Why is my buttercream grainy or lumpy? There are two likely culprits: you didn’t sift your powdered sugar, or your butter was too cold. Always sift your sugar, and make sure your butter is properly softened to room temperature.
2. How can I make my vanilla frosting whiter? For the purest white color, use clear vanilla extract instead of regular brown vanilla extract. Also, beating the butter on its own for a full 5 minutes at the beginning will make it very pale, which gives you a whiter starting point.
3. Can I make this frosting ahead of time? Yes! You can store it in an airtight container in the refrigerator for up to a week, or in the freezer for up to 3 months. When you’re ready to use it, let it come back to room temperature on the counter, then re-whip it with your mixer for a few minutes to bring back its light and fluffy texture.
4. My frosting is way too sweet! How can I fix it? The pinch of salt is your first line of defense. If it’s still too sweet for your taste, you can try beating in another pinch of salt or even a tiny splash (like, ¼ teaspoon) of lemon juice to cut the sweetness without adding a noticeable lemon flavor.
5. Can I make this frosting dairy-free or vegan? Absolutely. Use a high-quality vegan butter substitute (the kind that comes in sticks works best) and your favorite unsweetened plant-based milk (like almond, soy, or oat milk).
6. What’s the difference between this and other buttercreams? This recipe is for American Buttercream, which is the easiest and sweetest, made from butter and powdered sugar. Other types, like Swiss or Italian Meringue Buttercream, involve cooking egg whites and sugar to create a meringue base, which results in a less sweet, more silky, and more stable frosting. They’re delicious, but more advanced.
7. How much frosting does this recipe make? This recipe makes enough to generously frost a two-layer 9-inch cake or about 24 cupcakes.
Final Thoughts

Look at that beautiful bowl of fluffy, creamy, perfect frosting you just made. You did that. In five minutes. You are a frosting wizard. You have officially broken up with the canned stuff, and I promise you will never look back.
Now go on, find something to frost. A cake, a batch of cookies, a graham cracker, your finger… there are no wrong answers here. The tyranny of the sad, metallic-tasting can is over. Welcome to a better, more delicious world.