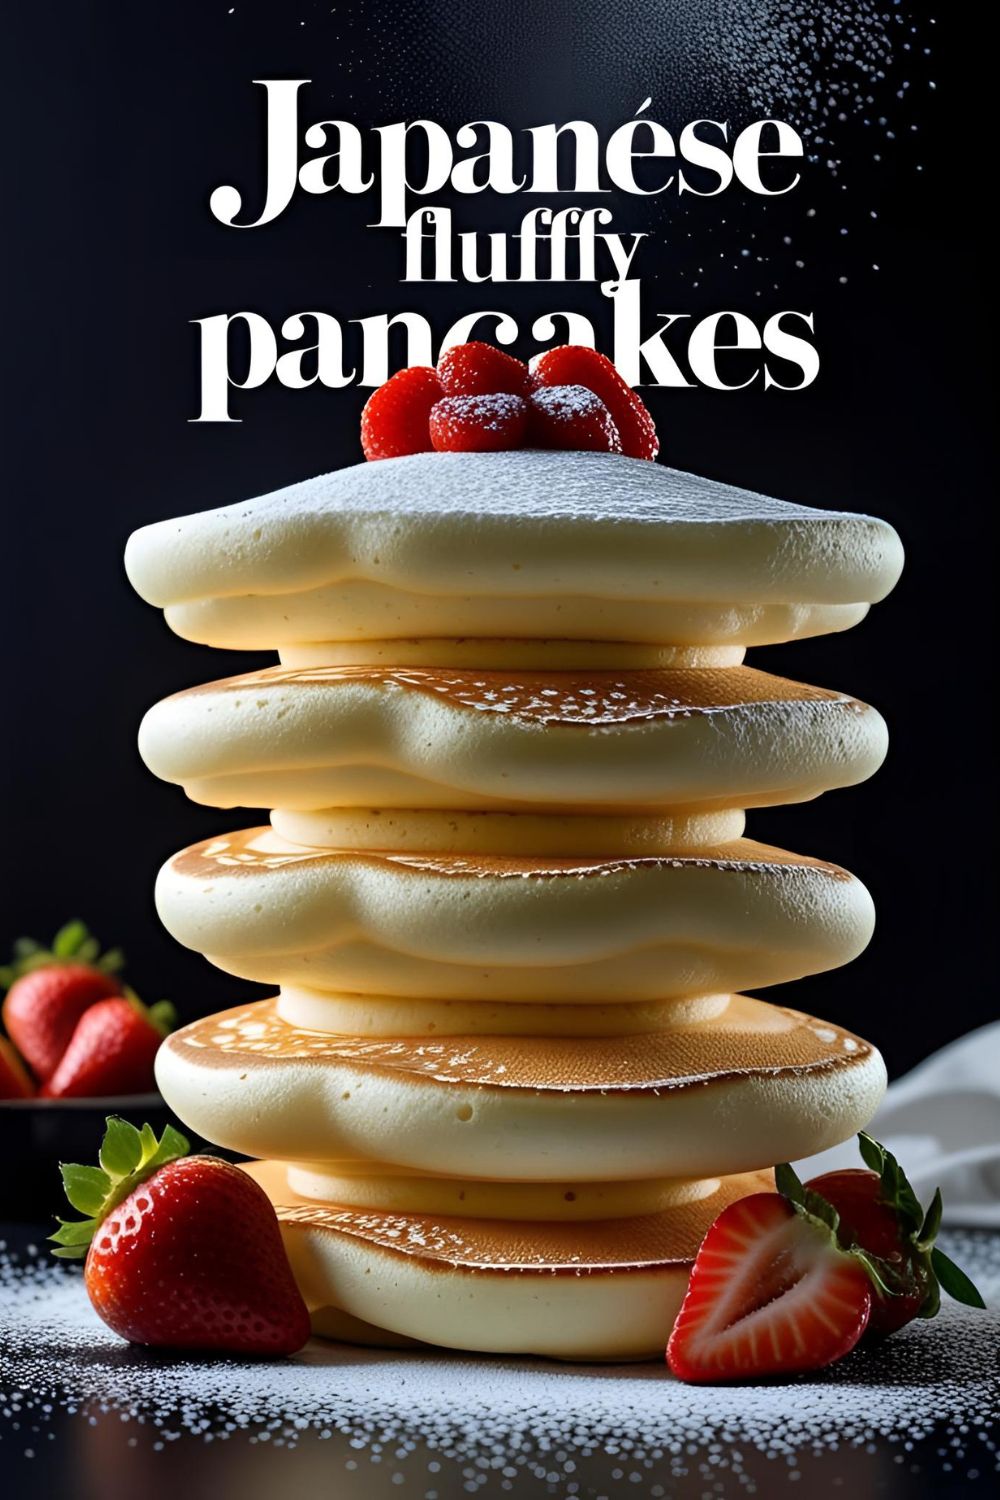
How to Make Fluffy Japanese Pancakes (Easy Soufflé Recipe!)
How to Make Japanese Fluffy Pancakes (And Win Brunch Forever)
You’ve seen them, right? Those impossibly tall, wobbly, cloud-like pancakes that haunt your Instagram feed and make you question everything you thought you knew about breakfast. You’ve probably wondered, “Is that even real?” or “What kind of wizardry is this?” Well, I’m here to pull back the curtain and show you exactly how to make fluffy pancakes Japanese style. And yes, they are very real, and the wizardry is something you can totally master in your own kitchen.
Let’s be real: this isn’t your average Saturday morning pancake recipe. This is a project. This is a culinary flex. But is it worth it? Absolutely. Get ready to create the most ethereal, melt-in-your-mouth soufflé pancakes you’ve ever tasted. Your brunch game is about to hit legendary status.
Why This Recipe Is a Game-Changer
So, why go through the trouble? What makes these jiggly stacks of air so special?
First, the texture is absolutely sublime. Imagine a pancake and a soufflé had a beautiful, delicious baby. It’s light, airy, eggy, and custardy all at once. It literally dissolves on your tongue. Regular pancakes will seem, dare I say, a bit pedestrian after this.
Second, they are a total showstopper. Plating a wobbly stack of these bad boys for guests is the ultimate power move. The “oohs” and “aahs” are guaranteed. You’ll look like a culinary genius who trained with Japanese masters, even if you just learned this from a slightly sarcastic foodie friend on the internet (that’s me!).
Finally, while it looks complicated, the process is actually a fun and rewarding challenge. It’s all about technique, not a million fancy ingredients. Once you nail the meringue, you’ve unlocked the secret.
The Special Ingredient Lineup
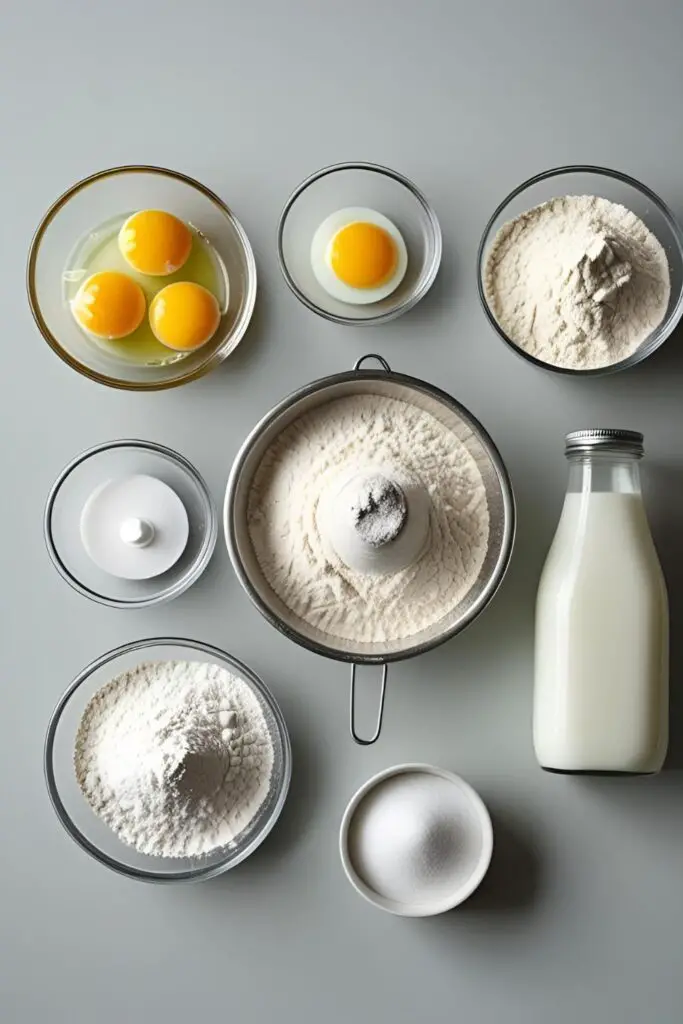
This recipe requires a little more precision than your standard flapjack. Pay attention to the details!
- 2 large egg yolks (from very fresh, room temperature eggs)
- ¼ cup (60ml) whole milk
- ½ cup (60g) cake flour – This is highly recommended! It has less protein and results in a more tender, delicate crumb.
- 1 teaspoon baking powder
- ½ teaspoon vanilla extract
- 4 large egg whites (again, room temp is best)
- ¼ teaspoon cream of tartar – Your secret weapon! This stabilizes the egg whites so your precious meringue doesn’t collapse.
- ¼ cup (50g) granulated sugar
The Essential Tools & Kitchen Gadgets

You’ll need a few specific items to achieve that signature height and fluff. Don’t say I didn’t warn you.
- Electric Hand Mixer or Stand Mixer: This is non-negotiable for whipping the egg whites into a stable meringue unless you want an arm workout worthy of a pro athlete.
- Multiple Mixing Bowls: You’ll need at least two: one for the yolk batter and one scrupulously clean one for the meringue.
- Fine-Mesh Sieve: For sifting the flour and baking powder to avoid lumps.
- Silicone Spatula: For gently folding the meringue into the batter. This is a delicate operation.
- Large, Deep Non-Stick Skillet with a Lid: The lid is crucial for trapping steam, which helps the pancakes cook through evenly.
- Metal Ring Molds (3-inch diameter, at least 1.5 inches high): This is the key to getting that perfect, tall, round shape. You can DIY them, but the real ones are a game-changer.
- Ladle or Piping Bag: For neatly getting the batter into the molds. A piping bag offers more control.
Step-by-Step to Jiggly Pancake Glory
Deep breath. You can do this. Follow these steps precisely.
- Prep Your Station: Lightly grease the inside of your ring molds with butter or non-stick spray and set them aside. Get all your ingredients measured and ready. This recipe moves fast once you start.
- Make the Yolk Batter: In a medium bowl, whisk the egg yolks and milk together until combined. Sift the cake flour and baking powder directly into the bowl, and whisk until you have a smooth, thick batter. Finally, stir in the vanilla extract. Set this aside.
- The Sacred Meringue: In a separate, large, and impeccably clean bowl (any grease will ruin your meringue!), add the egg whites and cream of tartar. Using your electric mixer on medium speed, beat until the whites become foamy.
- Sweeten the Meringue: Once foamy, slowly sprinkle in the sugar, a little at a time, while continuing to beat. Increase the speed to medium-high and beat until the meringue forms stiff, glossy peaks. This is the moment of truth! When you lift the beaters, the peak should hold its shape and maybe curl over slightly at the very tip, like a little ski slope. Don’t over-beat it!
- The Gentle Fold: Take about one-third of your magnificent meringue and plop it into the yolk batter. Gently fold it in with your spatula to lighten the batter. Now, add the remaining meringue and fold very gently until just combined. You want to see a few streaks of white remaining. Be careful not to deflate all that air you just created!
- Time to Cook (Low and Slow): Heat your lidded skillet over the lowest possible heat. Place your prepped ring molds in the pan. Fill each mold about ¾ of the way full with your fluffy batter.
- The Steam Bath: Carefully pour about 1-2 tablespoons of water into the pan, away from the molds. Immediately cover the skillet with the lid. This creates steam, which helps the pancakes rise and cook gently.
- Cook and Flip: Cook for about 9-12 minutes on the first side. The pancakes should have risen significantly and the top should look slightly set. Very carefully, using a spatula and tongs, flip the molds over. Cover again and cook for another 4-5 minutes.
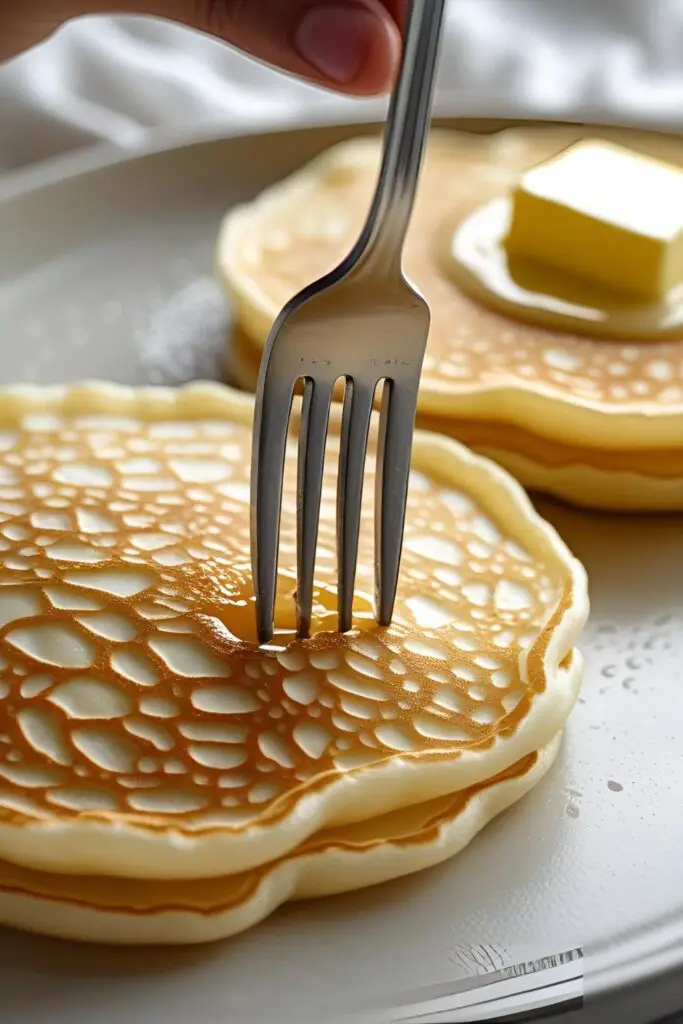
- The Grand Finale: Gently remove the pancakes from the pan and carefully run a knife around the inside of the molds to release them. Serve them immediately with butter, syrup, fresh fruit, or powdered sugar. Now, watch them jiggle!
Calories & Nutritional Info
This is an indulgence, for sure. Here’s a rough estimate per pancake (this recipe makes about 3-4 tall pancakes).
- Calories: Approximately 200-250 kcal per pancake
- Protein: ~10g
- Carbohydrates: ~25g
- Fat: ~8g
- Note: They are quite eggy, providing a good amount of protein for a sweet treat!
Common Mistakes That Will Deflate Your Dreams
Avoid these pitfalls to ensure your pancakes reach their full, fluffy potential.
- Deflating the Meringue: This is the #1 crime. It happens from either having grease in your bowl/beaters or from folding too aggressively. Treat the meringue with the respect it deserves.
- Cooking on High Heat: You’ll end up with a burnt exterior and a raw, gooey center. Patience and low heat are mandatory. This is not a race.
- An Unstable Meringue: You either didn’t beat it to stiff peaks or you skipped the cream of tartar. This acidic stabilizer is your insurance policy against a weepy, sad meringue.
- Skipping the Lid & Steam: You won’t get the “soufflé” effect without it. The steam is essential for cooking the pancakes all the way through and helping them rise tall.
Fun Variations & Customizations
Mastered the classic? Time to get fancy.
- Matcha Soufflé Pancakes: Sift 1 tablespoon of high-quality matcha powder in with your cake flour. The slightly bitter, earthy notes of matcha are a perfect complement to the sweet, eggy pancake.
- Decadent Chocolate Soufflé Pancakes: Sift 2 tablespoons of unsweetened cocoa powder in with the flour. Top with chocolate sauce and chocolate shavings for a truly indulgent experience.
- Tiramisu-Style Pancakes: Serve the classic pancakes topped with a dollop of sweetened mascarpone cheese, a dusting of cocoa powder, and a tiny drizzle of coffee syrup. It’s dessert for breakfast!
Frequently Asked Questions (The Jiggly Pancake Inquisition)
Let’s clear up some common questions before you begin your fluffy journey.
H3: Why did my beautiful pancakes deflate after cooking? This is the classic heartbreak. It usually means the meringue wasn’t stable enough (under-beaten) or you deflated it during the folding process. Also, they will naturally settle a little bit—that’s normal. Serve them fast!
H3: Do I really, really need ring molds? For that signature towering look, yes. But you can try a DIY version by folding heavy-duty aluminum foil into thick strips and forming rings. FYI, it’s a bit more fiddly, but it can work in a pinch.

H3: What if I don’t have cake flour? You can make a substitute! For every 1 cup of all-purpose flour, remove 2 tablespoons of flour and replace it with 2 tablespoons of cornstarch. Sift them together a few times. It’s not perfect, but it’s a solid alternative.
H3: Can I make the batter ahead of time? Absolutely not. This is a one-and-done deal. The meringue will begin to break down and deflate the second you stop looking at it. The batter must be made and cooked immediately.
H3: What exactly are “stiff peaks” and how do I know I’m there? It’s when your meringue is thick, white, and glossy. When you lift your beaters out of the bowl, the peak of meringue that forms should stand up straight, with only the very tip possibly flopping over. If it’s droopy, keep beating. If it looks chunky or separated, you’ve gone too far.
H3: Why did my pancakes burn on the bottom? Your heat was too high. I can’t stress this enough: use the lowest heat setting on your stove. It should feel like it’s barely on.
H3: Can I make these without an electric mixer? You can, if you have a whisk and the bicep endurance of a superhero. It will take a very, very long time to whip the meringue by hand. I do not recommend it for your own sanity.
Final Thoughts
You did it. You stared into the fluffy, jiggly abyss of Japanese soufflé pancakes and you conquered it. You now hold one of the most impressive breakfast recipes known to humankind.
Go on, serve these wobbly towers of perfection and accept the shower of compliments that will rightfully come your way. You’ve earned your brunch crown.