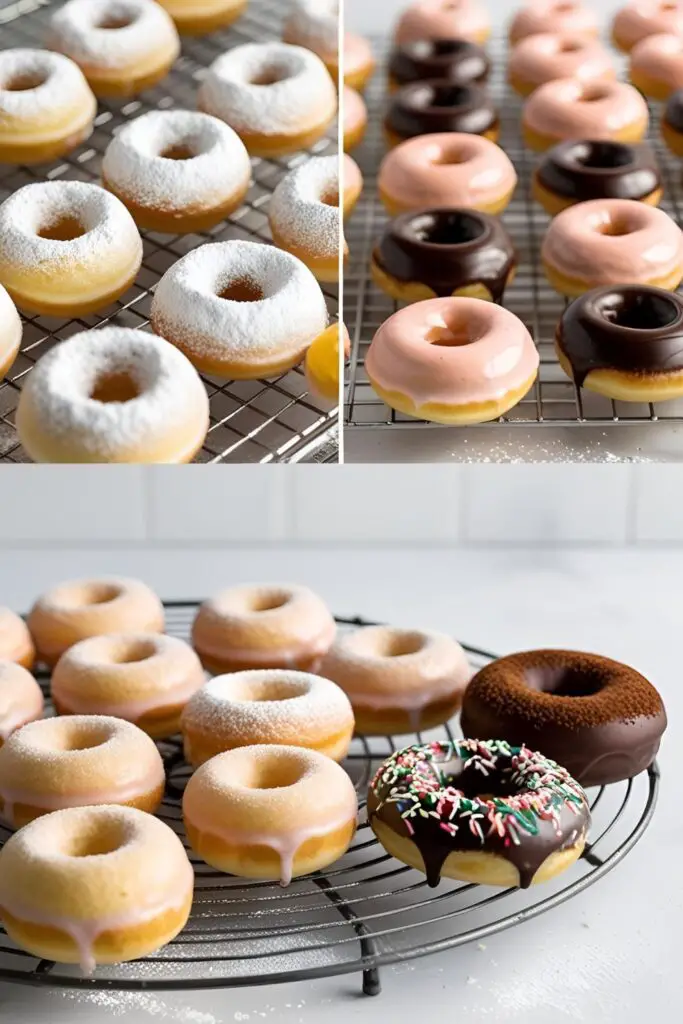
Mini Donuts Recipe That’ll Make You Ditch the Store-Bought Stuff Forever
The Sweet Little Bites That Took Over My Kitchen (And My Life)
Ever found yourself elbow-deep in a bag of store-bought mini donuts at 2 AM, questioning your life choices? Yeah. Same. But here’s the plot twist: making mini donuts at home is ridiculously easy, wildly satisfying, and honestly? Kind of addictive. You’ll feel like a kitchen wizard who moonlights as a snack god.
And let’s be real—there’s something magical about eating a donut that’s smaller than your palm. It’s like, “Look at me being responsible! I only had six…”
Let’s dive into the sugary spiral, shall we?
Why These Mini Donuts Are a Big Deal
First off, they’re adorable. Like, take-a-photo-before-you-bite adorable.
Second? They’re light, fluffy, and have just the right level of sweetness—none of that overly sweet, toothache-in-a-bite nonsense. Plus, you can glaze ’em, dip ’em, powder ’em, or just eat ’em straight like a savage.
And here’s the kicker: no frying involved. Yep. These bad boys are baked. So your kitchen won’t smell like a fast-food fryer for the next week. You’re welcome.
Whether you’re feeding kids, showing off at brunch, or just treating yo’self—these mini donuts are your new go-to snack.
Ingredients You’ll Need (Nothing Weird, Promise)

- 1 cup all-purpose flour
- 1/3 cup granulated sugar
- 1 tsp baking powder
- 1/4 tsp salt
- 1/2 cup milk (whole is best, but plant-based works too)
- 1 egg
- 2 tbsp unsalted butter, melted
- 1 tsp vanilla extract
- Optional toppings: powdered sugar, cinnamon sugar, chocolate glaze, sprinkles, maple glaze, crushed Oreos (I could go on…)
Substitutions:
- No dairy? Use almond or oat milk.
- Vegan? Sub the egg for 1/4 cup applesauce or a flax egg.
Tools & Kitchen Gadgets Used
Affiliate marketers, assemble!
Here’s what you’ll need (aka your Amazon goldmine):
- Mini donut pan – The star of the show.
- Mixing bowls – Because you’re not mixing this in your hands. Hopefully.
- Whisk – For smooth, lump-free batter.
- Measuring cups & spoons – Precision, darling.
- Cooling rack – So they don’t steam themselves into soggy oblivion.
- Piping bag or zip-top bag – For mess-free batter distribution.
- Oven mitts – Unless you’re into surprise blisters.
Step-by-Step Instructions (Even a Sleep-Deprived Zombie Can Follow This)
- Preheat your oven to 350°F (175°C). Yes, before you start mixing. We’re not animals.
- Grease your mini donut pan. Use nonstick spray or a touch of melted butter. Skip this and you’ll be prying donuts out with a fork like an amateur archaeologist.
- Whisk dry ingredients in one bowl: flour, sugar, baking powder, and salt.
- In another bowl, mix wet ingredients: milk, egg, melted butter, vanilla. Give it a good whisk like it owes you money.
- Combine wet and dry. Stir until smooth, but don’t overmix or the donuts will get grumpy and dense.
- Pour batter into a piping bag (or zip-top bag with the tip cut off). Pipe it into the donut pan, filling each cavity about 2/3 full.
- Bake for 9–11 minutes, or until the tops are lightly golden and a toothpick comes out clean. No peeking every 30 seconds, okay?
- Cool on a rack for a few minutes. Then decorate like the kitchen artist you are.
Calories & Nutritional Info (Per 1 Mini Donut)
- Calories: ~70
- Carbs: 10g
- Fat: 2.5g
- Protein: 1g
- Sugar: 5g
Notes:
- Baked, not fried = lighter.
- Toppings will affect the final count (duh).
Common Mistakes to Avoid (So You Don’t Rage Quit Halfway)
- Overfilling the pan – They’ll puff up like muffin tops. Fill only 2/3.
- Skipping the grease – Rookie mistake. You’ll regret it.
- Overmixing the batter – Want rubbery donuts? Didn’t think so.
- Opening the oven too early – They’re shy, let them bake in peace.
- Forgetting the cooling rack – Unless soggy-bottomed donuts are your thing.
Variations & Customizations (Because You’re Extra)
- Chocolate Lovers’ Dream: Add 2 tbsp cocoa powder and mini chocolate chips.
- Cinnamon Sugar Swirl: Dip warm donuts in melted butter, then toss in cinnamon sugar. Boom.
- Keto-ish Version: Use almond flour + erythritol + coconut oil. Will it taste exactly the same? No. Will it still hit the spot? Absolutely.
FAQ About Mini Donuts
1. Can I make mini donuts without a donut pan?
Sure! Use a mini muffin tin. They’ll be donut-ish, but who’s judging?
2. How long do mini donuts last?
About 2–3 days in an airtight container. If they last that long.

3. Can I freeze mini donuts?
Yes! Freeze them unfrosted. Defrost, then reheat in the oven for a few minutes.
4. What’s the best glaze for mini donuts?
Chocolate, vanilla, maple, or even a simple powdered sugar glaze. Go wild.
5. Can I make them gluten-free?
Yep—use a 1:1 gluten-free flour blend.
6. Why did my mini donuts turn out dry?
You probably overbaked them. Watch the timer like a hawk next time.
7. Can I air-fry these instead of baking?
Technically yes, if your pan fits. But baking gives the best texture IMO.
Final Thoughts: Are You Even Ready for the Cutest Donuts Ever?
Let’s be real—once you try these homemade mini donuts, you’ll never look at the plastic-packaged ones the same way again. They’re cute, they’re fluffy, and they’re dangerously poppable.
Make a batch. Then make another. Then pretend it’s for guests.
And hey—if you make these, show them off! Snap a pic, tag your donut-loving bestie, and prepare for the flood of “OMG where’d you get these?!”